Sunday, December 4, 2011

And a Bonus Quilt!

Using some of the extra component pieces I had cut way back last November when I first started RRCB,  I was able to piece this bonus top! I had to cut and stitch another ten blocks.... I reversed the pink and brown from the original blocks and left the red/neutral HST blocks off.  I did however use the green corner stone blocks for the centers of the 10 extra I made...so I used all those up!

 I still have some of the border components... but I'm thinking of cutting some green/pink/green strips  and making some cute 4" 9 patch blocks.... not sure where they'll get used yet.. but I'm sure they'll get more use than the leftovers I have now....

The piece of shell pink I used for the alternate blocks has been hanging around for awhile.... and I used most of the piece I had....  This measures about 53 x 65".  A great youth size, or even a nice sized baby quilt.   I'll have this one waiting in the wings for someone special.  It has more piecing in it than most of the charity type baby quilts I do. 


I can't believe how labor intensive those pieced borders are.... 

Saturday, December 3, 2011

My Roll, Roll, Cotton Boll Mystery top by Bonnie Hunter

Roll Roll Cotton Boll mystery quilt
Well,  this mystery started a year ago!  I know I work slowly sometimes... but I had actually made excellent progress on the steps as they were posted last December,  but I put it aside sometime in early spring to work on something else... and didnt get back to it.   (I had been sloppy in either cutting, sewing or both, when it came to all those  red and neutral 1/2 square triangles). 

I've decided that I don't need another queen size quilt.... and since the majority of quilts that I gift to people are larger lap throws to snuggle under,  I've decided to use fewer blocks... and not add the pieced border that is pictured at the very top of the photo.   This is beautiful and busy, just as it sits... so I'll sandwich it... quilt it... and put a binding on it.... no border at all!  This will most likely go to one of my nieces..... sure hope she likes pink, green and brown! 

The remaining units that are cut, stitched, etc?   I have an internet buddy who wants a King size... and she dislikes the string piecing process... so I'll ship my strings to her this next week..... then I'll use the remaining pieced blocks and border pieces and some neutral fabric to create another top.   Since I miscut several of those half square triangles... I won't border the churn dash blocks with them... rather I'll use the ones that are the correct size in another way.... or possibly set them aside for a different project later.   (I already have a baggie full of HST to cut down to 1 1/2"  rather than the 2" they were supposed to be.)   Lesson learned... cut carefully... stitch carefully... watch that scant 1/4"! 

I do love the way this has turned out!   Bonnie has started a new mystery for 2011 on her blog which is now in step 3.  I'm saving the steps for later... because as you see by my side bar... I have tons of projects in process that I am determined to get off the shelf and into someone's arms. 

Thursday, December 1, 2011

Quilts for others....

I've been working on several quilts that will go or which have already gone to others, who I don't personally know, in the hopes that they will find warmth and hope around them.

This little quilt went to a young lady who's dad was killed in a surfing accident this fall.   The Windy Hill Quilters out in Corbett give to those in their community who are in need.  Each of three siblings received a quilt.  I worked on this one..... thinking that a 12 year old girl would enjoy the bright panel prints and sort of funky floral fabric.


Teen Girl Panel Quilt

This butterfly quilt is a group project at thequiltandneedle.com .  We have several group projects going... Quilts of Valor,  Charity projects for Pine Ridge Reservation, and a children's center for children who have been through abuse.  We also make Quilt Auntie quilts for the wee ones in the lives of our members.  This quilt will go to a little baby granddaughter of one of our members in Arkansas.   I was the quilter for this project, but it is good to know that it is  on it's way to it's proper owner.

Where is my Blog mojo?

I always have good intentions of stopping by and giving updates..... but this has been a stressful last couple of months for me...

Excuse #1 - my dear husband was diagnosed with prostrate cancer in September.   After consultation with his doctors, we opted for surgical removal.  His surgery was a the week before Thanksgiving and he is now home healing and recouperating.   Pathology reports will be back any day now... and we'll know if there was anything detected in the lymph nodes that they removed.  If it's an "all clear", then he won't need any radiation or chemo. 

Excuse #2 - the program that I teach for, moved locations over the summer. This has created some changes in the types of activities we do with our students and the locations that those activities occur in.   We also have a new administrator this year, so things are stressful there as well.

Excuse #3 - when I feel like I actually have some "extra me time".... I try to fill it with doing something creative.

Excuse #4 - my mom always told me that if I couldn't say anything nice, not to say anything at all.  I try to live this daily.. and try to carry it a step further... and feel that if I can't be positive then I should probably not share my thoughts..... instead, I try to reach deep within and find the strength to keep moving on... to recharge myself.....to look for solutions to problems  and figure out how to turn lemons into lemonade.

So... why do I sit here and type excuses on a blog?  Mostly to let those of you out there in blog land, know why I haven't posted in several months.....   In the next few days... I hope to give you all an update of what's been happening postive in my life the last few months.... 

Thursday, August 25, 2011

Twin Star Tutorial

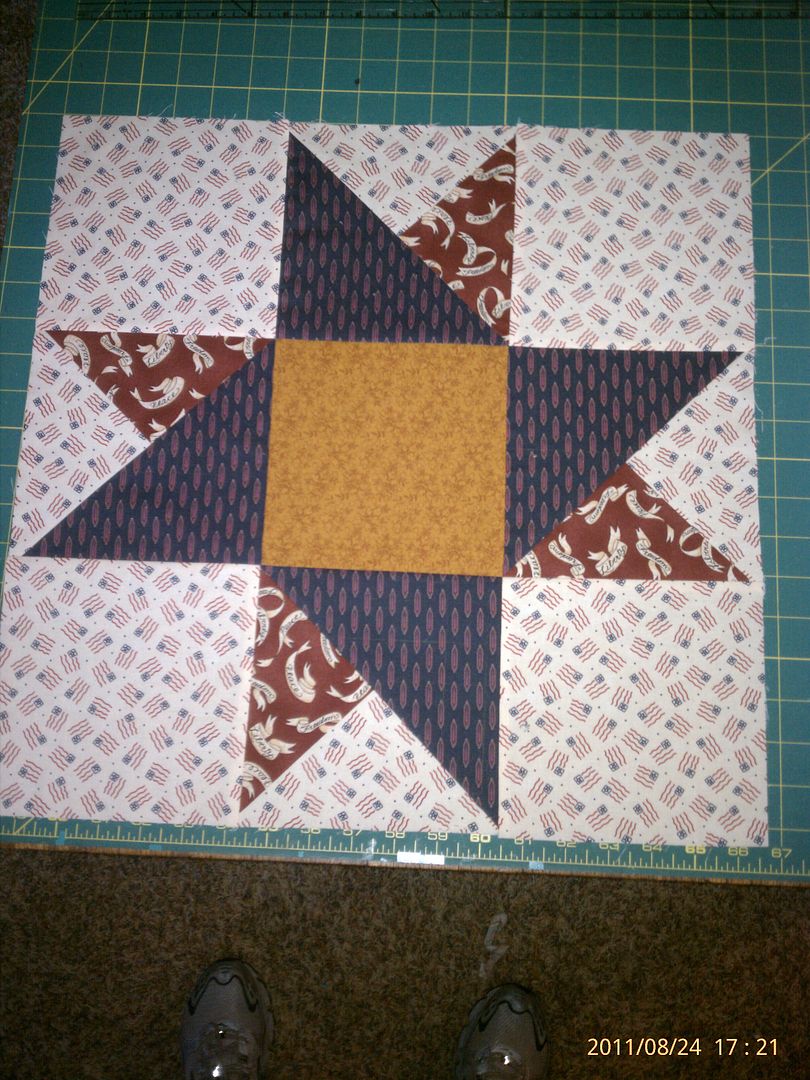
This is a tutorial for making one 18 1/2" Twin Star Block.
You need:

one square background 7 3/8"

four squares background 6 1/2"

one square for center 6 1/2"

two squares main star color 6 7/8"

one square accent color 7 3/8"


Now, we will cut the two 7 3/8" squares on both diagonals, creating 4 quarter square triangles of each color. (QST)
Take the two 6 7/8" squares of the main star color, and cut on one diagonal to create 4 half square triangles. (HST)


Match a background QST with an accent color QST right sides together. Orient as in the picture above, so that you will start stitching from the flat side of the triangle. Stitch with the background fabric on the top. (this will assure that all your resulting units will be the same)


Repeat to make 4 units. Press towards the darker fabric. Trim dog ears. (Take care, not to stretch the bias as you stitch and press)


The resulting triangles will look like this... with the background on the left side, when the triangle is pointing up like in the picture below.
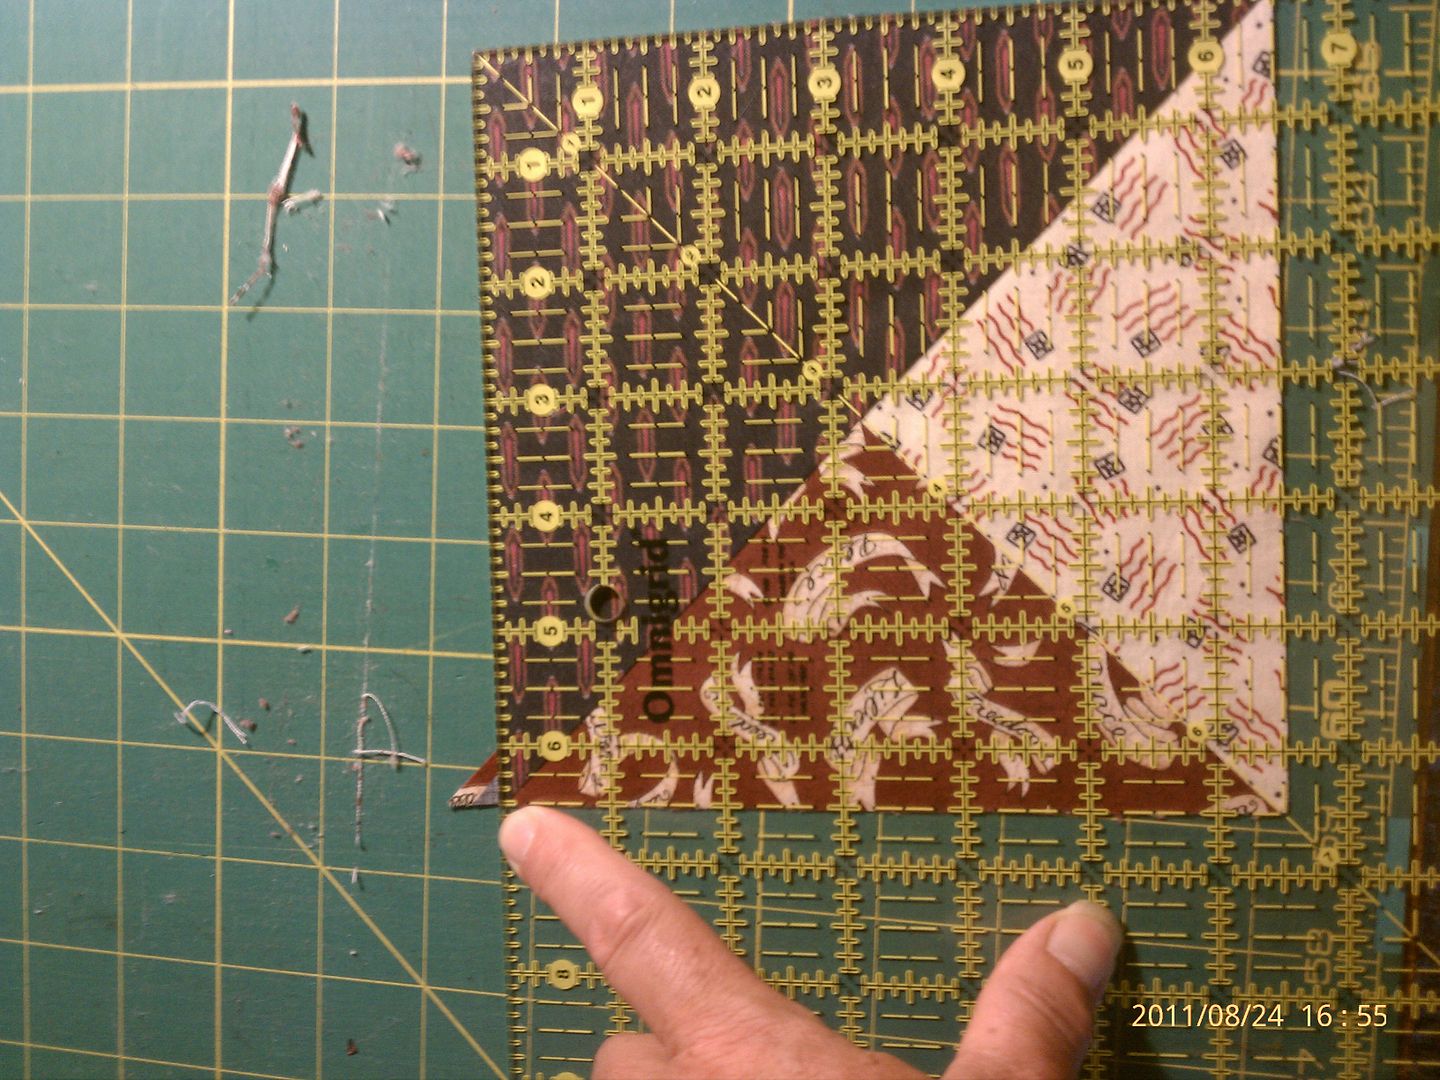
Now, place a main color HST on top of this unit with right sides together, matching the 90 degree corner and the short sides. Using your ruler, double check to make sure that the short sides of the triangles measure an accurate 6 7/8".


(As you can see, my pieced triangle is a bit larger... I may not have cut very accurately)


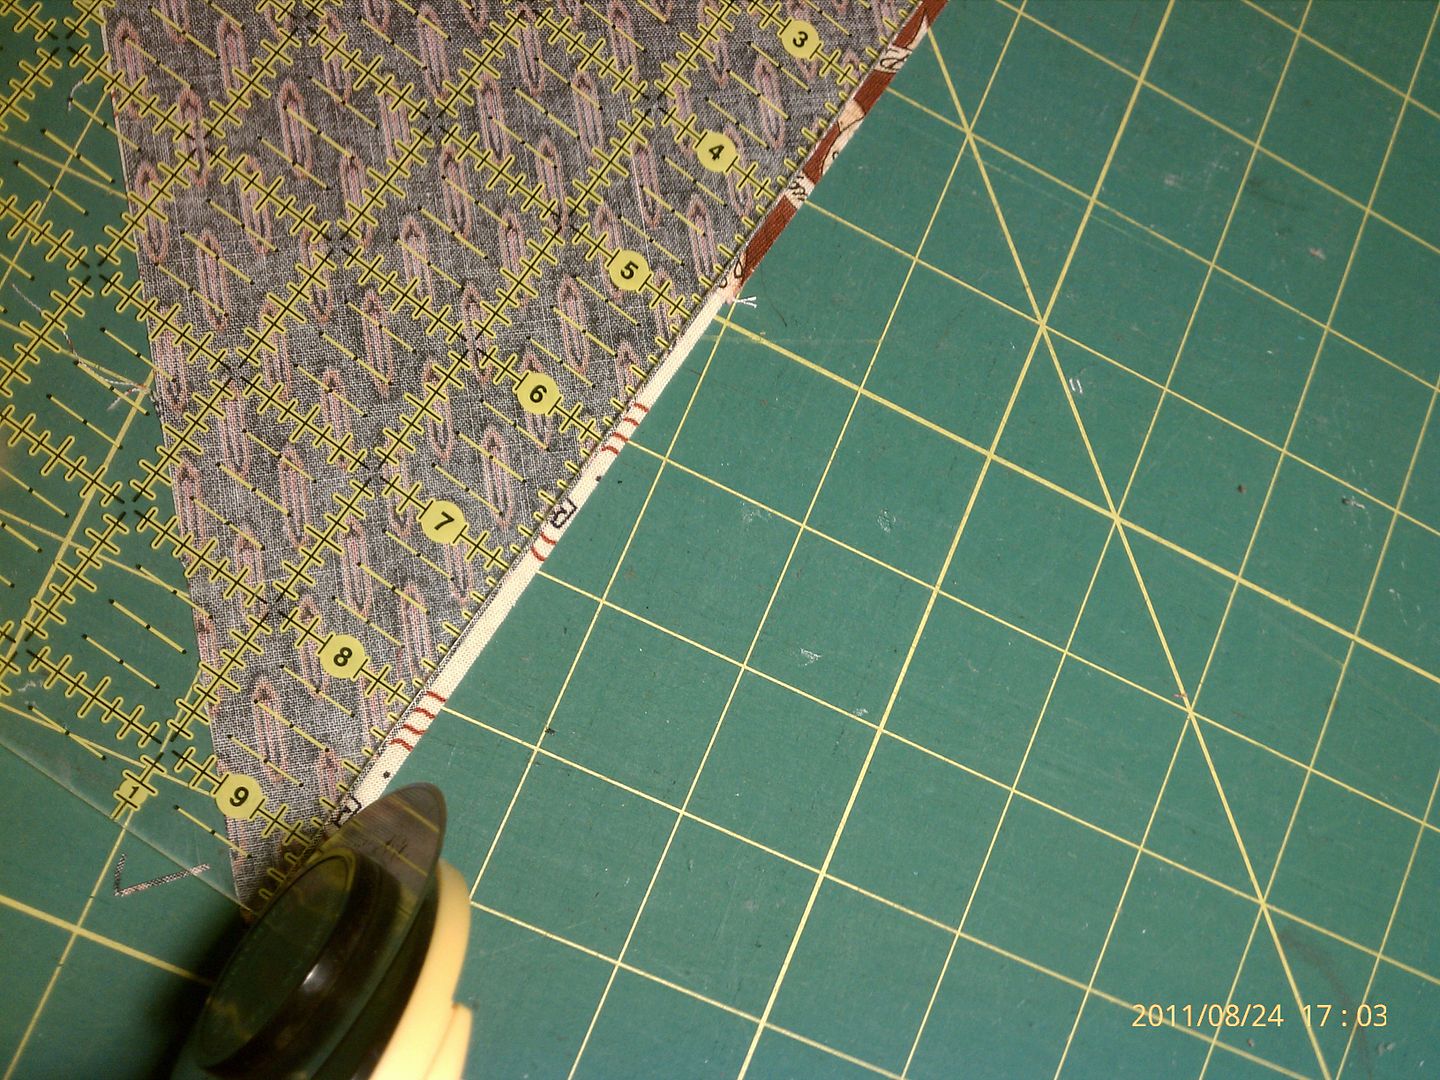
I could just stitch this using the blue as a guide, but I'm a bit more compulsive than that, and I prefer to carefully cut this little extra off.


(Sometimes, it may be even larger than this, making it difficult to get a perfect scant 1/4" seam allowance.)

                                                                                                                                                                               
When you have the triangles corrected, you are ready to stitch.   Congratulations if you didn't have to adjust any at all!
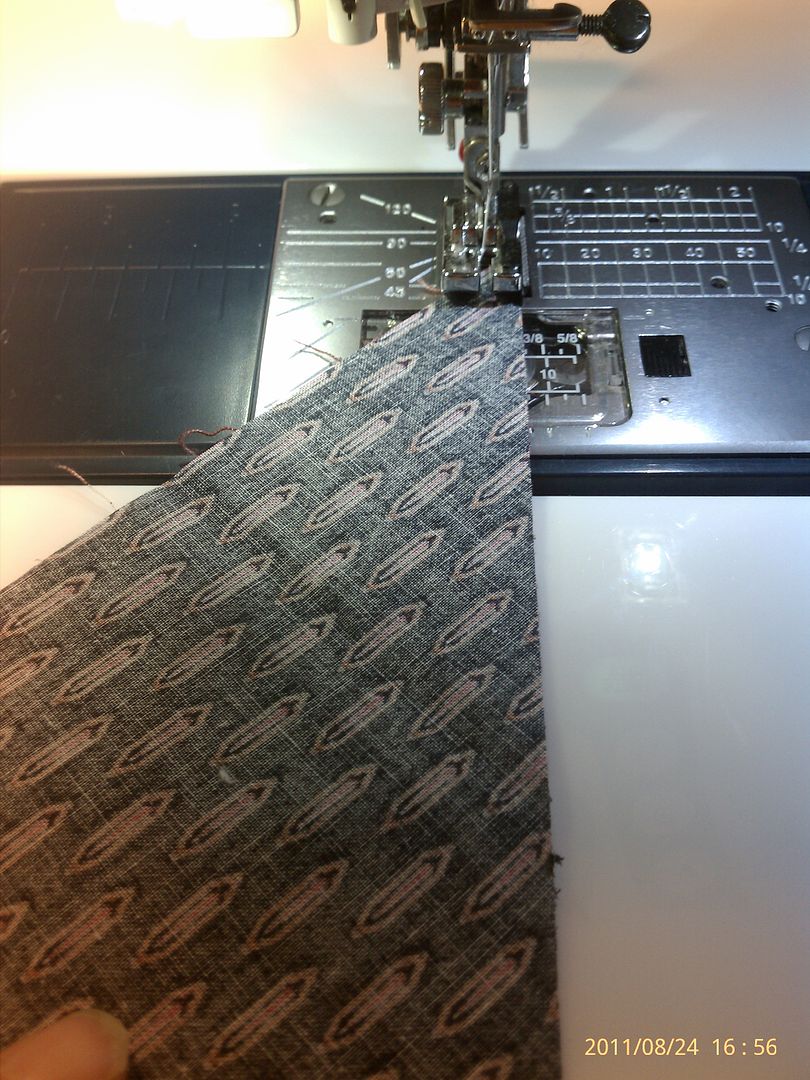
Stitch the units together on the long edge.  This is on the bias, so be careful not to stretch it as you stitch.
Make 4
Press towards the large triangle. 
Trim your dog ears, and square to 6 1/2".
All your units should now measure 6 1/2".  Lay them out so that they look like the picture below.
Now we'll stitch it together like a ninepatch block.    Too make sure that your star points will be nice and sharp, make sure that the outside edges of your blocks are all nice and even. 
Stitch into 3 rows,  press towards the background and center squares. 
Stitch the rows together.  Press.   Your block should be a perfect 18 1/2" inches.  trim and square if necessary. 

Tuesday, August 9, 2011

July UFO finish!

I actually got this finished in May..... Not a machine stitch in it anywhere! YEAH!

Time Flies

Where does time go? My last post was in early May? I've been working in the garden.... and doing some stitching..... This little baby quilt will be for a great-great nephew that will join us sometime in September. The best news? That monkey fabric was on clearance for $1.50 a yard..... I purchased the banana fabric, but the others all came from my stash. I couldn't resist making a few applique monkey faces to fill in the yellow brick road's large squares.
My summer break is over 1/2 over now... and my "to do" list is still looming. The ground is now leveled for my greenhouse, the shop still needs major re-organization, and the lower bathroom still needs it's facelift.
I'm signing off for now... got things to do....