 Well, I've signed up for another internet block swap.... this one is a Christmas Stocking Block Swap at blockcentral.com . I found an easy way to prep the stocking sections for applique, and wanted to share it with everyone. This will work with any simple shape applique you want to do, and can be adapted for both machine, and hand applique. Try it!
Step 1: print your pattern
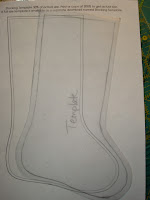
Step 2: Using plastic template material, trace your pattern, add seam allowance and cut out.
Well, I've signed up for another internet block swap.... this one is a Christmas Stocking Block Swap at blockcentral.com . I found an easy way to prep the stocking sections for applique, and wanted to share it with everyone. This will work with any simple shape applique you want to do, and can be adapted for both machine, and hand applique. Try it!
Step 1: print your pattern
Step 2: Using plastic template material, trace your pattern, add seam allowance and cut out.
Step 3: Using whatever method and pattern you decide, create your pieced fabric. Just make sure it's large enough to accommodate your template.

Step 4: Lay the template on your fabric, and trace around it

Step 5: Trace around the shape and cut it out.
Step 6. Lay the template on a lightweight non woven interfacing. I used some grid type pattern material, 'cause it was what I already had. Trace and cut out.
Step 7: Lay the interfacing on the top of the right side of the stocking....

Step 8: Stitch around the shape. All the way around. Do not leave any opening. The more complex the curves, the smaller you want the stitch for a smooth edge. I used a 2 on my stockings.

Step 9: Carefully cut a small hole in the center of the interfacing. clip up the middle and towards the corners. Just enough to be able to turn to the back.

Step 10: Using pinking shears, (mine are scallop shears) Trim the curved areas to make it easier to turn and to reduce fullness.

 Step 11: Roll the interfacing to the back, finger pressing the seams so that the interfacing does not show from the front.
Step 12: Turn over and press the interfacing, so that the cut edges are close together. You do not have to stitch them together. Press lightly.

Step 13: Turn to the right side, and press well... making sure that the interfacing is all on the back side.
 Step 14: Position on the background square. (If you will be machine stitching, I suggest that you use some starch on the background before pinning the stocking down. This will make it easier to stitch.)
 Step 15: Add the top cuff. Then applique with your desired method.
I hope you enjoy using this method. It makes it so easy to get a nice clean edge, with no raw strings to deal with.


