Just two weeks ago, I was in the hustle and bustle of planning a quilt show! We were two to three weeks away from displaying 300 plus quilts in a new venue. Our 46th Annual Festival of Quilts.
The news of the Corona Virus in China was in the news, and we were watching on the news about cruise ships having multiple cases on board.
The terms "Social distancing" and "Flatten the curve" were most likely only known to those who study epidemiology. While I watched the world begin to go into shutdown mode in Italy, the thought of what that might look like here at home was still vague.
"Protect the folks at higher risk", "make your own best judgement", "we will honor your decision to take care of yourself and your family", were all phrases being used within my own circle of friends and contacts. That was just a week ago!
And in a matter of 24 hours we went from that mindset to one of maybe we should cancel our show. Beginning to think about what the ultimate cost would be if even one person who attended being exposed by someone who wasn't feeling any symptoms. We decided to cancel the show we were ready to launch. Refund checks were written to all of our vendors, and our supply vendors and venue were notified. Just hours later, our governor announced an immediate shut down of events with more than 250 participants for the next four weeks.
This COVID-19 virus is new. It has never been seen in the human population before. No one has any immunity. There is NO history of how it works, how long it lasts on surfaces, how long it takes to run it's course. No history of vaccines that may have given the general public a step ahead of seasonal changes. Just how long can someone who is asymptomatic run through the public exposing the unsuspecting? There are so any variables.
I'm not one to panic. I usually approach most problems by seeing the glass as "half-full" rather than "half-empty". We have tackled Polio in the 50's. We haven't seen small-pox in years. Measles were essentially gone until recently. I have faith that we will see results along those lines with this as well. Those positive results above did not happen overnight.
Until then, I'm hunkered down here at home. My husband is one who is at higher risk. We have cancelled birthday plans with friends and have purchased groceries to cook at home rather than eating out.
I have plenty of fabric, our TP supply seems to be sufficient, the weather is sunny today and I may decide to go pull weeds in my flower beds. Netflix has binge worthy series, and my hubby has some projects he can work on in the shop. We are keeping up with friends and family by phone and social media.
I am hoping that for those of you who follow my blog, that you are able to remain healthy, optimistic, and can find enough projects to feel productive while we work together to slow down the spread. Please remember to keep washing those hands!
Tuesday, March 17, 2020
Sunday, March 1, 2020
February progress
I could show you all the work I've been doing to get ready for our quilt show, but paperwork and planning for a show is not exciting blog material, I'm sure. Needless to say, our show is 19 days away. I'm excited. As President of our Guild and the Show Chair this year, it's been one task after another. We have a new venue this year, which means new floor plans, measuring and double checking those measurements... taking pictures from different angles etc.
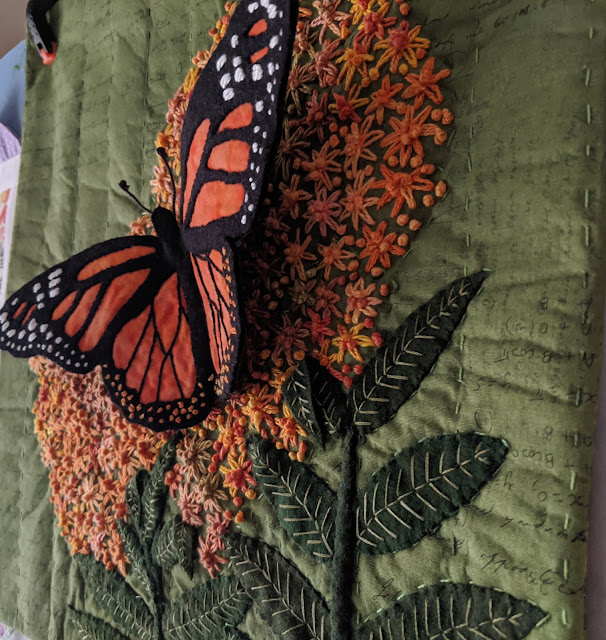
I have attached all the sleeves to my entries, so those are ready to go. I also finished my "Monarch" project. This was really fun to do, and I challenged myself to do more than use the color orange.
Here are a couple of pictures of the finished project. It measures about 16" x 16".
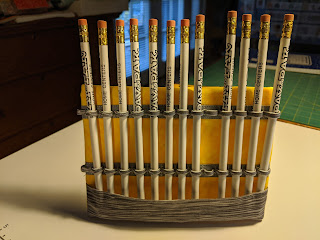
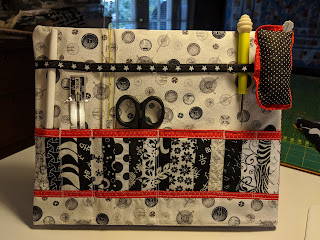
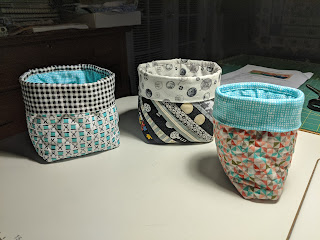
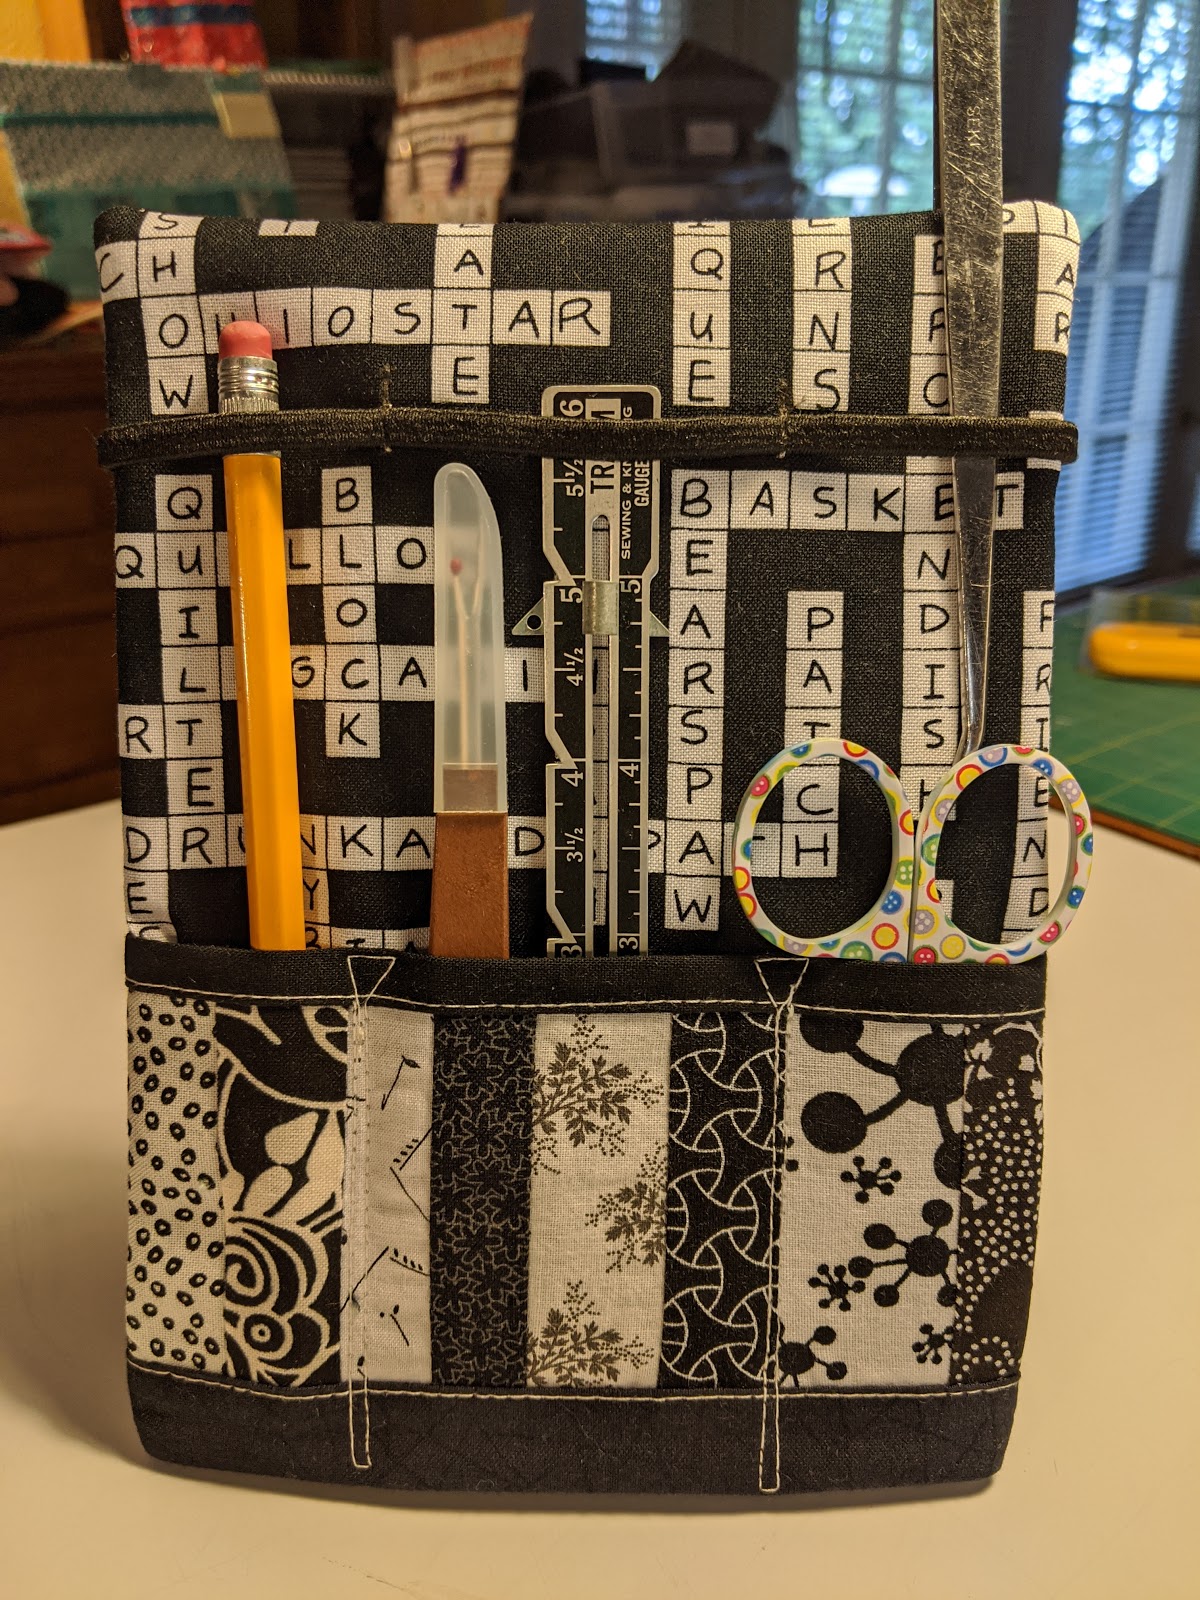
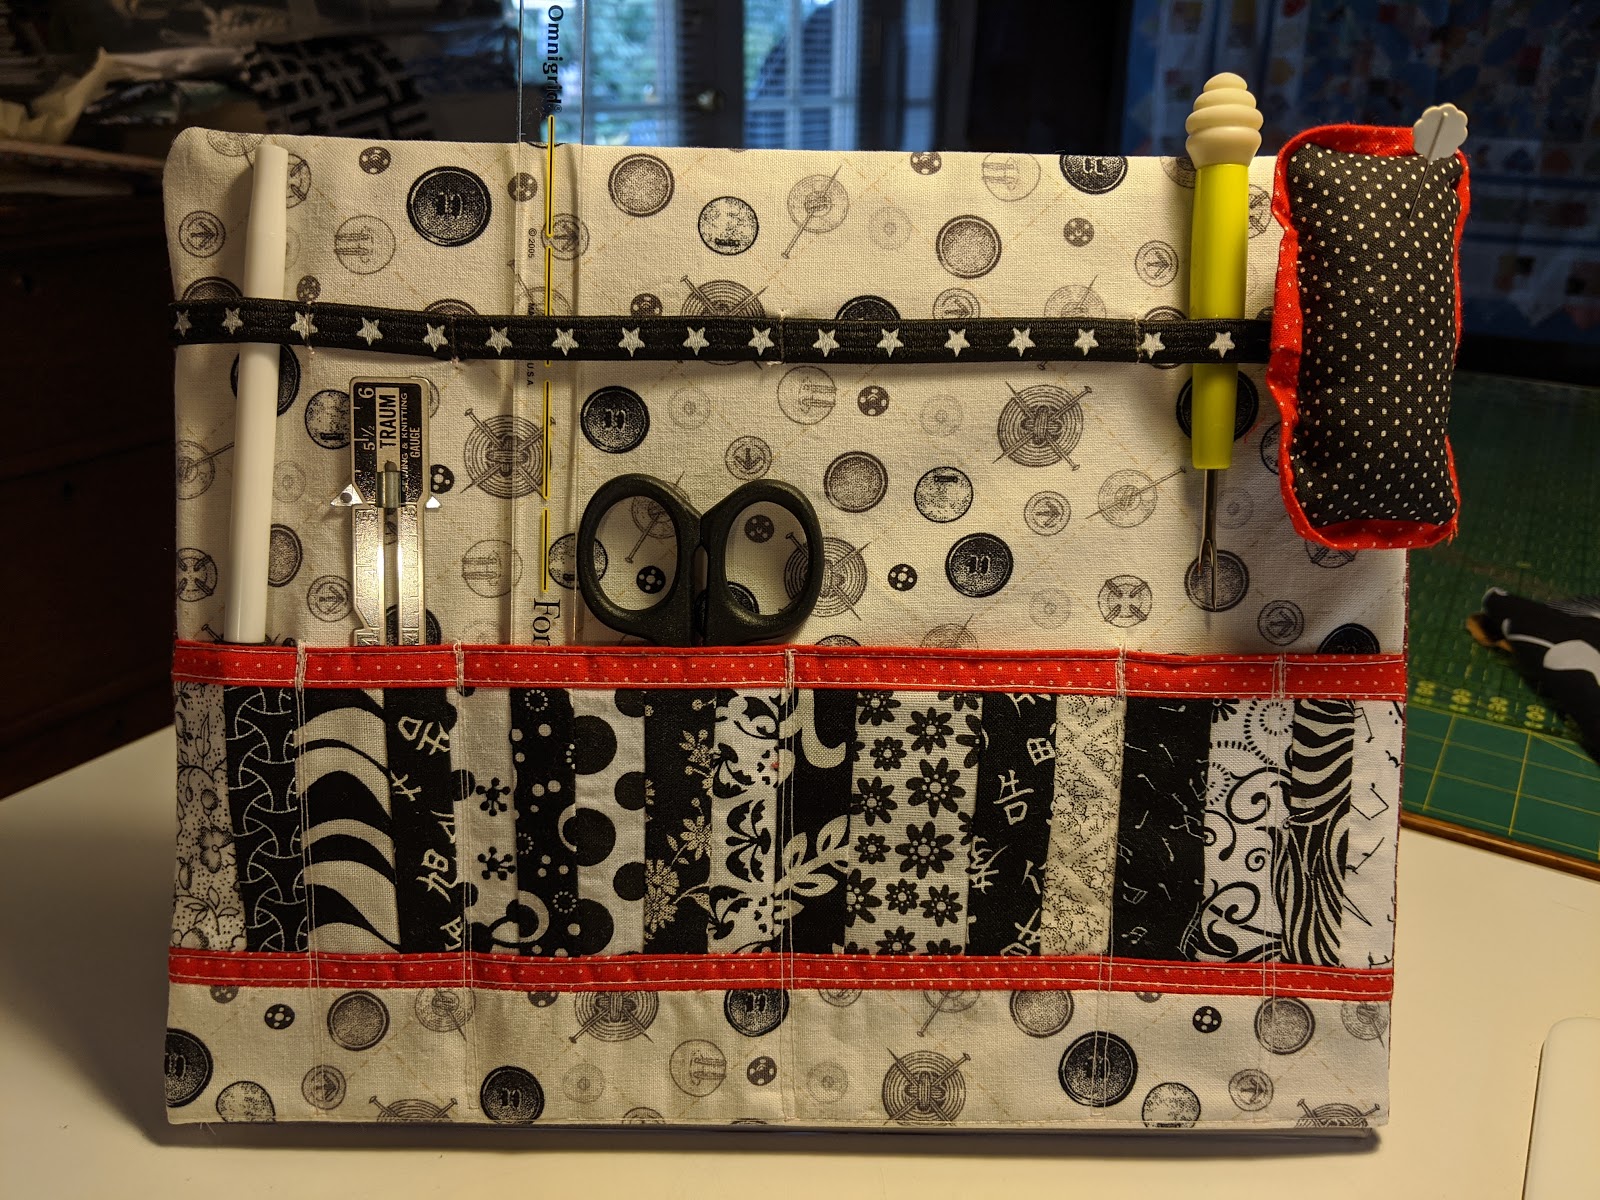
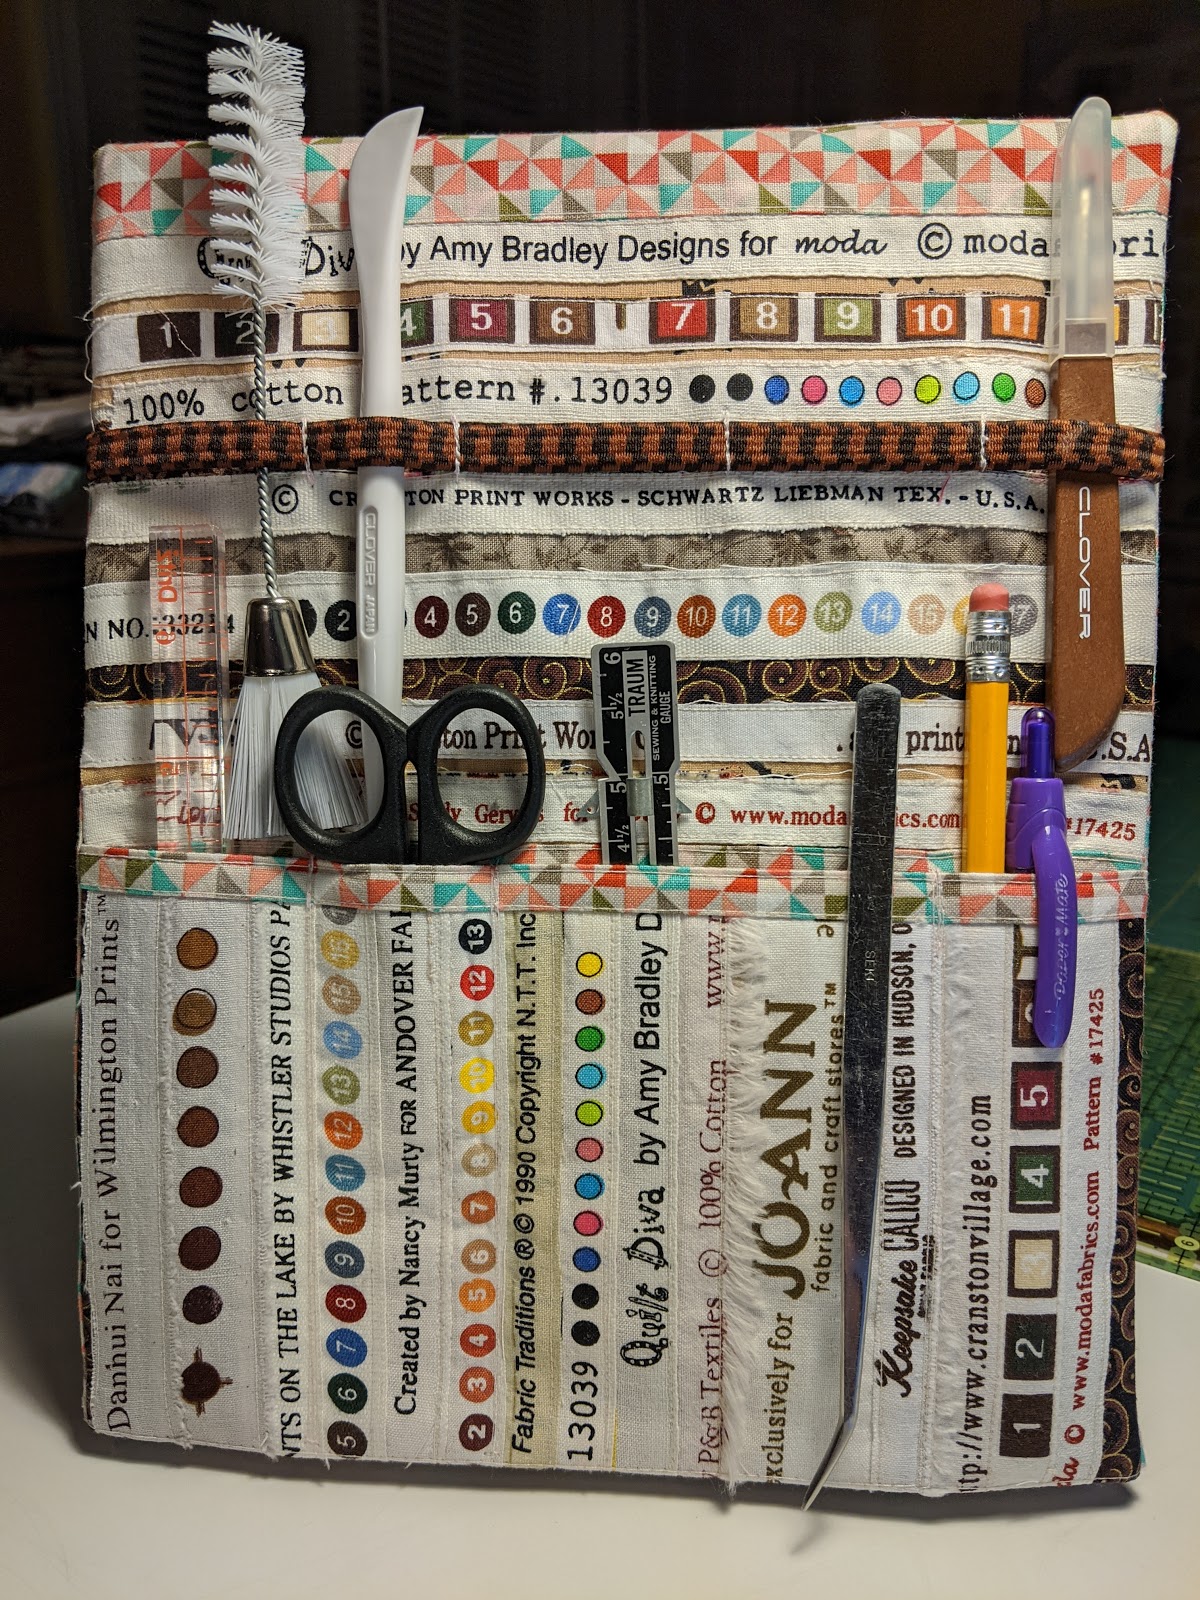
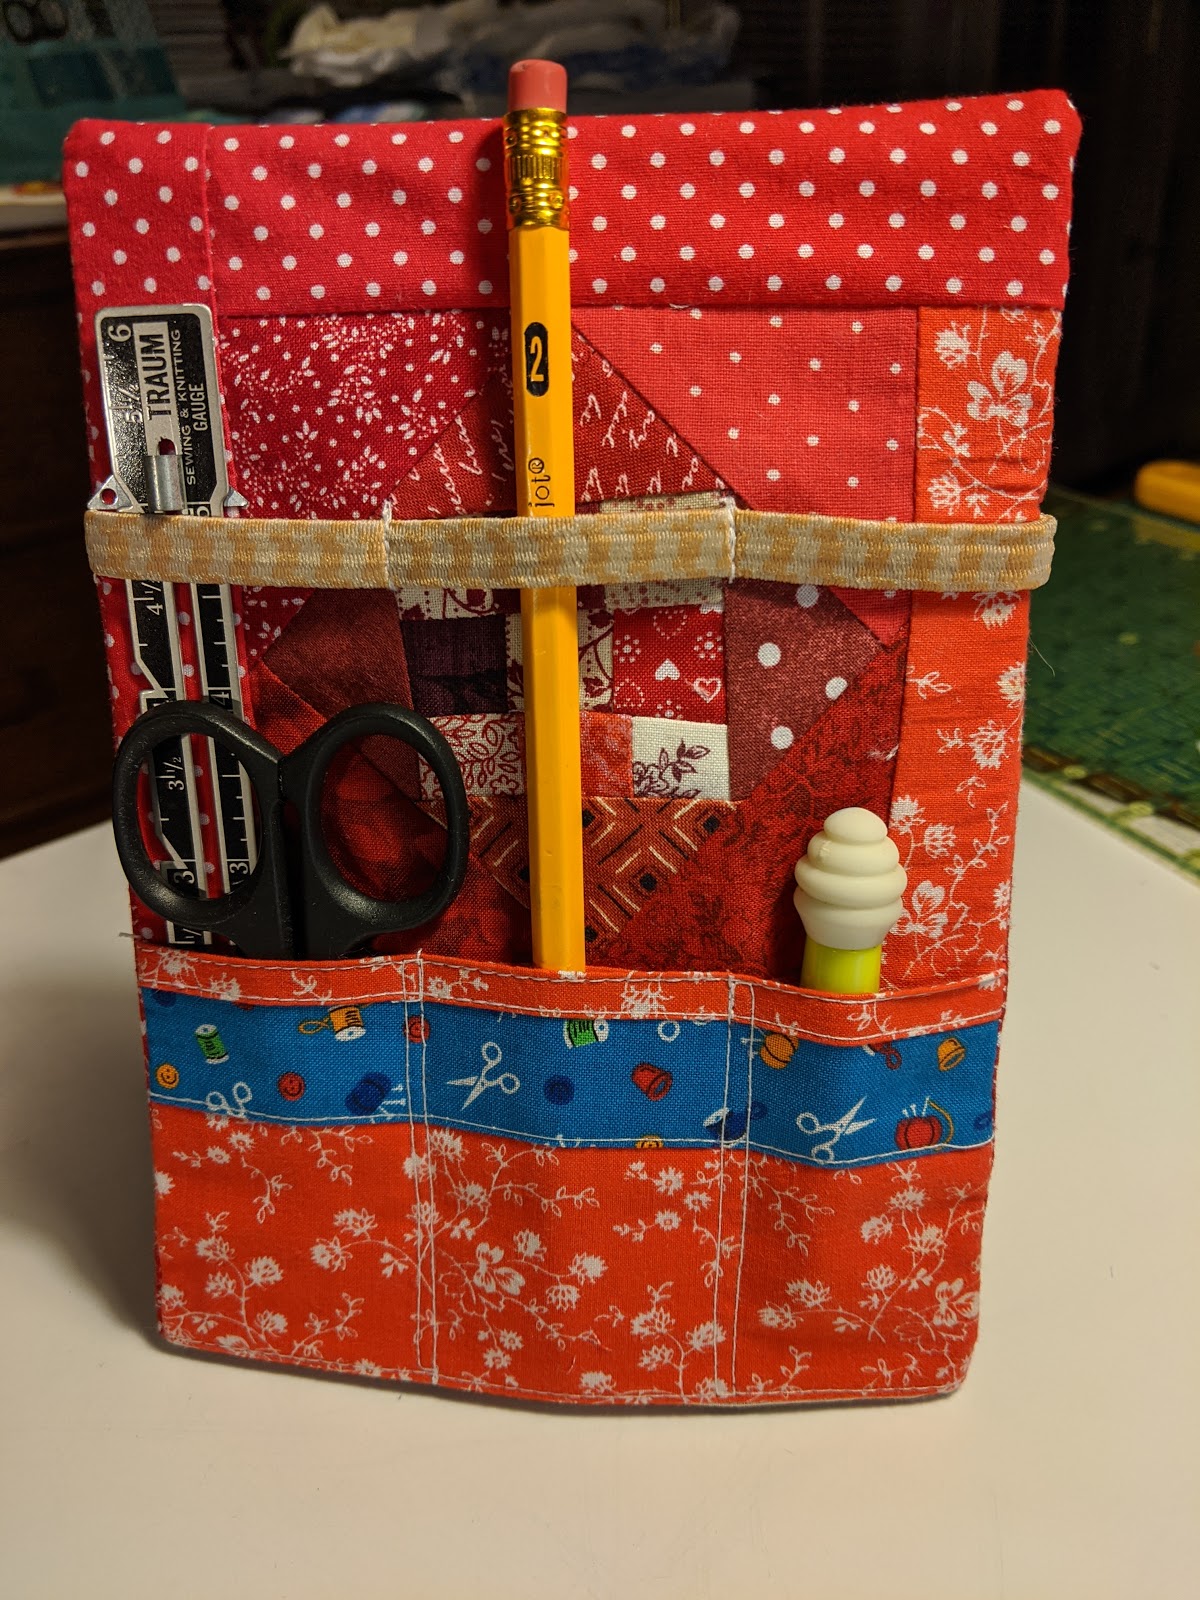
I also made some items for our guilld's gift boutique at the show. These little tool holders are made on Dollar Tree acrylic picture frames. I made some that are 5 x7 and some 8x10.


I have attached all the sleeves to my entries, so those are ready to go. I also finished my "Monarch" project. This was really fun to do, and I challenged myself to do more than use the color orange.
- I did a reverse applique with wool and cotton
- I dyed my background fabric
- I used some new threads for the embroidery
- I did some big-stitch quilting
- I learned how to attach a facing rather than a binding
- I figured out how to make the butterfly 3-dimensional.
Here are a couple of pictures of the finished project. It measures about 16" x 16".

I also made some items for our guilld's gift boutique at the show. These little tool holders are made on Dollar Tree acrylic picture frames. I made some that are 5 x7 and some 8x10.


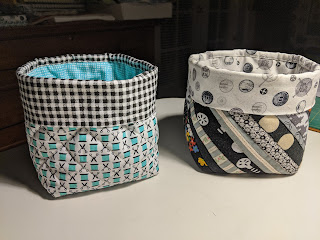
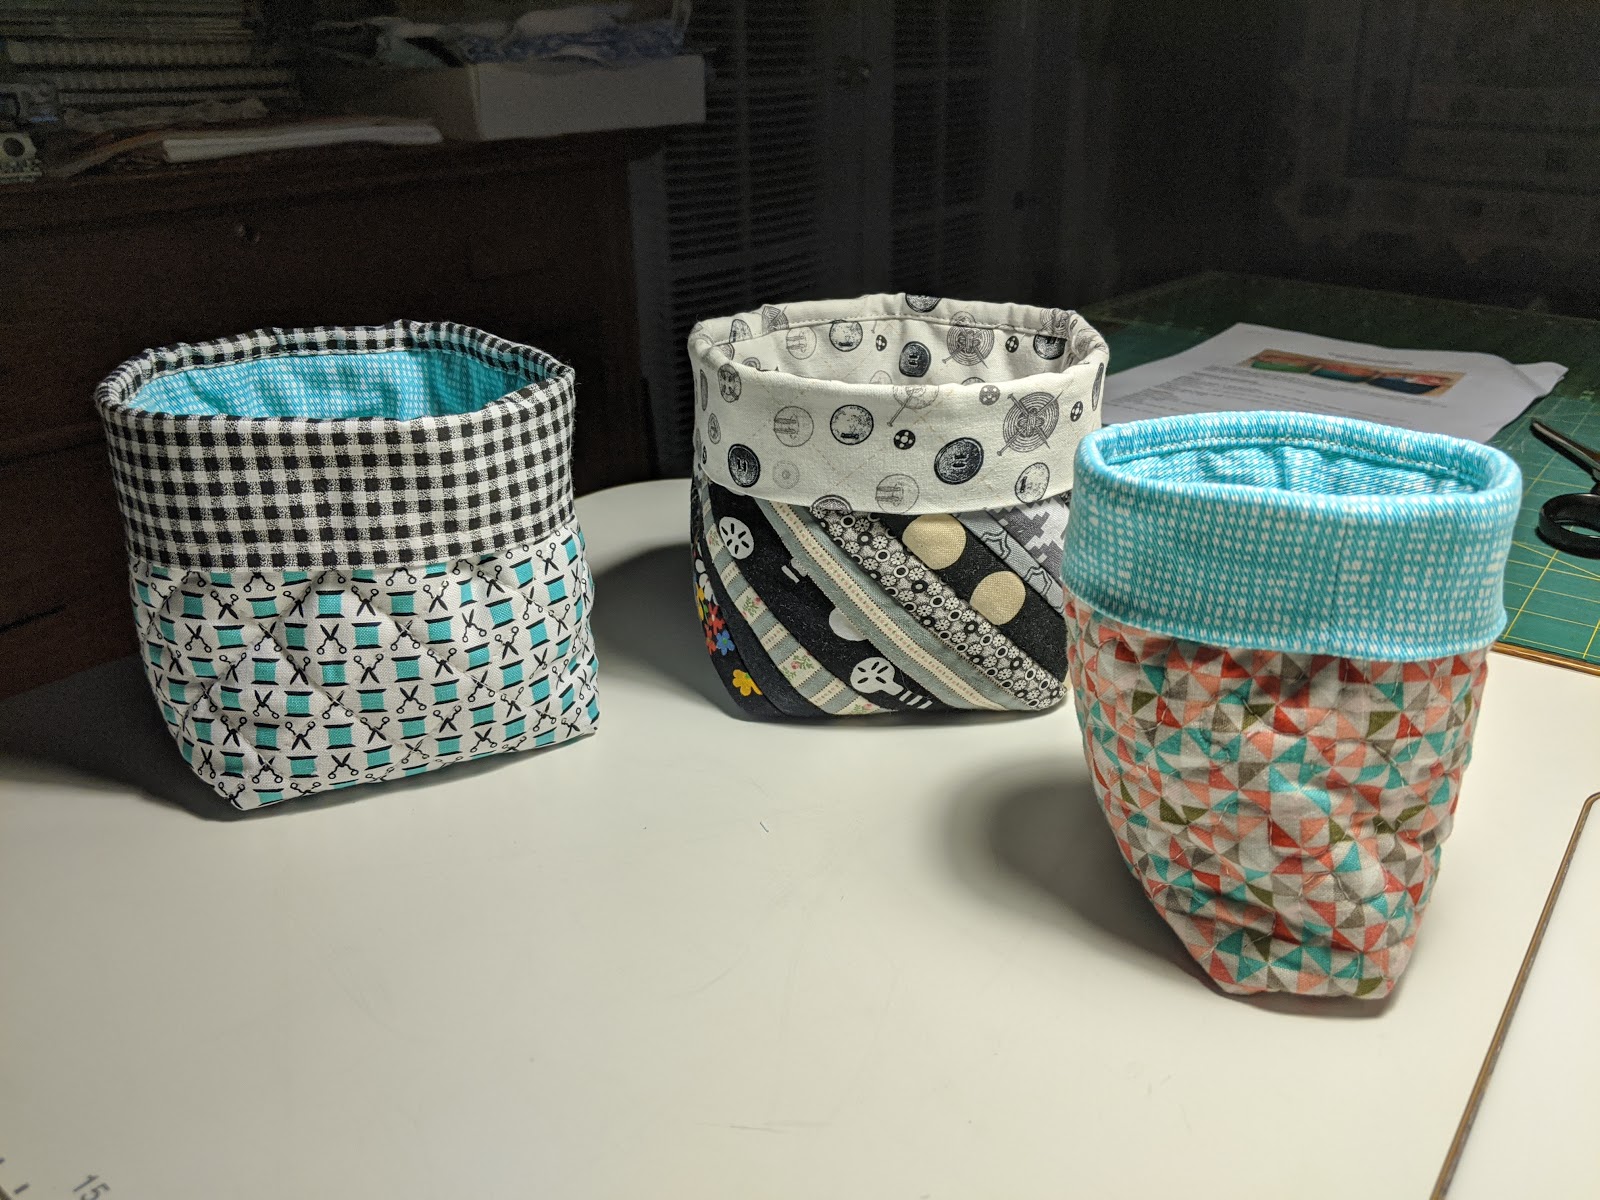
I also made some of these fabric buckets.. they are about 4 x 4".

All in all... it has been a productive month.... I'm really looking forward to having the Quilt Show behind me, and then our quilting retreat where I can get back to normal stitching.
Tuesday, February 11, 2020
A Little bit of Frolicking happened
I know, I wasn't going to start on Bonnie Hunter's 2019 - 2020 mystery, "Frolic". But I must need a 12 step program for mystery quilts. After the reveal a week ago, I could not let go of the idea of trying it with more of a 2 color twist. "What if?" , "How about?" ,and "I wonder..." occupied my thoughts over and over.
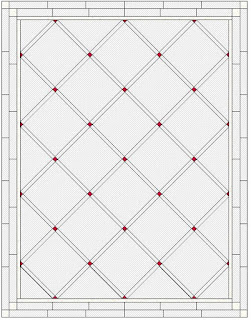
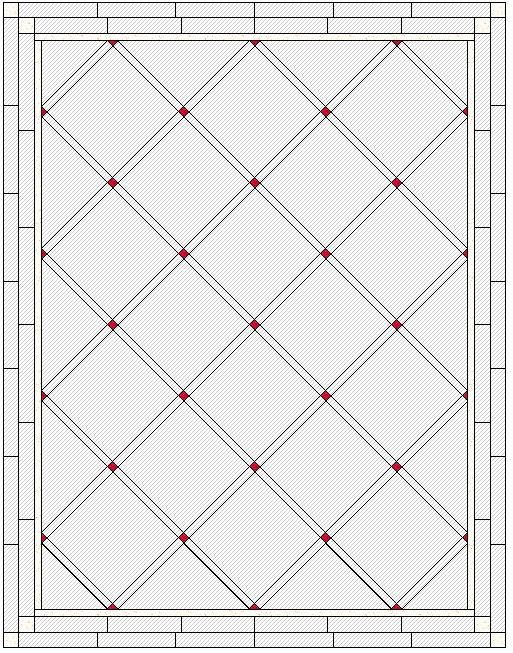
So, I decided to jump in. First, I went to my EQ software to give the layout a rectangular rather than square finish. 18 rather than 25 full pinwheel blocks will give me a finish of 65" x 86" rather than 86" x 86".
Bonnie has asked that we not post EQ layouts of the quilt blocks, so as not to give away proportions of her pattern which will go on sale later this winter. The pattern is FREE until she removes it from her blog sometime in February. I played with the basic block sizes until I was close to what I think will be a good size for me.
Once I figured out how many of each block type I needed: full blocks, half blocks for setting on point and the corner blocks, I started to cut the fabrics I had pulled. My goal was to cut all I needed as a kit, so I can take it with me to retreat in March and use parts as leaders and enders during my sewing times in the next couple of months.
I'm a color renegade and rarely stick with the original colors in a mystery. This is no exception. I used raspberry last year, and my supply is limited. With my stash reduction plan purchasing more raspberry at this time didn't make sense, since I have so many other scrumptious colors in my stash.
I settled on a two color scheme of browns, and light teals or aquas with a touch of butterscotch and a creamy pale yellow as my neutral. This was my thought process: a) I had about 6 yards of this background fabric in my stash which has been aging to a wonderful vintage. b) I had a bunch of strips leftover from previous projects in both sizes needed of browns. c) I had several of the teal / aqua fabrics that I did not use for a previous project. (I believe they were from "Grand Illusion", a previous Bonnie mystery that I didn't start.) d) I also had a few yards of a darling little gingham looking print that is the butterscotch.
It took me about 9 hours over 3 days to get all the components cut. I started with the components needing the larger strip size, and using as many of the strips I already had, I only needed to cut from my yardage about a dozen different browns to add to my variety and existing strips. Win! Very little yardage was used... Loss! The stack of browns is still just as tall as it used to be....
The light teals and aquas were in a variety of yardage pieces and fat quarters. I had to make strips for this color, but as I was cutting the larger strips I also planned ahead and cut one or two of the smaller strips to use for the smaller components. I used some of all the pieces that were in the color range that I have. result? I still have a stack of aquas nearly as tall as previously. How does that happen? I cut for days!
After all that cutting, I am now left with a fewer brown strips, but I now have a stack of aqua strips in both colors to put into my strip bins....
Oh, and I have this little bin full of pieces too small to put into my scrapsavers users system. These will go into my pet cushion bag.
I also use the pieces at the ends of strips that won't make a full component, but that can be trimmed to 2 1/2" squares, 2" squares, and 1 1/2" squares and trim to those sizes to be stored for later use. In previous mysteries I have used these pieces in clues. Unfortunately, I did not have enough of either color to use for any of my clues this time.
I had to see how my fabrics are going to play together so stitched up clue #1
To get the variety you see above, I cut my original strips in about 8 - 10" lengths, mixing them up as I went using the aquas with a variety of 4 different browns.
So, I decided to jump in. First, I went to my EQ software to give the layout a rectangular rather than square finish. 18 rather than 25 full pinwheel blocks will give me a finish of 65" x 86" rather than 86" x 86".
Bonnie has asked that we not post EQ layouts of the quilt blocks, so as not to give away proportions of her pattern which will go on sale later this winter. The pattern is FREE until she removes it from her blog sometime in February. I played with the basic block sizes until I was close to what I think will be a good size for me.
Once I figured out how many of each block type I needed: full blocks, half blocks for setting on point and the corner blocks, I started to cut the fabrics I had pulled. My goal was to cut all I needed as a kit, so I can take it with me to retreat in March and use parts as leaders and enders during my sewing times in the next couple of months.
I'm a color renegade and rarely stick with the original colors in a mystery. This is no exception. I used raspberry last year, and my supply is limited. With my stash reduction plan purchasing more raspberry at this time didn't make sense, since I have so many other scrumptious colors in my stash.
I settled on a two color scheme of browns, and light teals or aquas with a touch of butterscotch and a creamy pale yellow as my neutral. This was my thought process: a) I had about 6 yards of this background fabric in my stash which has been aging to a wonderful vintage. b) I had a bunch of strips leftover from previous projects in both sizes needed of browns. c) I had several of the teal / aqua fabrics that I did not use for a previous project. (I believe they were from "Grand Illusion", a previous Bonnie mystery that I didn't start.) d) I also had a few yards of a darling little gingham looking print that is the butterscotch.
It took me about 9 hours over 3 days to get all the components cut. I started with the components needing the larger strip size, and using as many of the strips I already had, I only needed to cut from my yardage about a dozen different browns to add to my variety and existing strips. Win! Very little yardage was used... Loss! The stack of browns is still just as tall as it used to be....
The light teals and aquas were in a variety of yardage pieces and fat quarters. I had to make strips for this color, but as I was cutting the larger strips I also planned ahead and cut one or two of the smaller strips to use for the smaller components. I used some of all the pieces that were in the color range that I have. result? I still have a stack of aquas nearly as tall as previously. How does that happen? I cut for days!
After all that cutting, I am now left with a fewer brown strips, but I now have a stack of aqua strips in both colors to put into my strip bins....
Oh, and I have this little bin full of pieces too small to put into my scrap
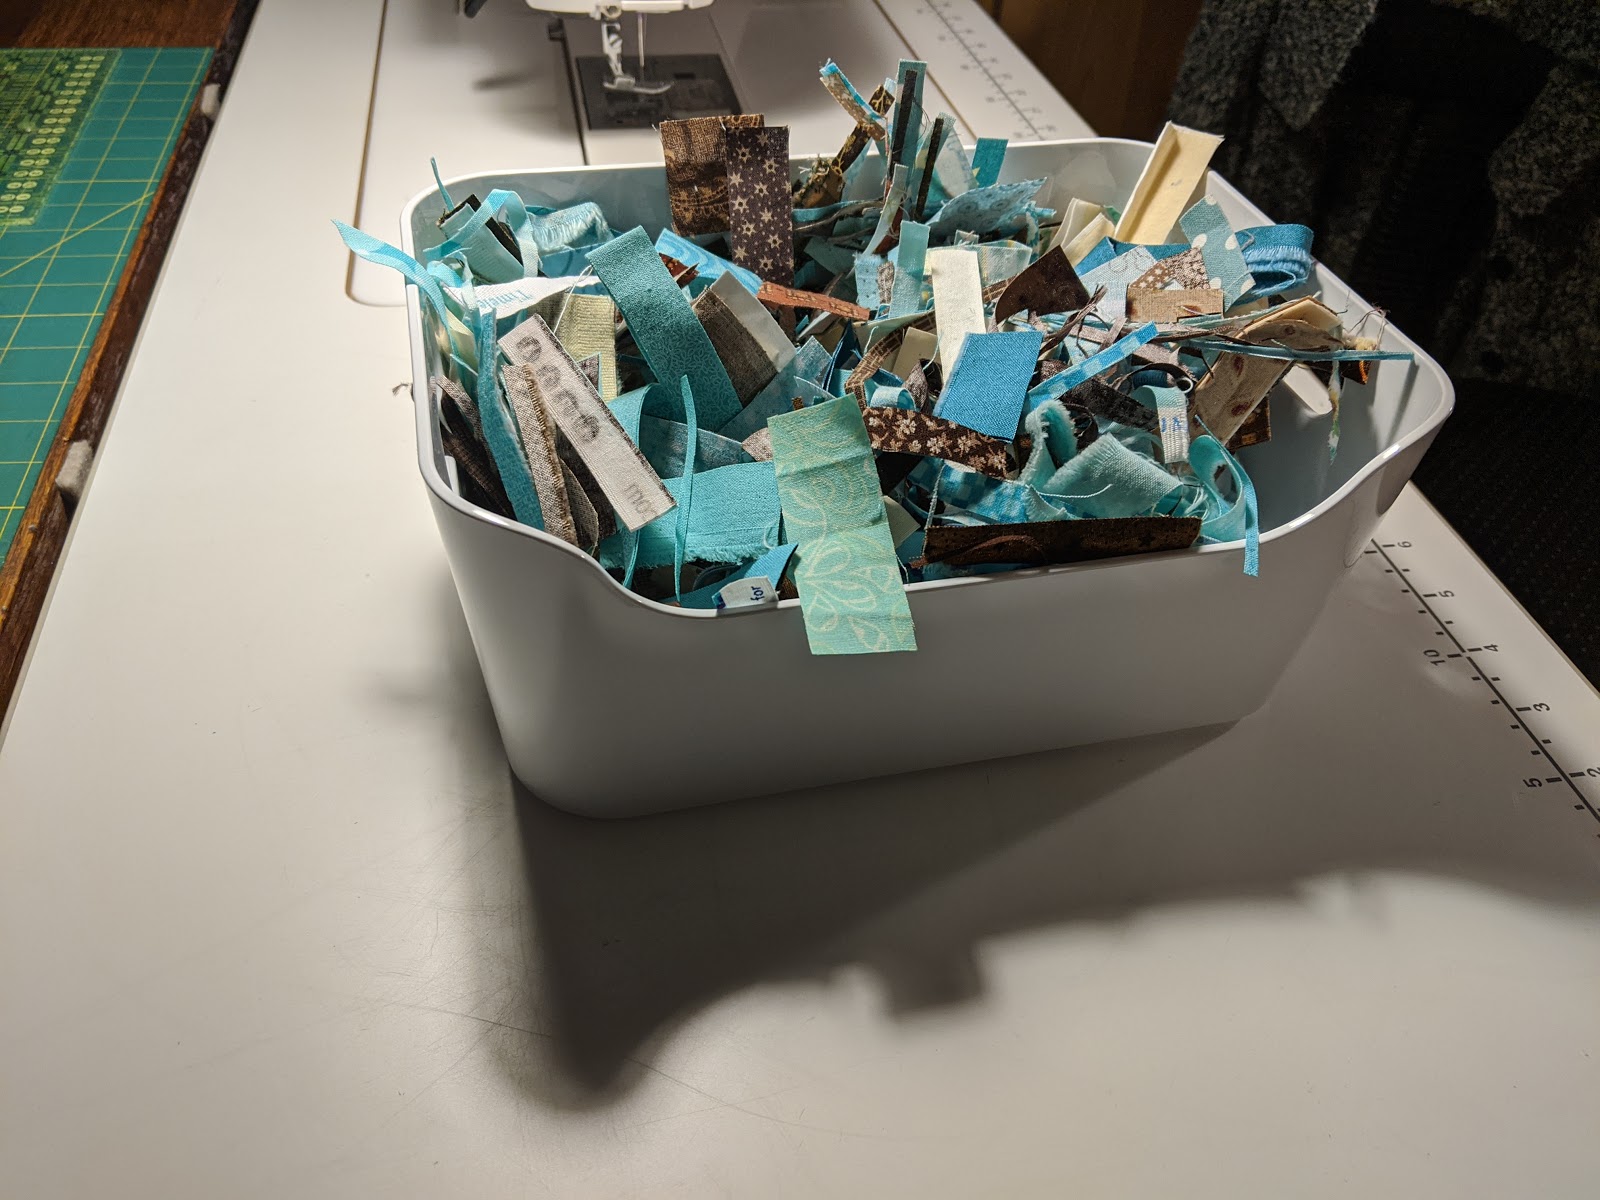 |
| As I cut, I place pet cushion scraps in one bin, and "crumbs" in another. This is the pet cushion bin. |
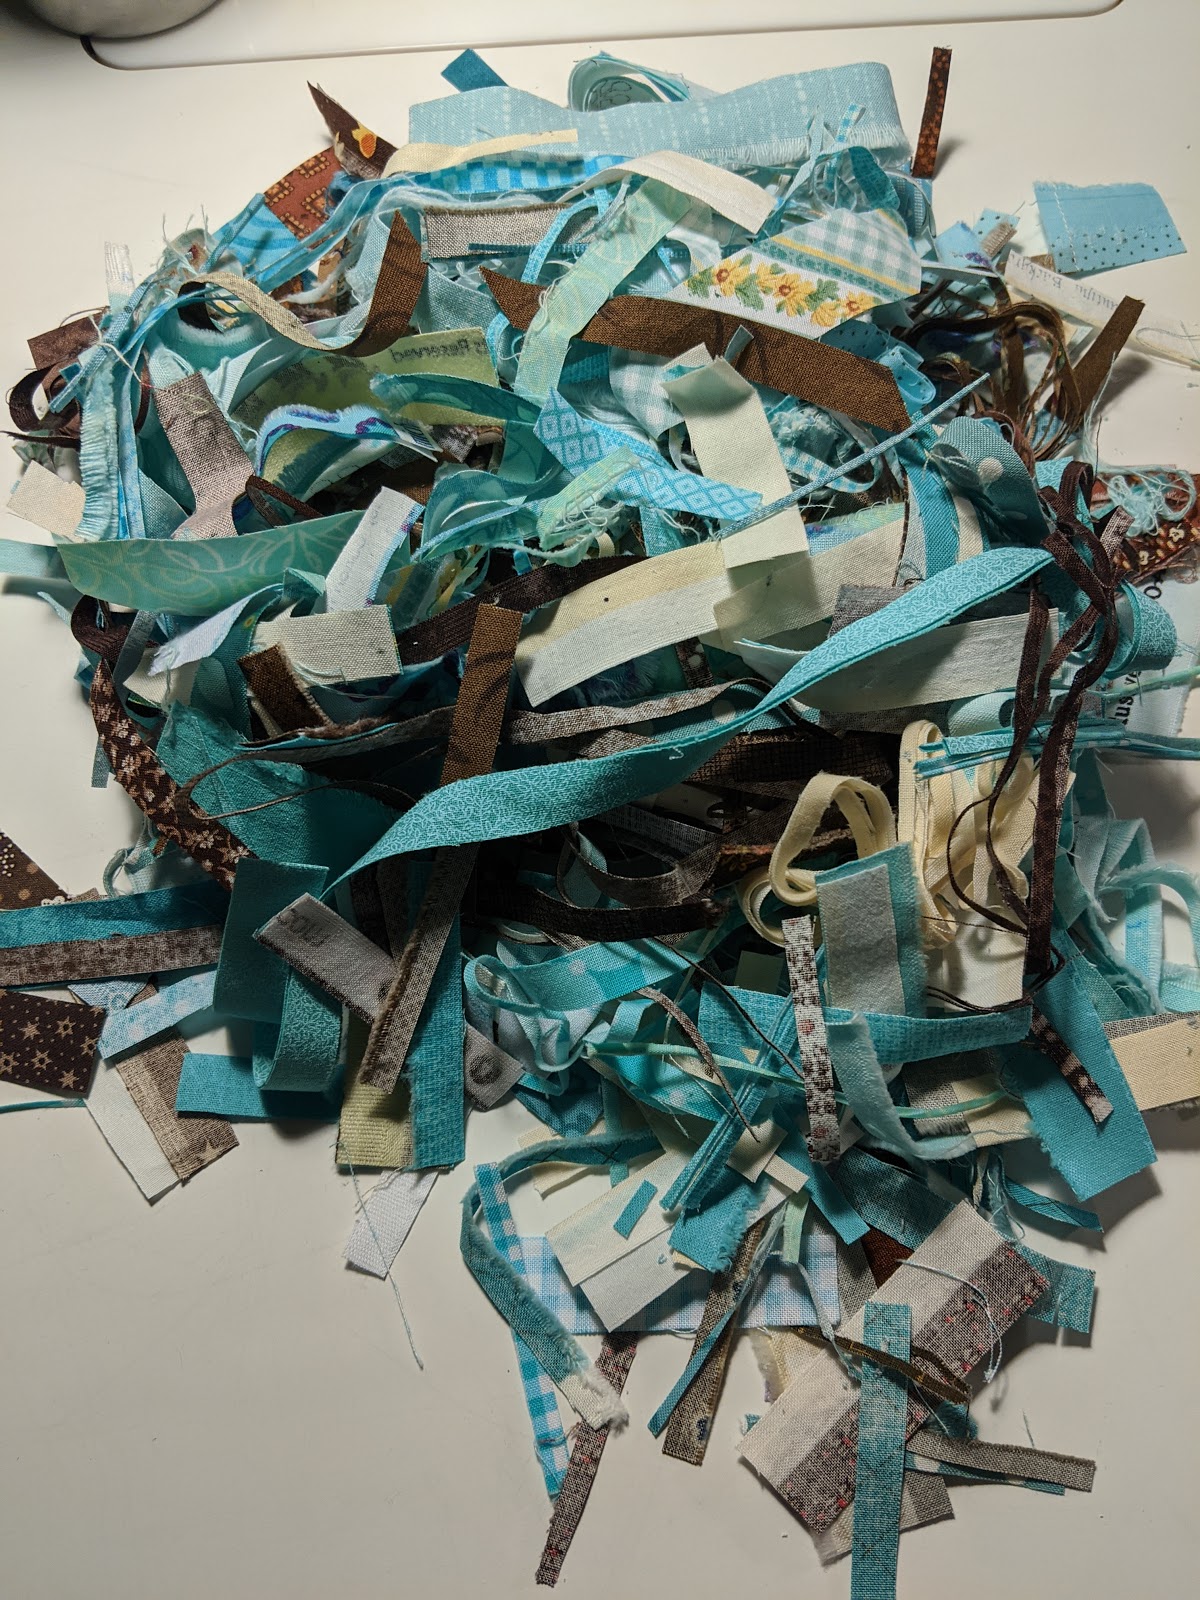 |
| Nothing larger than 3/4" here ( those went into the crumb bin to be used in projects) More on crumbs later. |
I also use the pieces at the ends of strips that won't make a full component, but that can be trimmed to 2 1/2" squares, 2" squares, and 1 1/2" squares and trim to those sizes to be stored for later use. In previous mysteries I have used these pieces in clues. Unfortunately, I did not have enough of either color to use for any of my clues this time.
I had to see how my fabrics are going to play together so stitched up clue #1
 |
| Clue #1 Aquas and Browns |
To get the variety you see above, I cut my original strips in about 8 - 10" lengths, mixing them up as I went using the aquas with a variety of 4 different browns.
Saturday, January 18, 2020
I had a Productive Week!
I was able to add another quilt to the finish column this week! This was number 2 on my UFO challenge list, and has been patiently waiting to have it's quilting done for 8 years!
I also finished putting the borders on this group project for Quilts of Valor. Our guild did a Quilt of Valor Sew day on Veteran's Day. I was supposed to be a "table mom", and had this one all cut. I also pre-did the applique stars. Turned out I was whisked away to Reno for the week, and someone else stepped in to keep our table group on task. The had finished all the sewing components, but the borders needed to be attached... so I brought it home to do that.
Pattern is from a 2013 Fons and Porter Patriotic Quilts magazine.
"Waving Old Glory".
I also made some hand work progress on my Monarch Butterfly project... the colors in these photos are much better than the last group I took. You can even see the text on the background here.
I'm not sure if I'll get the third UFO project on my list finished this month... but I'm hoping to decide what my next steps are and to get a start..
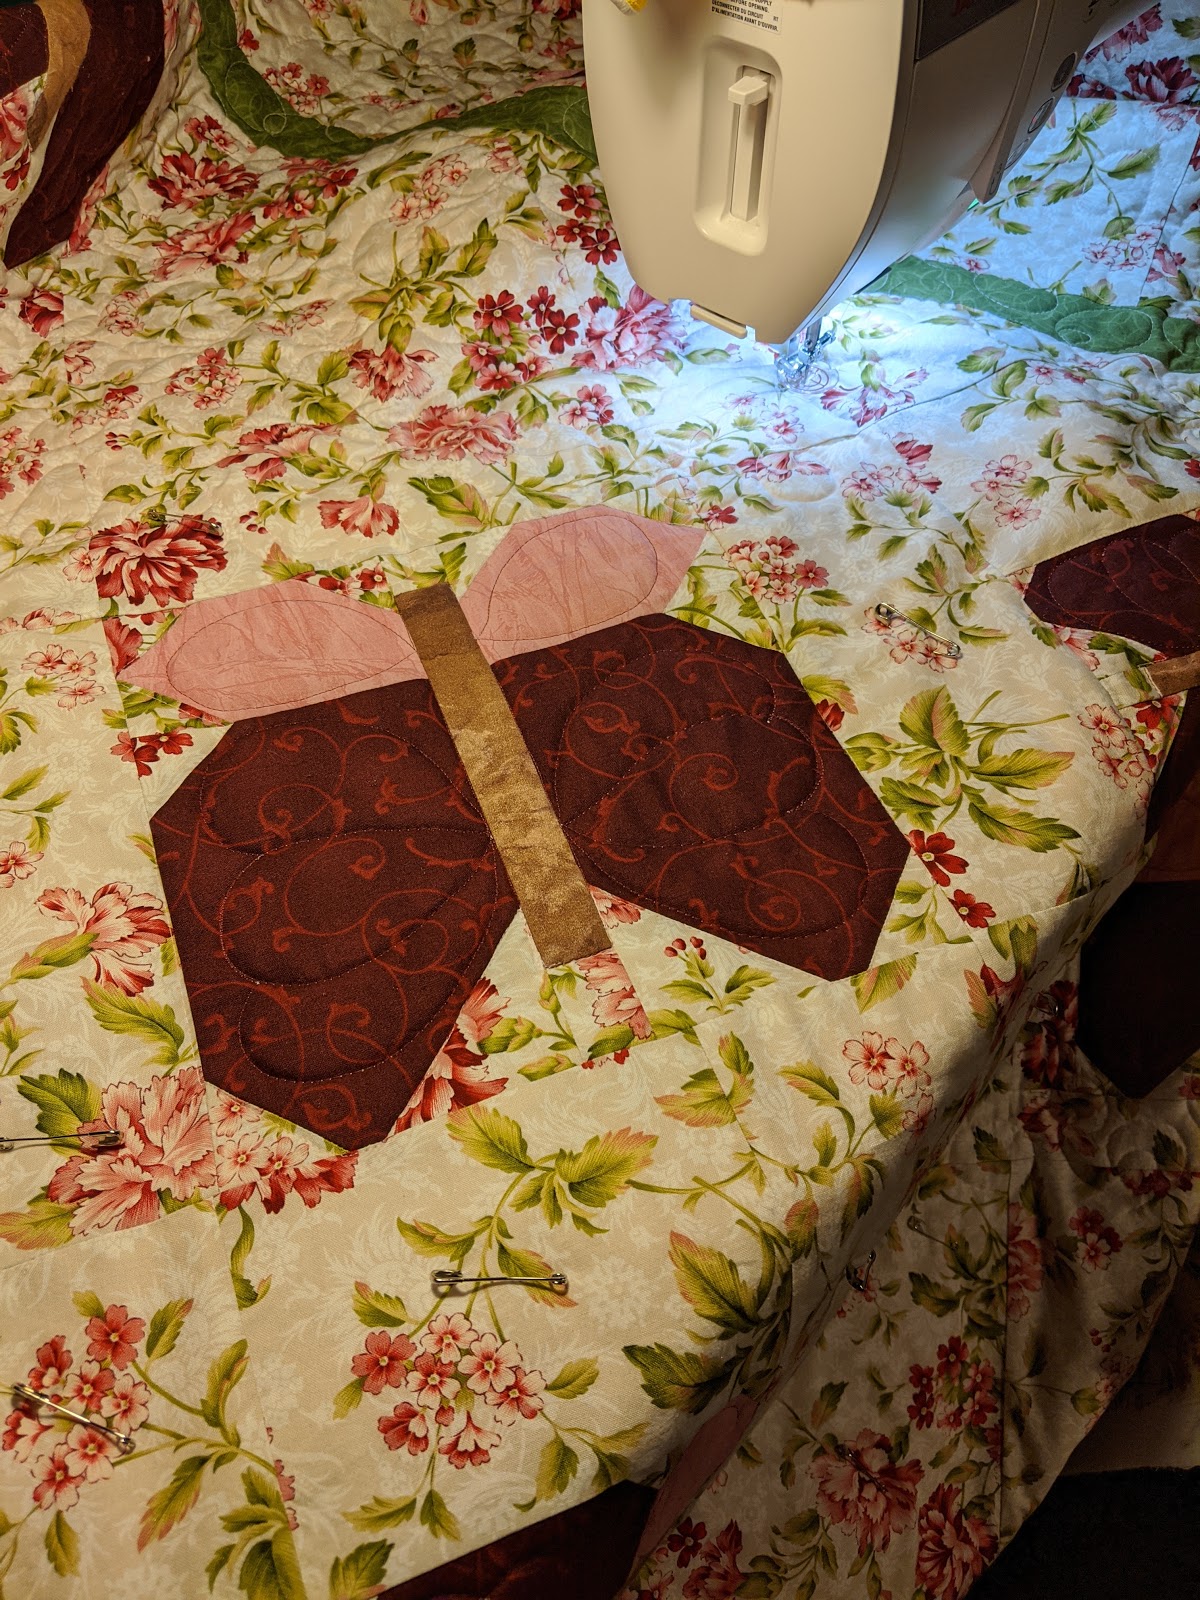 |
| Close up under my needle of fabric and butterfly. |
 |
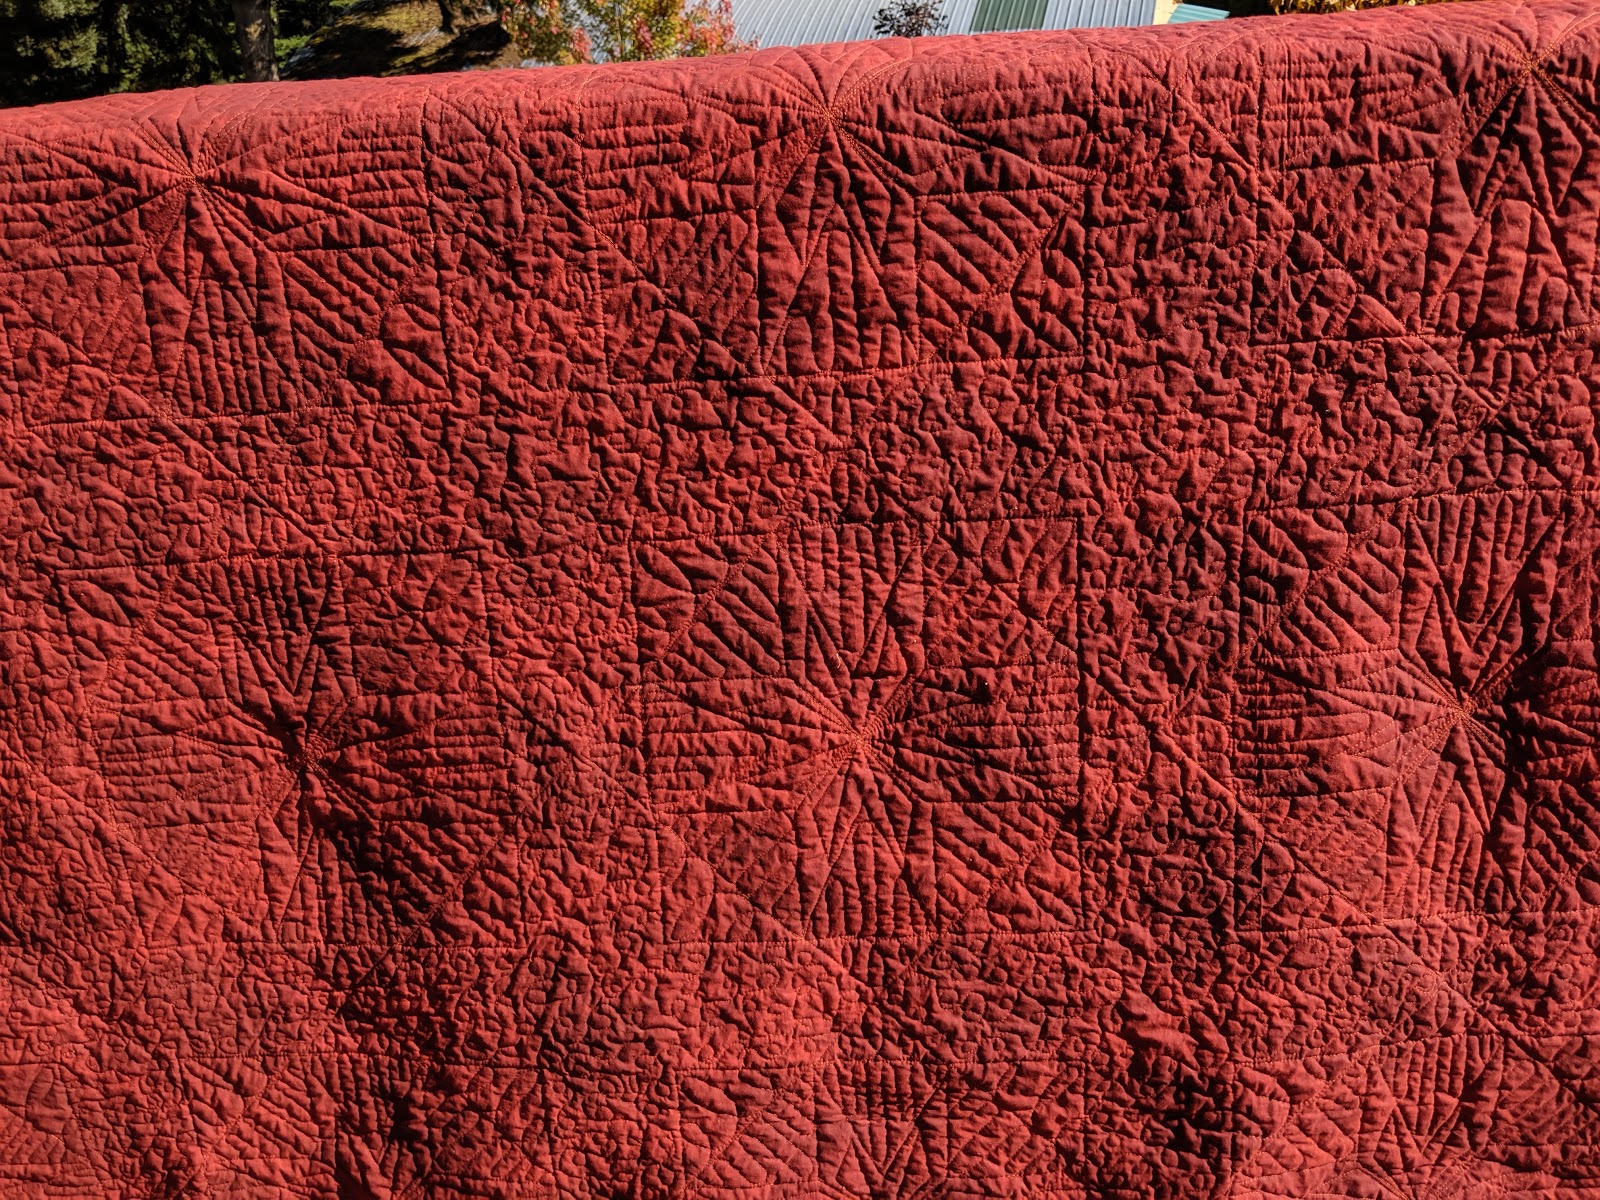
| More Quilting Details - I did an all-over double loopy meander because the background fabric is so busy, I wanted something loopy and with great texture |
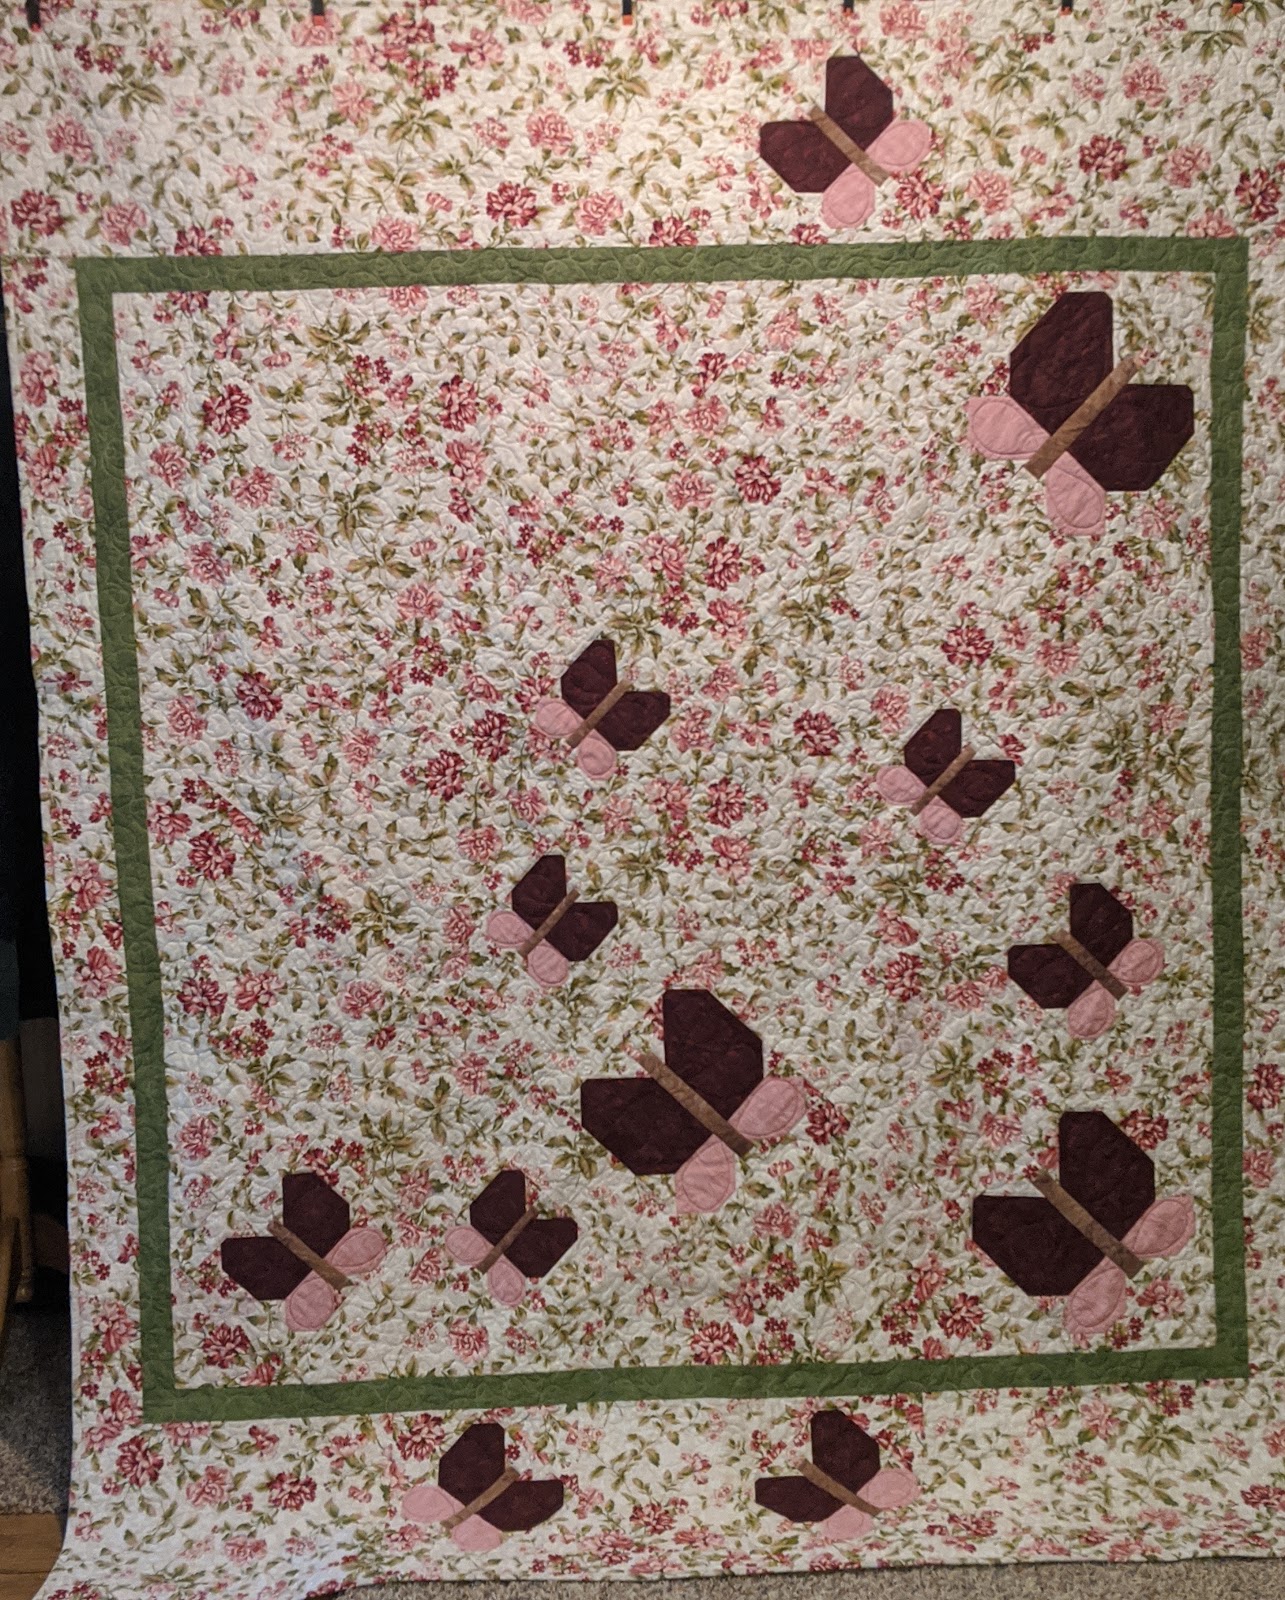 |
| Quilted and Bound! |
 |
| Corner Detail |
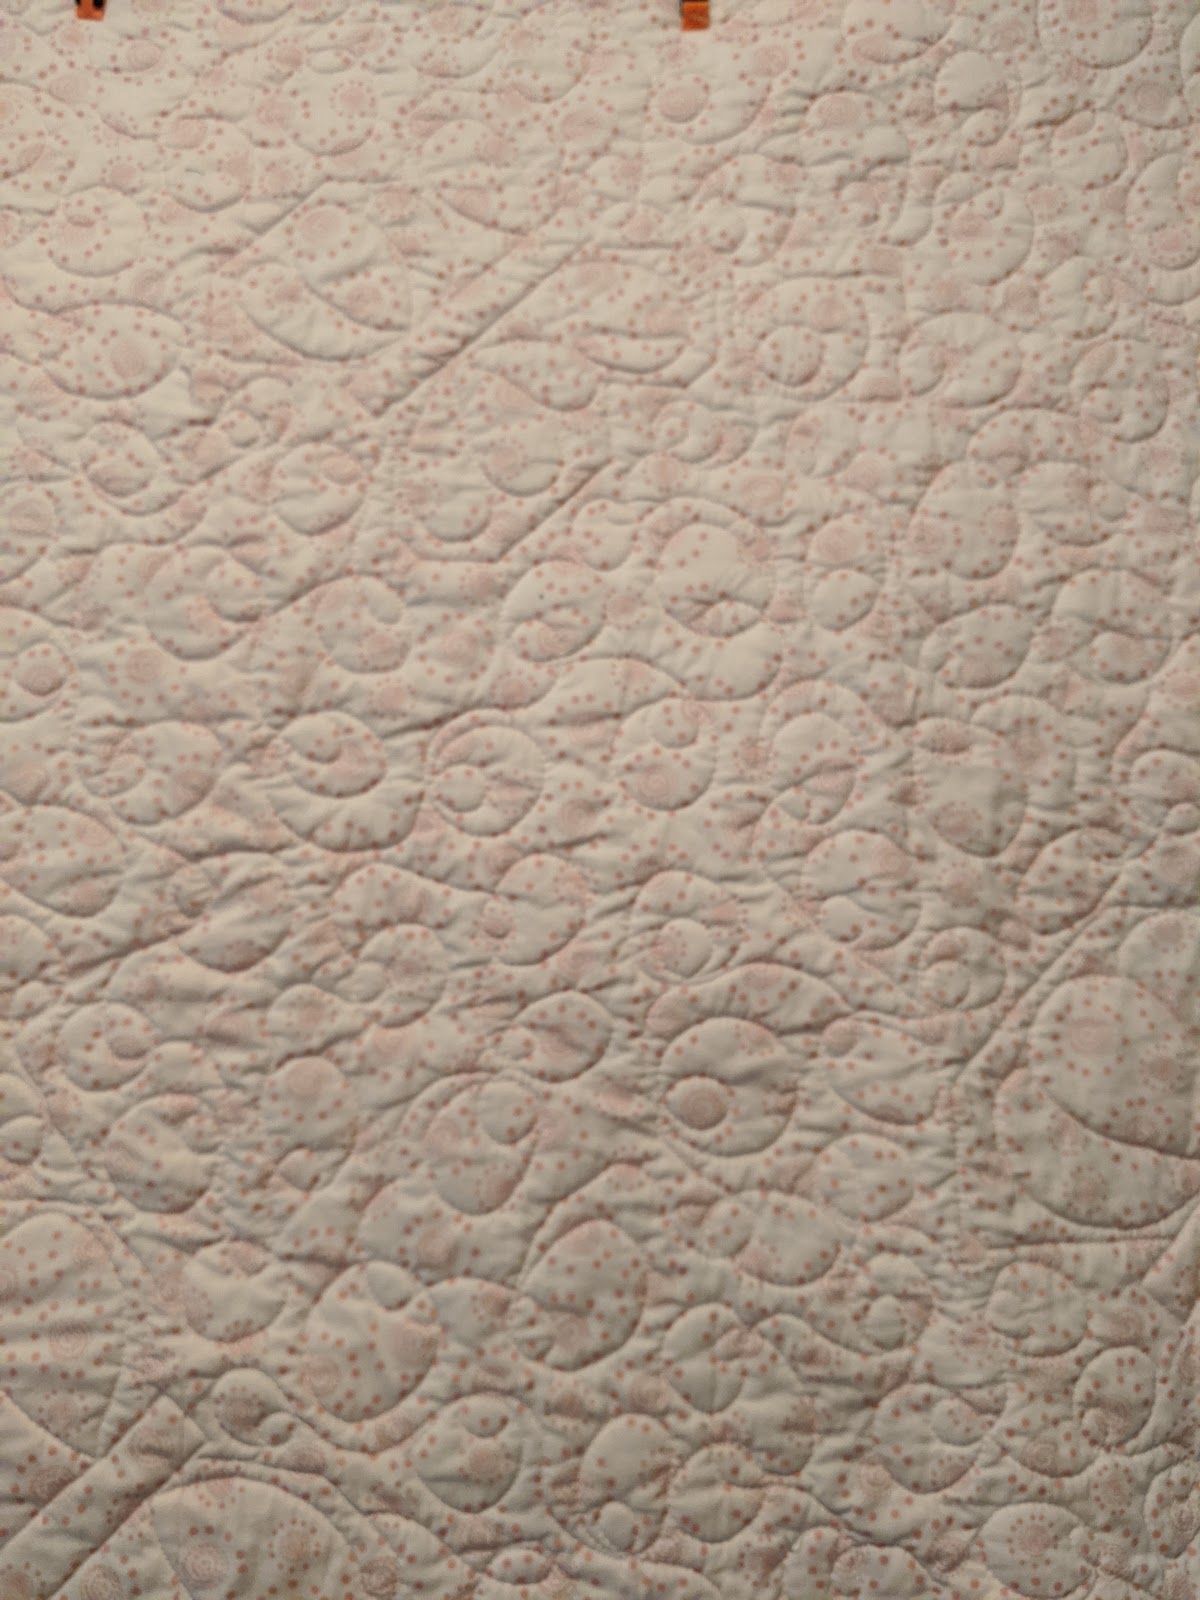 |
| Back texture detail |
I also finished putting the borders on this group project for Quilts of Valor. Our guild did a Quilt of Valor Sew day on Veteran's Day. I was supposed to be a "table mom", and had this one all cut. I also pre-did the applique stars. Turned out I was whisked away to Reno for the week, and someone else stepped in to keep our table group on task. The had finished all the sewing components, but the borders needed to be attached... so I brought it home to do that.
Pattern is from a 2013 Fons and Porter Patriotic Quilts magazine.
"Waving Old Glory".
 |
| All borders done, Ready for someone's Long Arm |
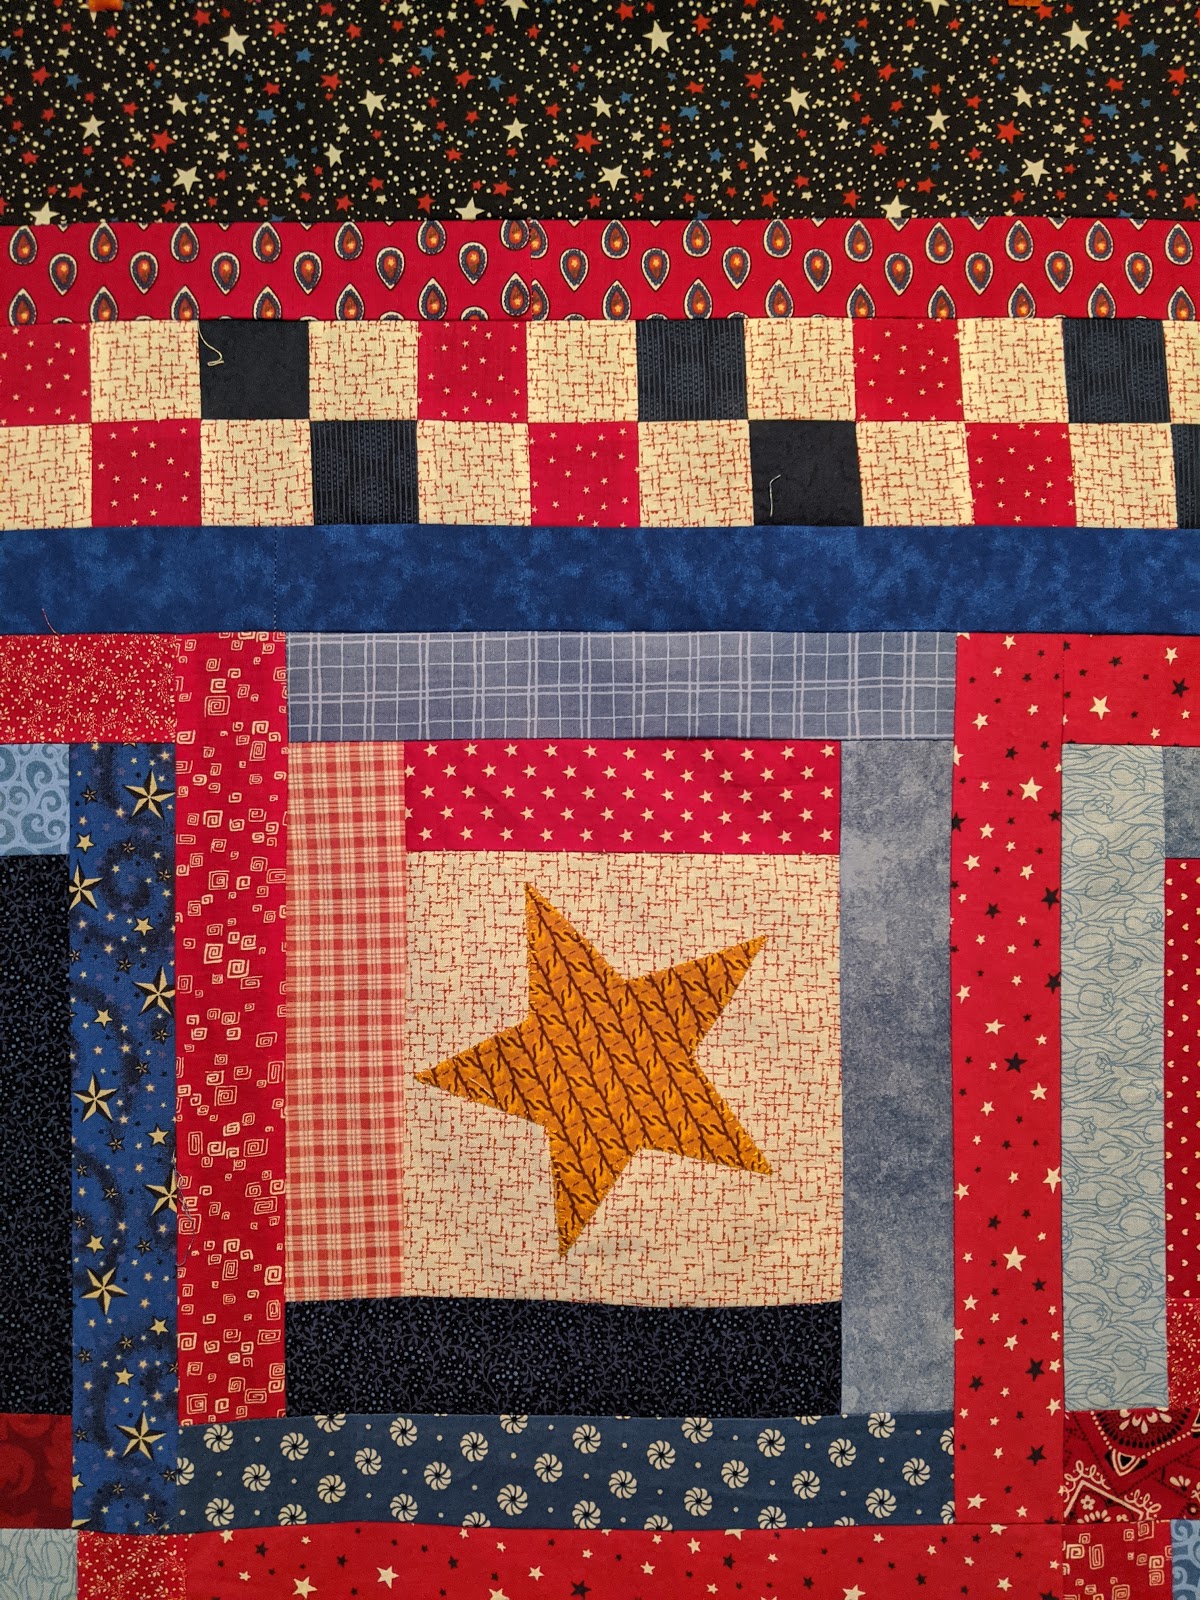 |
| Close up detail. - every gold star is different. |
I also made some hand work progress on my Monarch Butterfly project... the colors in these photos are much better than the last group I took. You can even see the text on the background here.
 |
| Making progress on the Milkweed... |
I'm not sure if I'll get the third UFO project on my list finished this month... but I'm hoping to decide what my next steps are and to get a start..
Saturday, January 11, 2020
Off to a Great Start in 2020!
I started out the year on a positive note!
I finished a UFO that I had on my list for awhile. "Spring" is the last of 4 seasonal projects with embroidery by Crab-Apple Hill.
A Couple of Finishes...
I finished a UFO that I had on my list for awhile. "Spring" is the last of 4 seasonal projects with embroidery by Crab-Apple Hill.
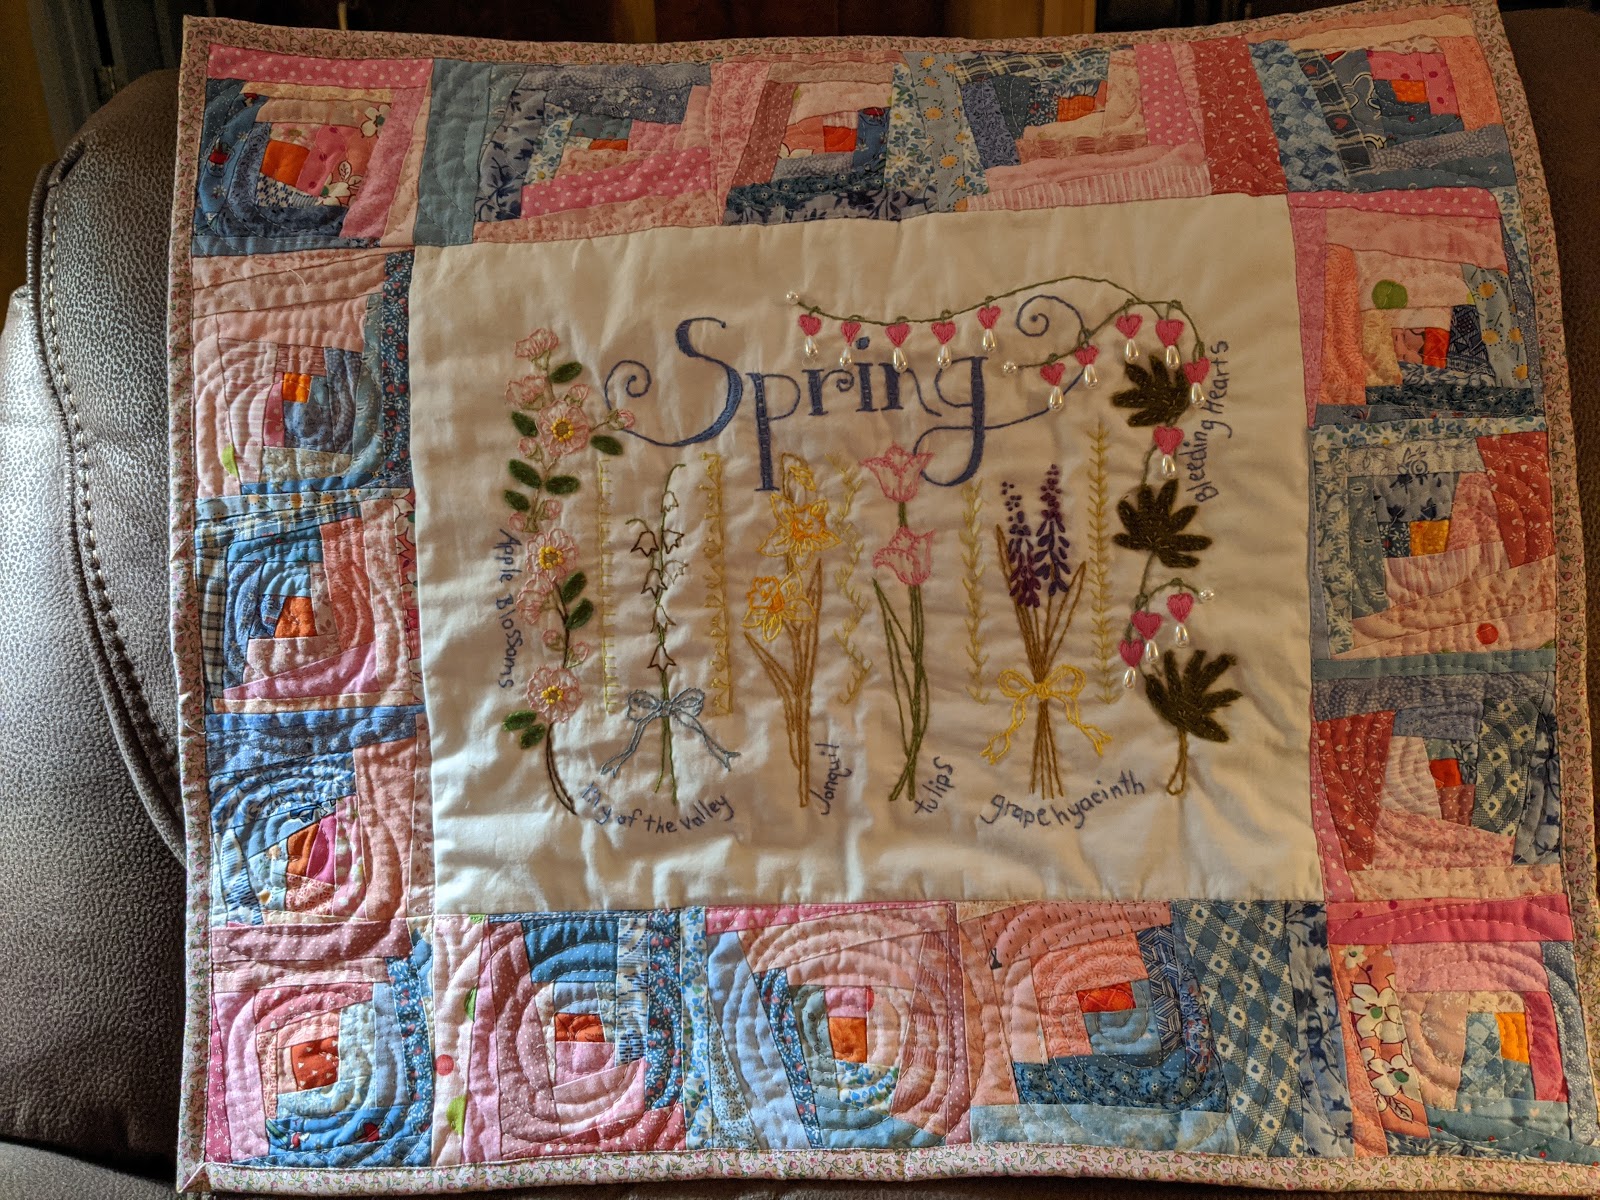 |
| Spring - Finished! |
I also finished one of my #2's from my APQ UFO challenge. This one is a lap quilt for our guild's Comforting Quilts Program. I'm hoping to finish at least one a month. These were stars from a Block Lotto when I hosted a Color Wheel Tour Block of the Month for our guild back in 2014. I'm hoping it can cheer someone up while keeping them warm.
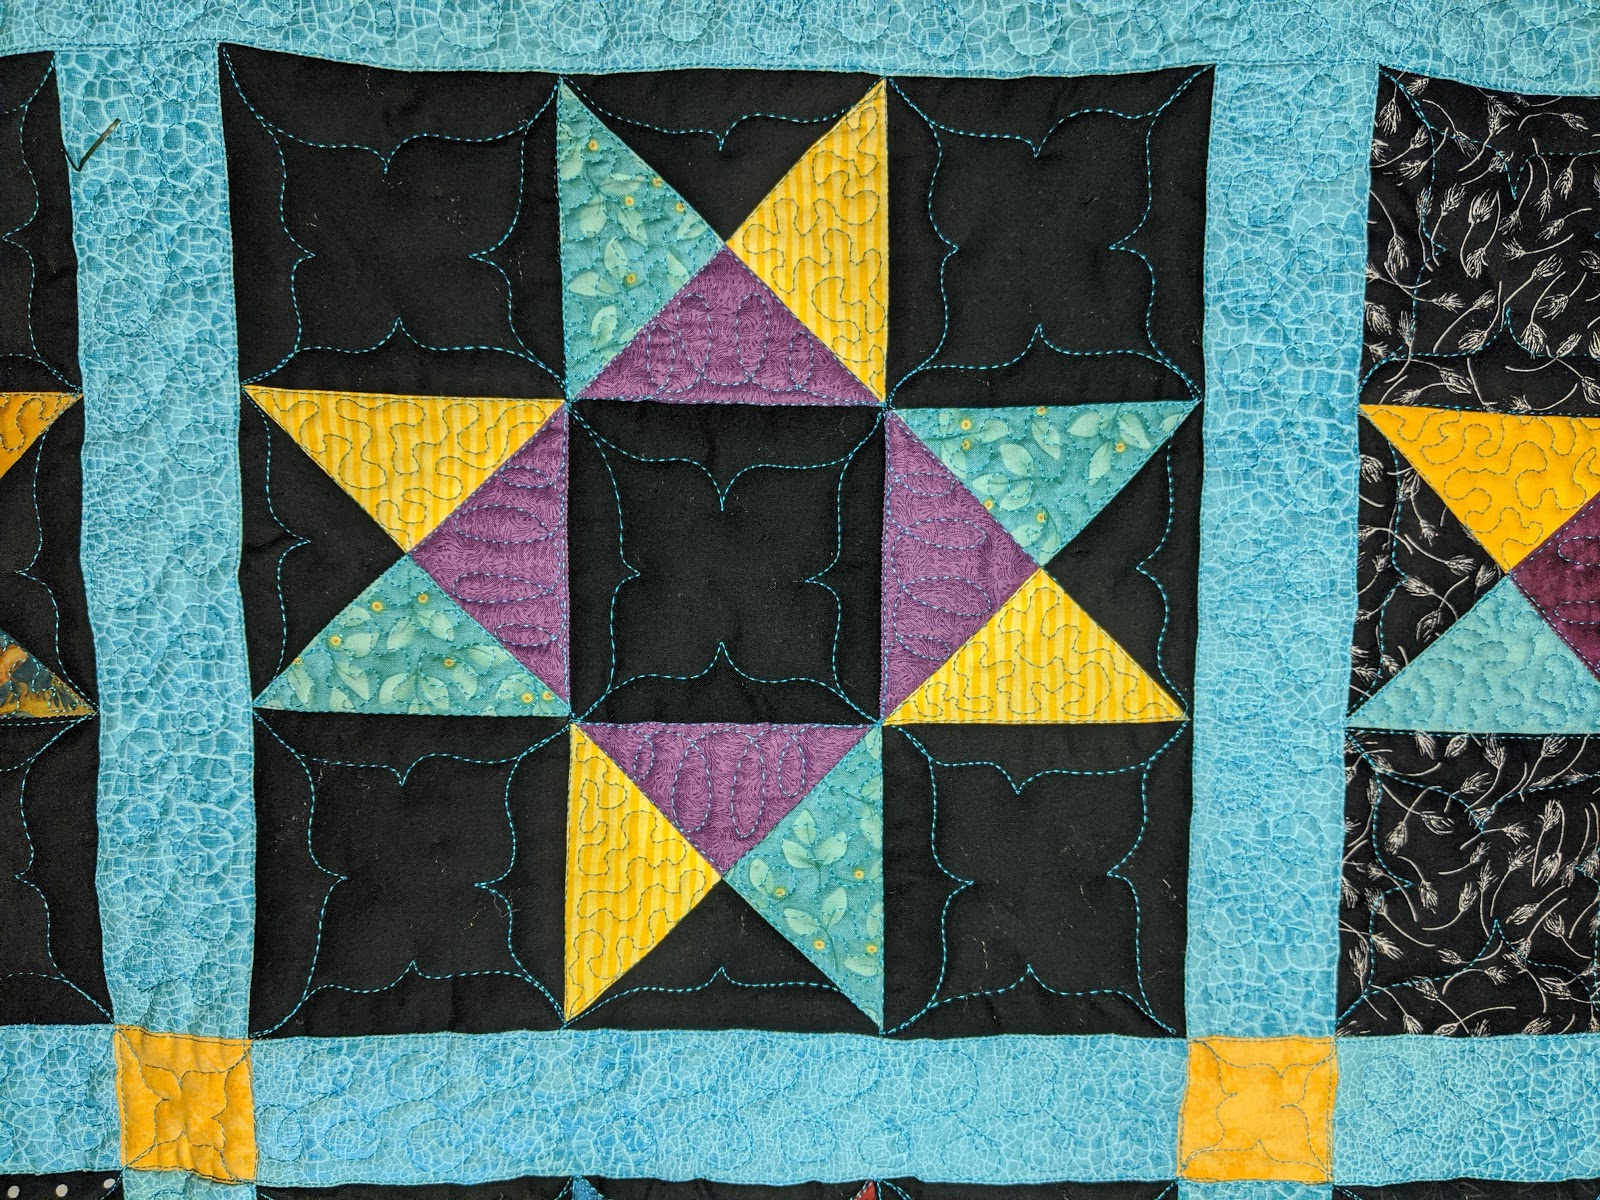 |
| Quilting close-up detail |
 |
Stars on Black - 43" x 43"A new challenge start!
My small hand stitching group decided to do a challenge for our quilt show in March. Hand stitched, something with the color orange, which was chosen out of a hat..... and smaller than a Fat Quarter.
I chose to do a Monarch Butterfly on milkweed.
this is my inspiration photo.... found in google images, so I'm sorry but there was no credit given to the photographer.
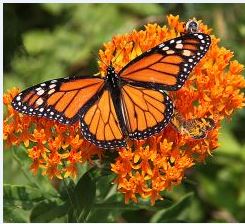
Inspiration photo
I had a fat quarter of a text fabric, which I dyed green. Then I used some orange marbled cotton, and using fusible web I fused two layers together... Reverse applique with black wool over it and then embroidery to finish the butterfly. It will sit on top of the milkweed as a dimensional item when done. I plan on adding more body details over the wings when I attach it to the flower.
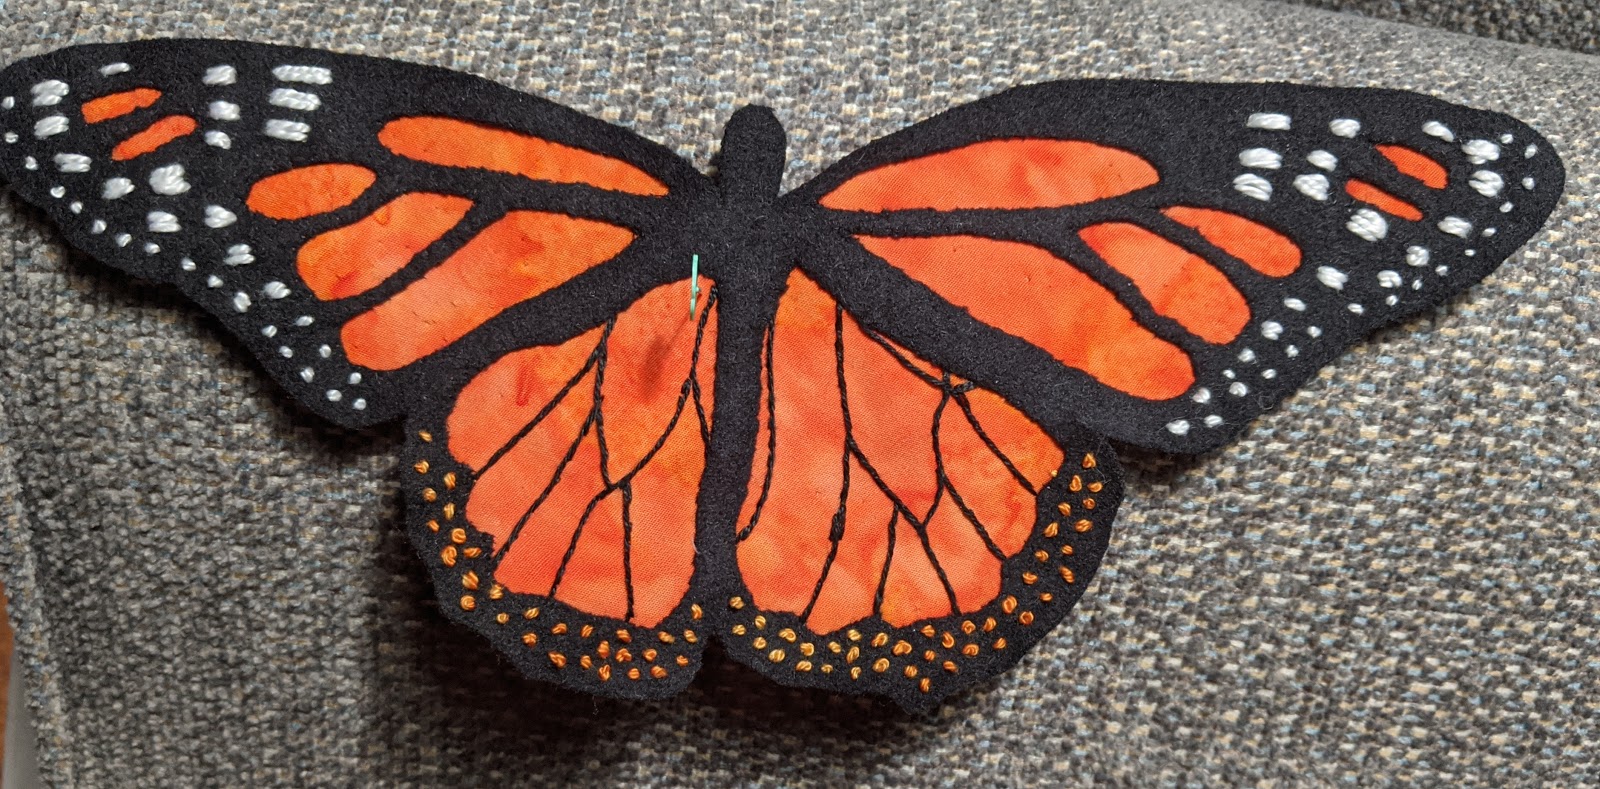
Butterfly - approx 9" across wing span.
I'm using a variety of variegated threads to embroider the milkweed flower.
Here is my progress on the embroidery so far... trying to use my threads that are not as expensive under the butterfly... so that is where i started.
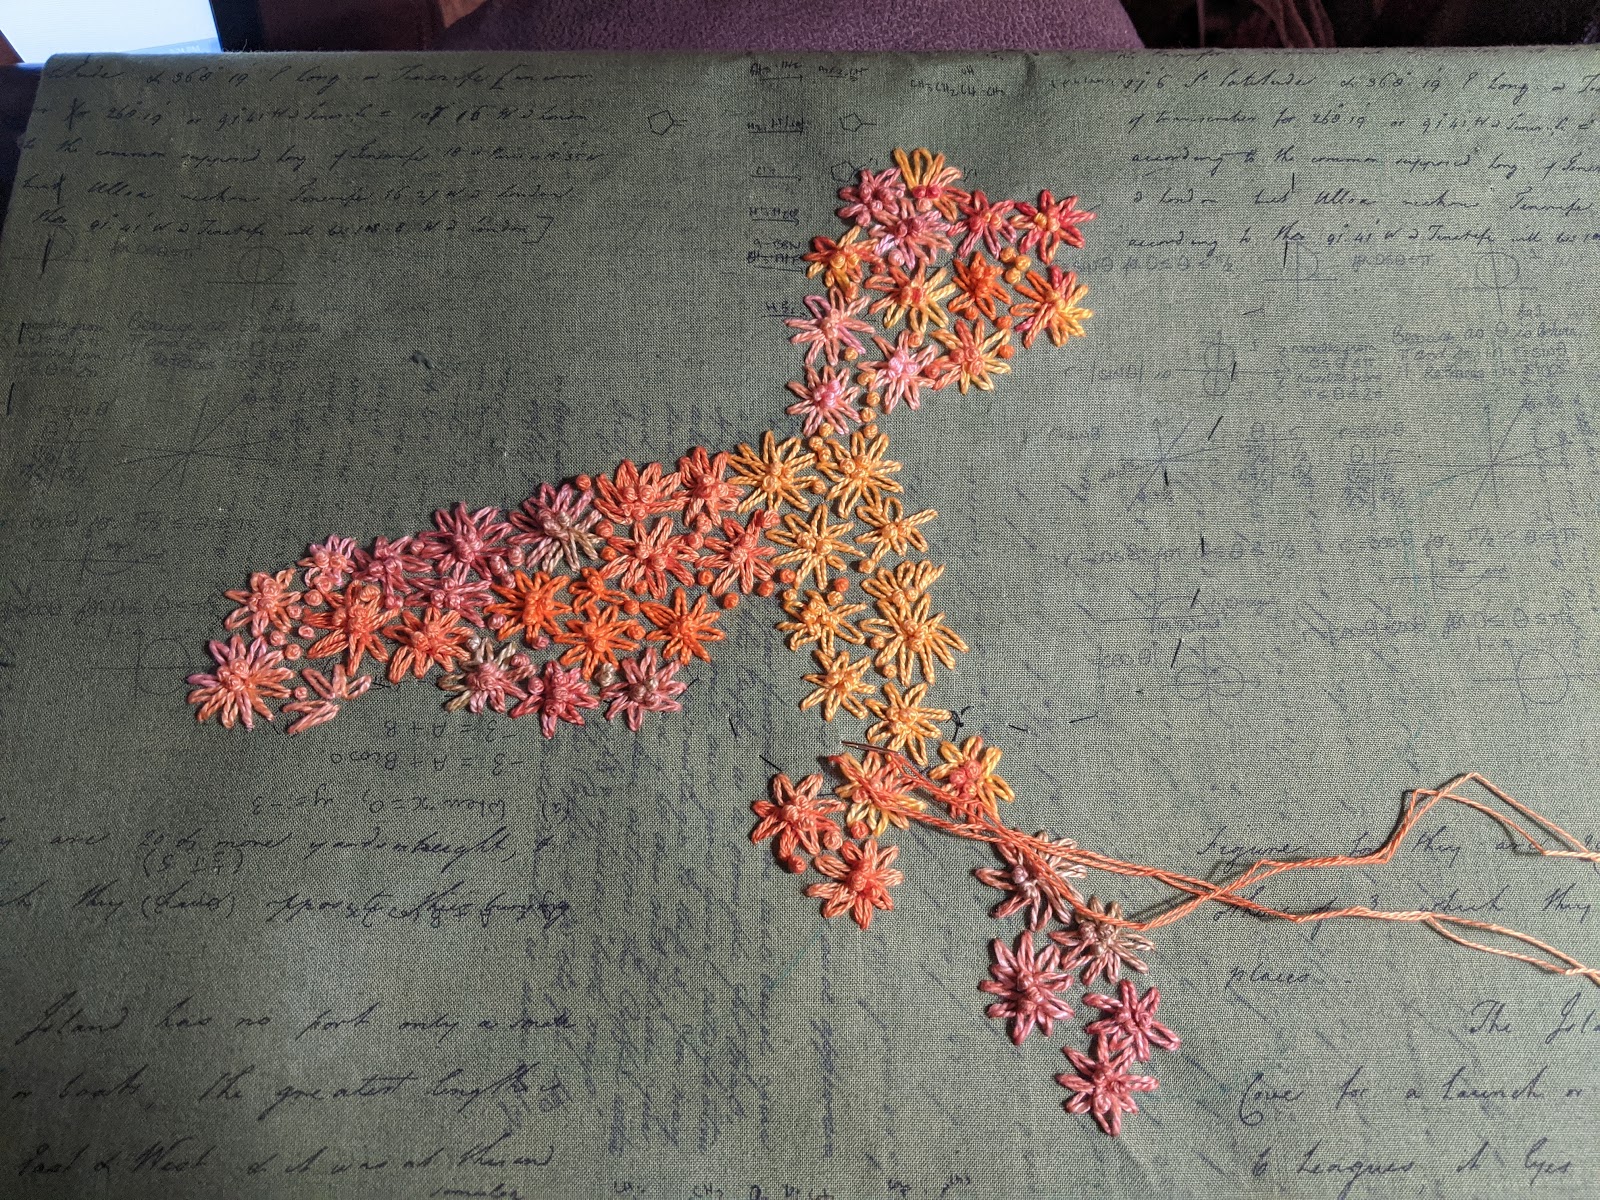
Embroidery progress to date
With the butterfly in place... I am tickled with the way it's coming along! Since I'm our show chair, i need to get this finished in the next few weeks, because things get really crazy as the show approaches.

A general idea of how the butterfly will sit when done.
|
Thursday, January 2, 2020
The Beginning of a New Decade.... or... What I Accomplished in the Final Months of 2019
Well, once again I went months without posting anything....
Much has happened since I finished that baby quilt..... Where should I start?
I apologize up front... this is long but it has lots of eye candy for pictures....
Grand Kids Projects -
I decided that since our thee grand kids have all finished college, started jobs and moved away from the nest in Helena that it was time they got a quilt.
Kaleigh loves pink, and as I started working on Bonnie Hunter's "Good Fortune" mystery last year it was the perfect color combination for her. I finished piecing the top while I was at our Spring Retreat last March. I had really wanted to use Minky on the back and purchased some in April. However... I'm a chicken! it needed to be pieced, and since I quilt on my domestic machine.. it really needed to be spray basted. This is an outside job at my house with Mike having Asthma... and I procrastinated enough that summer came and went..... so I decided to go with a nice thick flannel on the back.
 |
| Good Fortune - 72 x 72 |
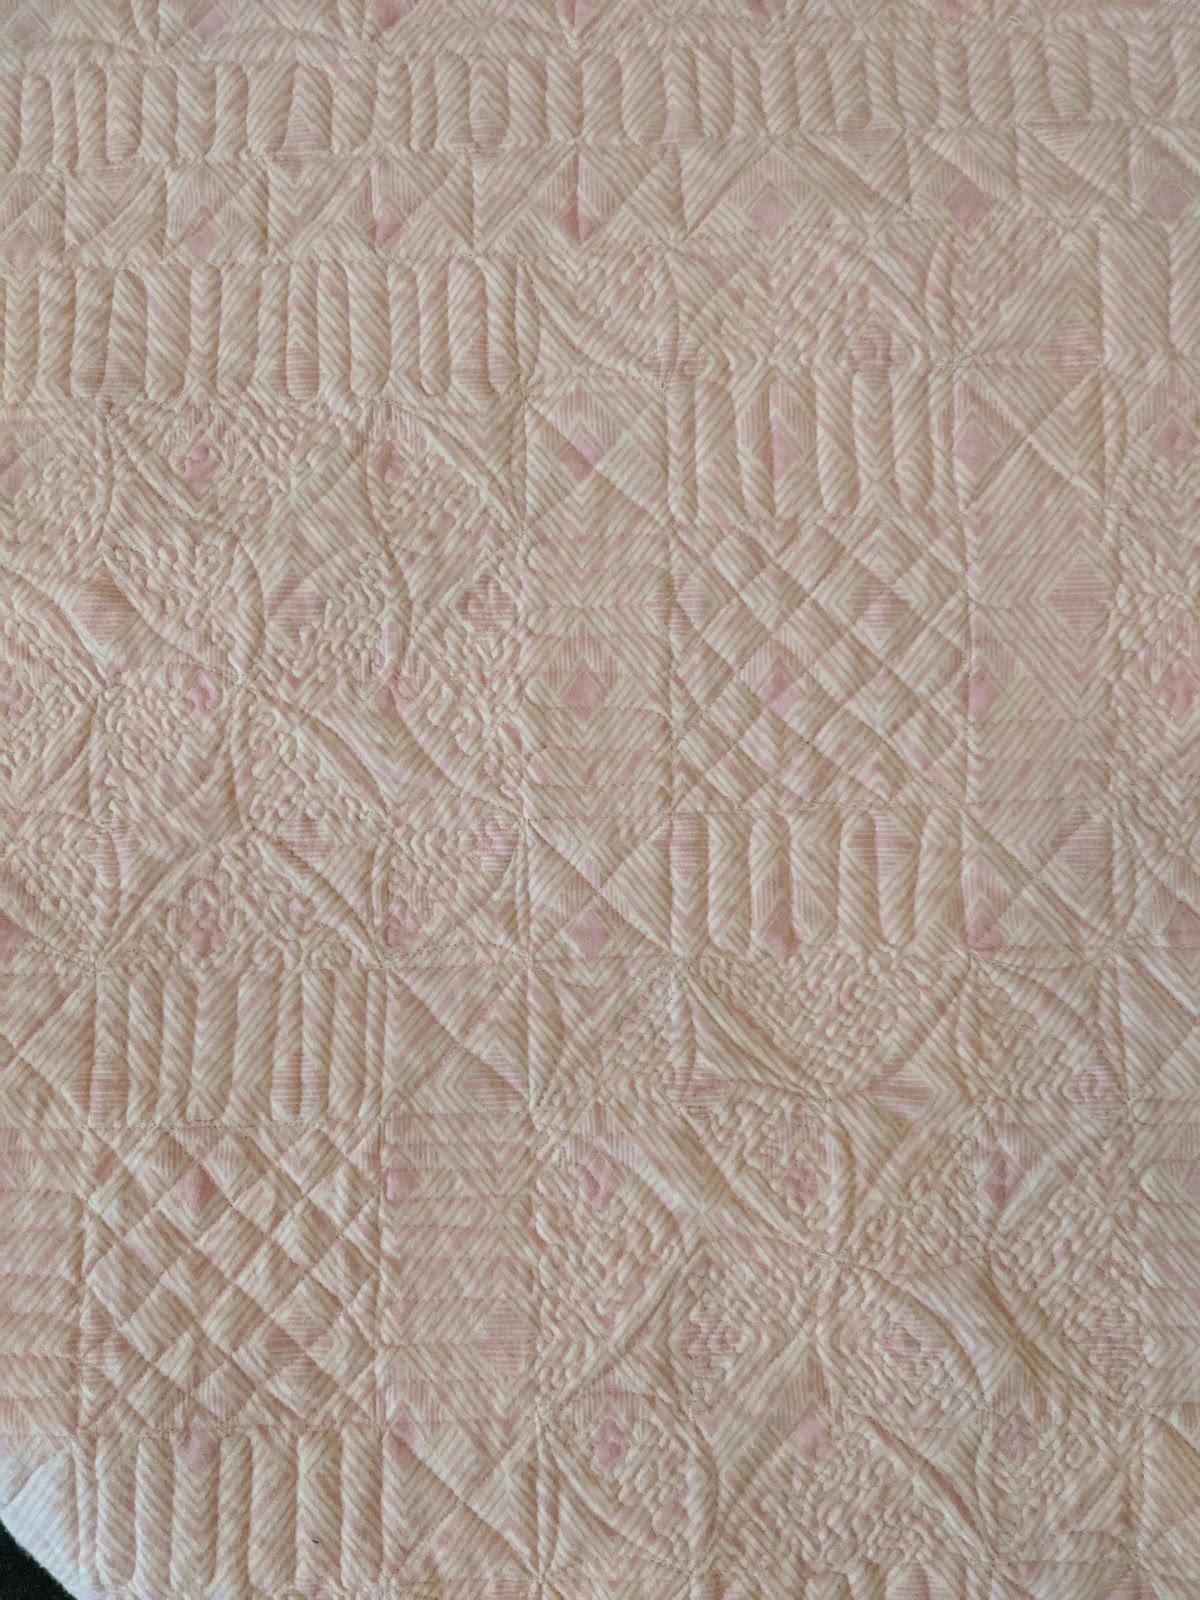 |
| Back texture close up |
 |
| Front - Quilting Detail |
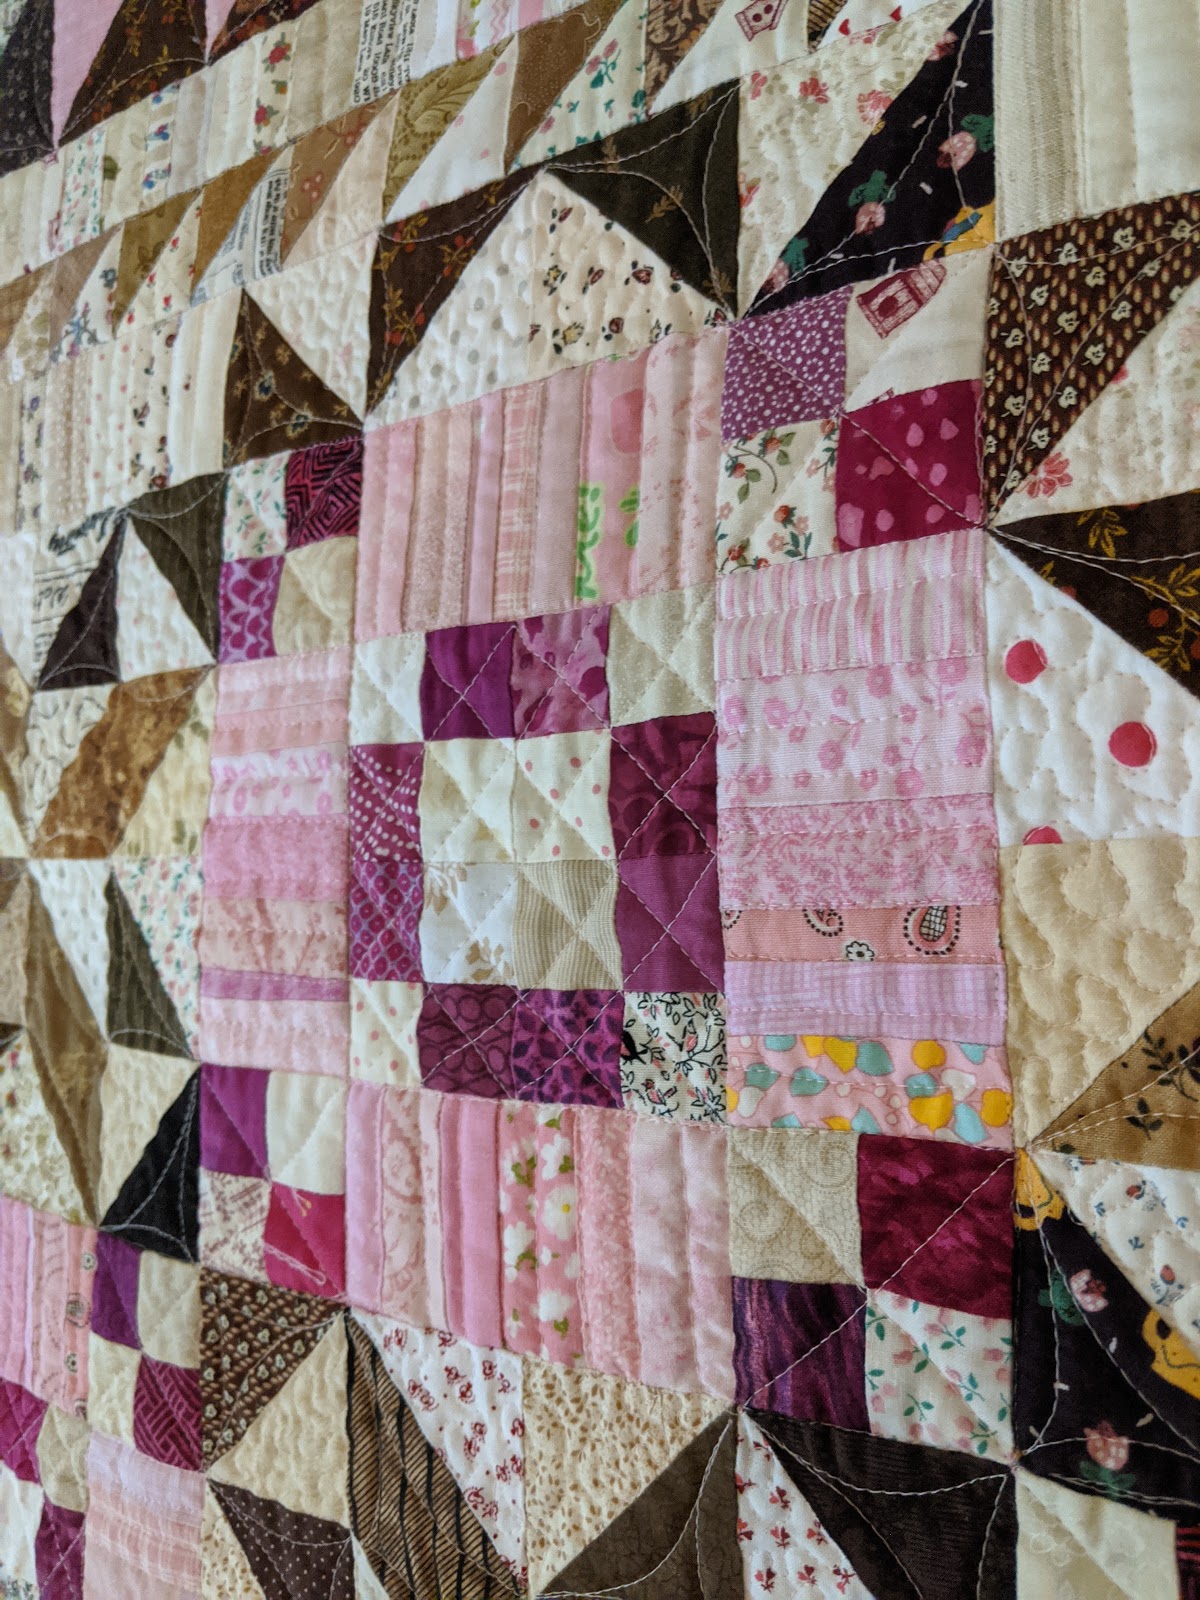 |
| Front - Quilting Detail |
 |
| Wrapped and ready to ship |
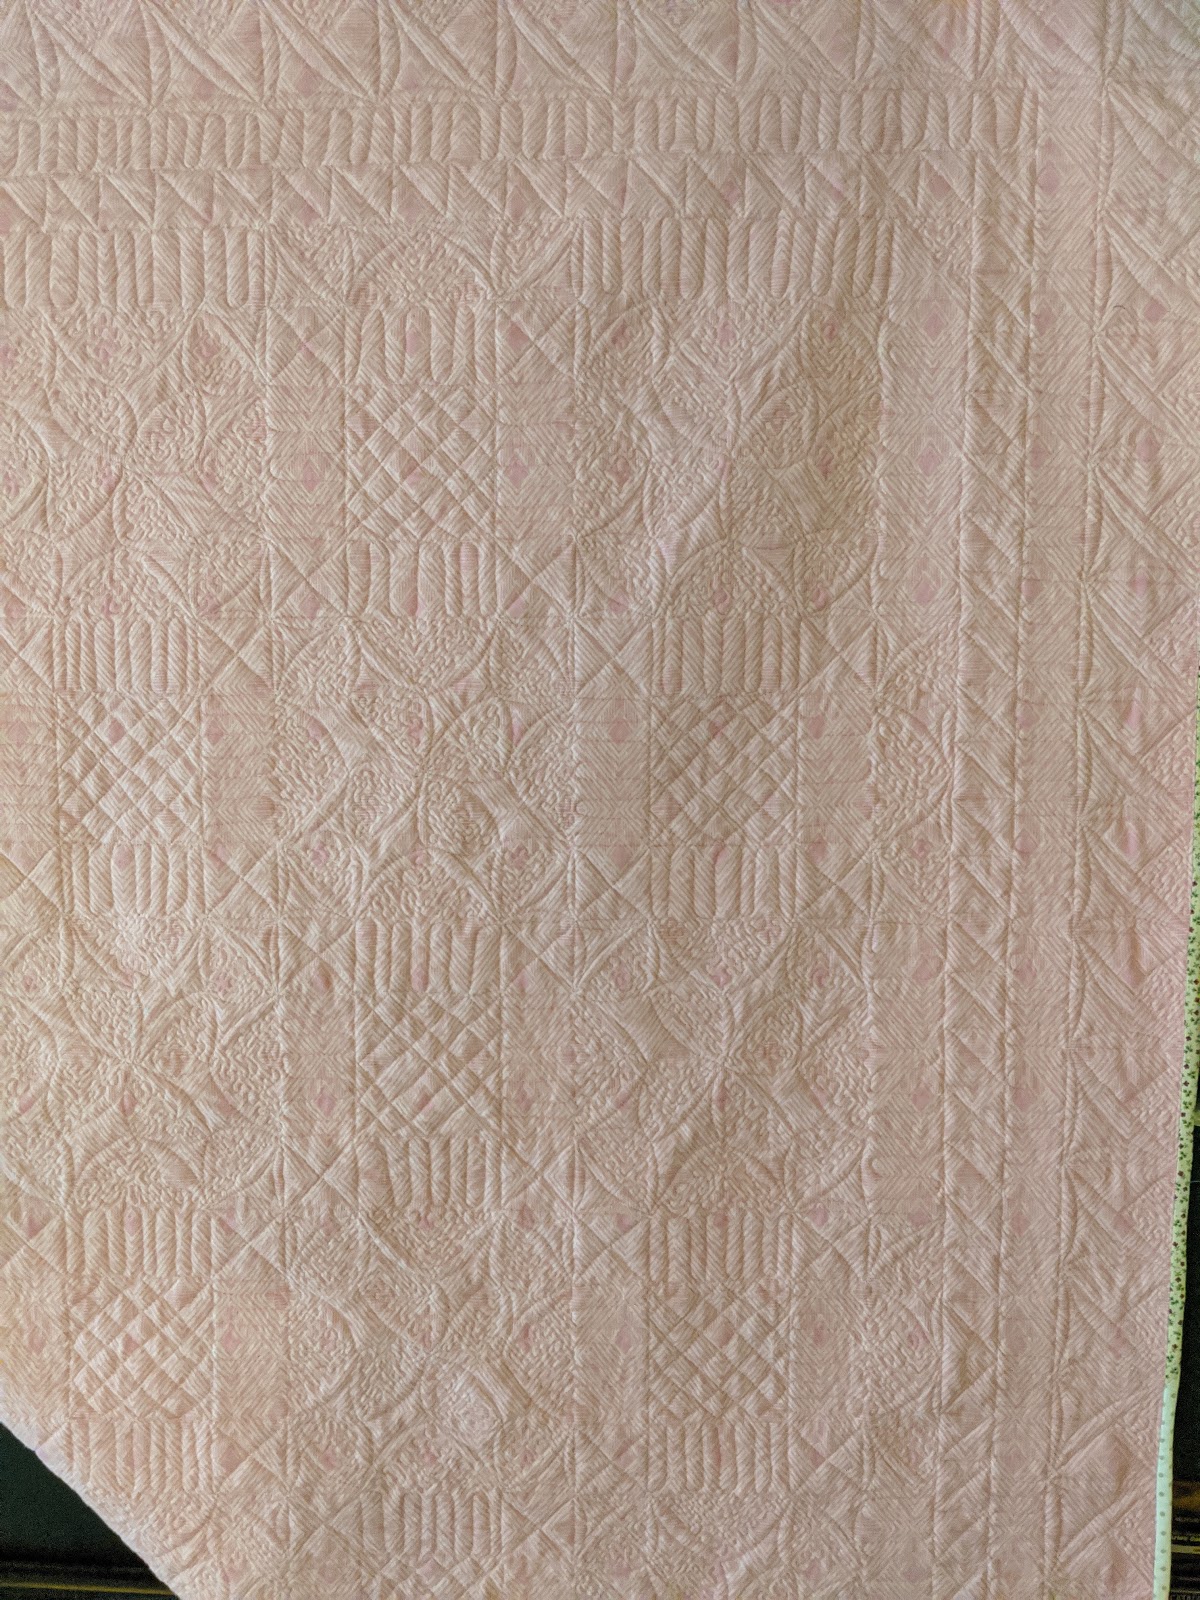 |
| Back Texture |
"Bronco Spirit" is for our oldest grandson. He is a Denver Bronco fan. He graduated from Montana Tech a few years ago and just bought his first home. The quilting on this one is along the seams so the back texture wasn't really as exciting as the other two.... but I must admit that turning that 85 x 85 quilt every 8 inches was a bear of a workout!
 |
| Bronco Spirit - before quilting |
 |
| Quilting close up |
 |
| More Quilting detail |
 |
| Labeled and Wrapped |
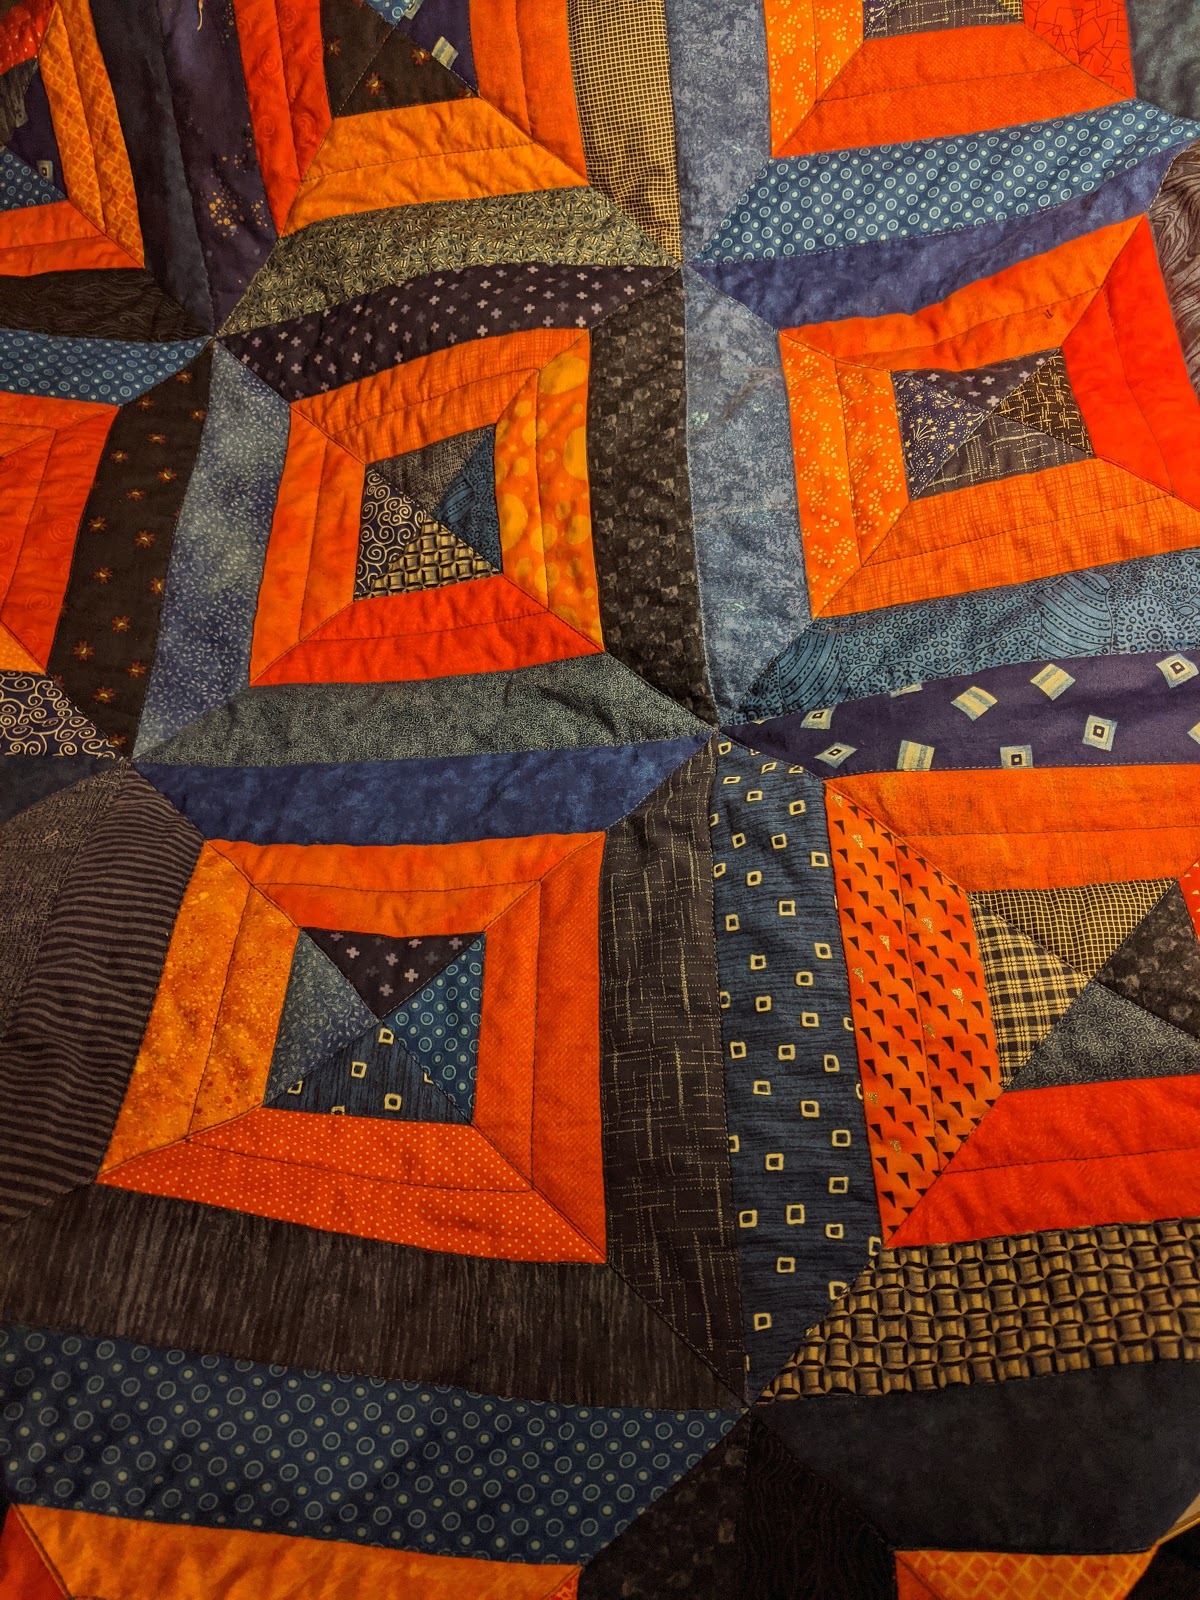
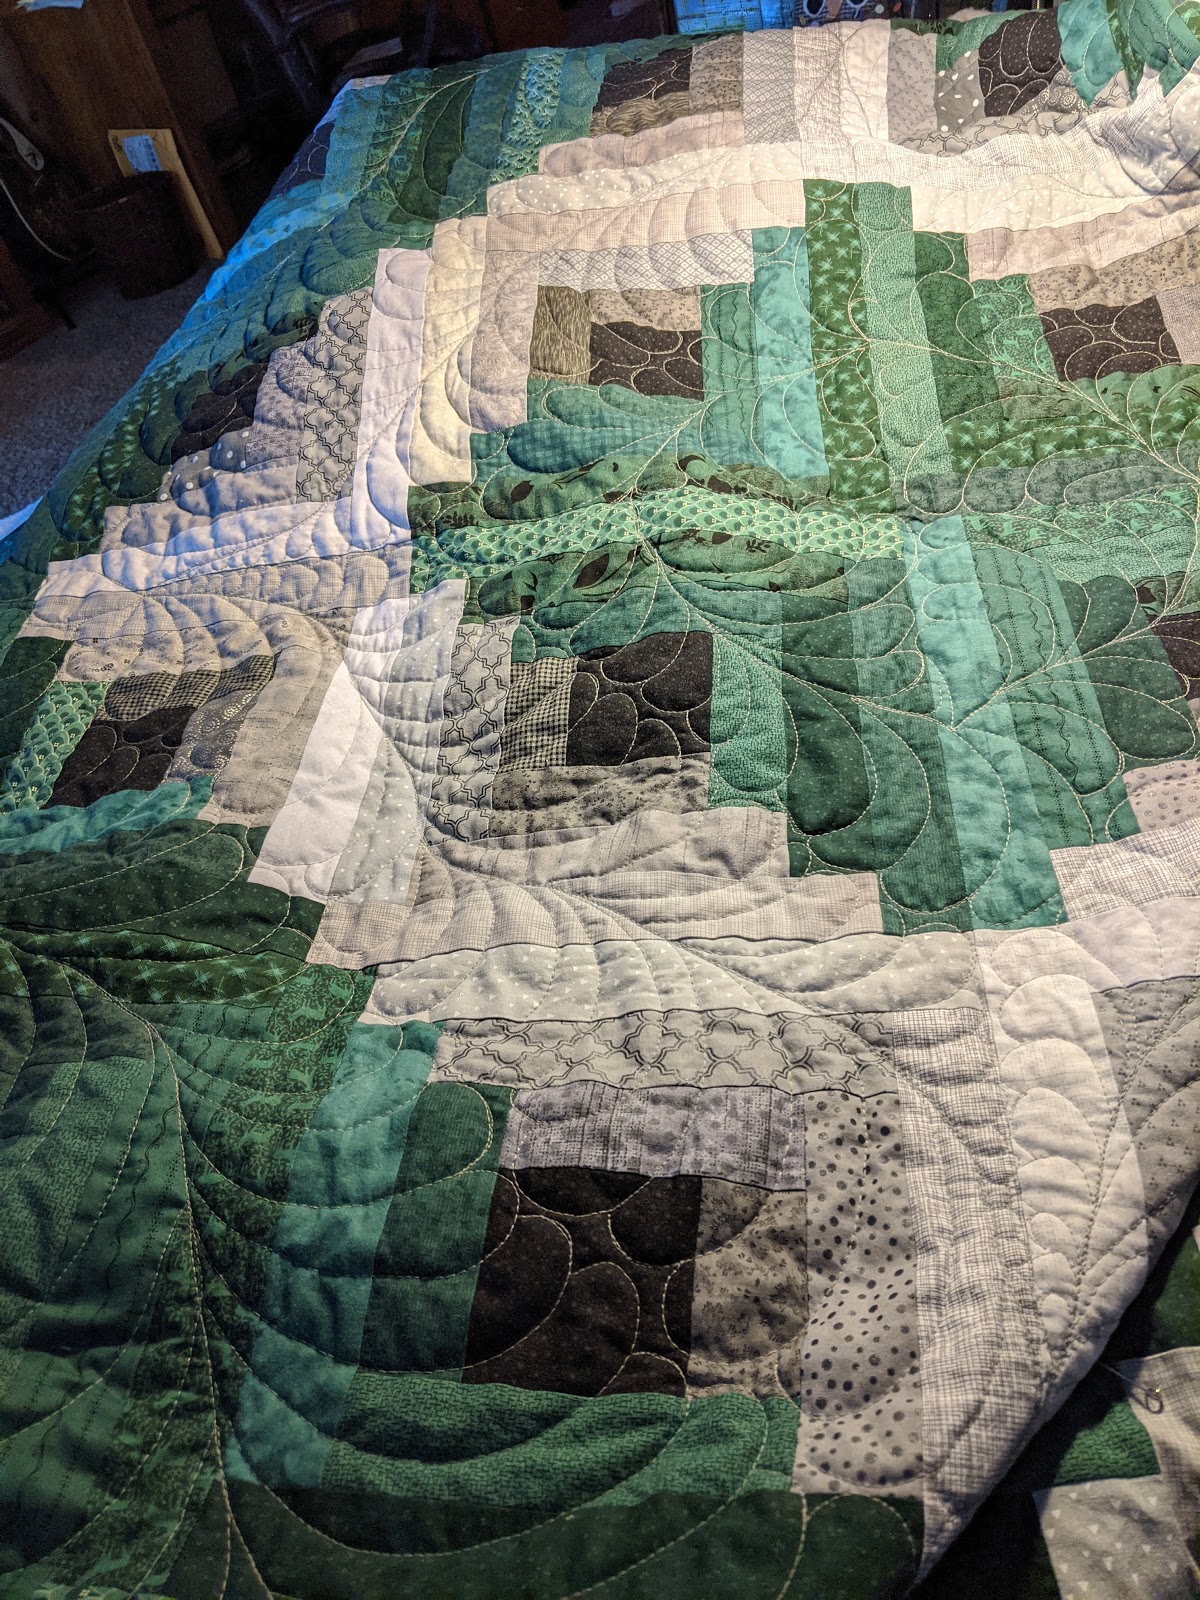
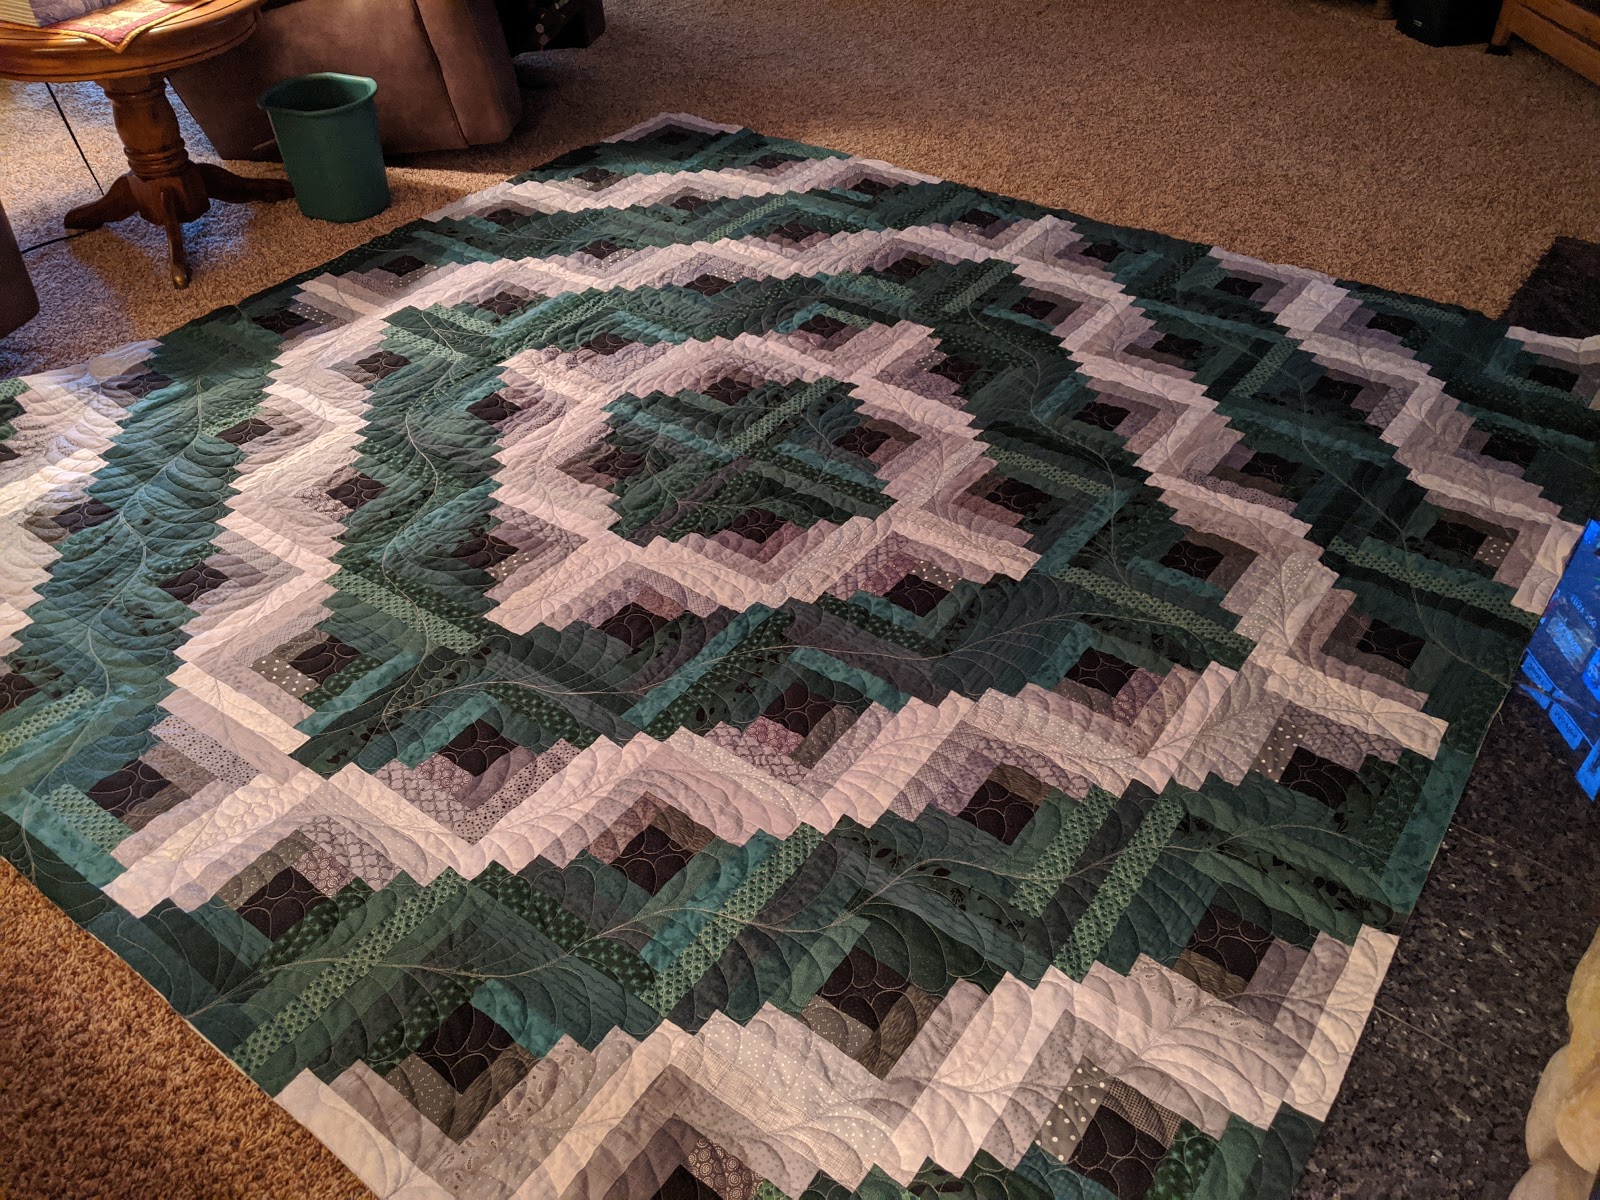
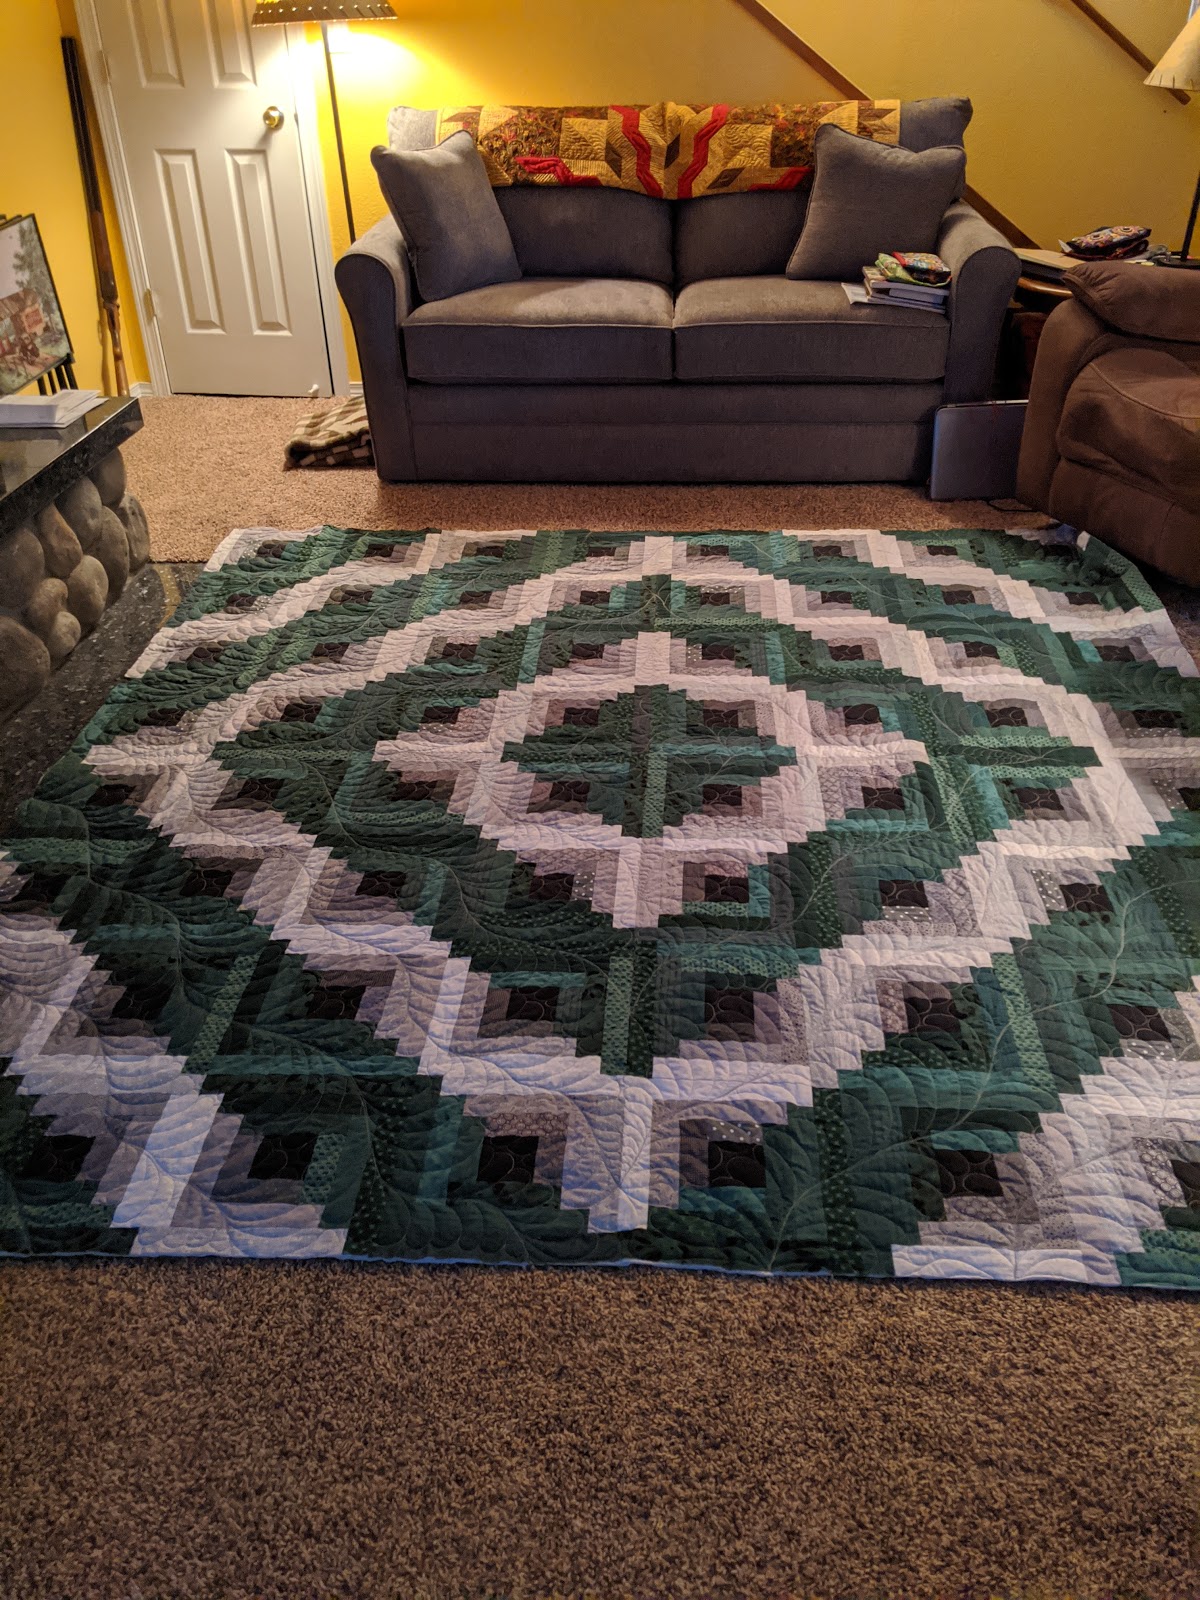
Aaron graduated last December and he has moved across country to Nashville Tennessee. A Philadelphia Eagle Fan, it only made sense to use team colors for him as well. I decided on a log cabin quilt. When it came to quilting, feathers were a definite decision! "Fly, Eagles, Fly!" this is 95" x 95", because I cut my strips too large... LOL
 |
| Close up Quilting detail |
 |
| Back Texture of feather quilting |
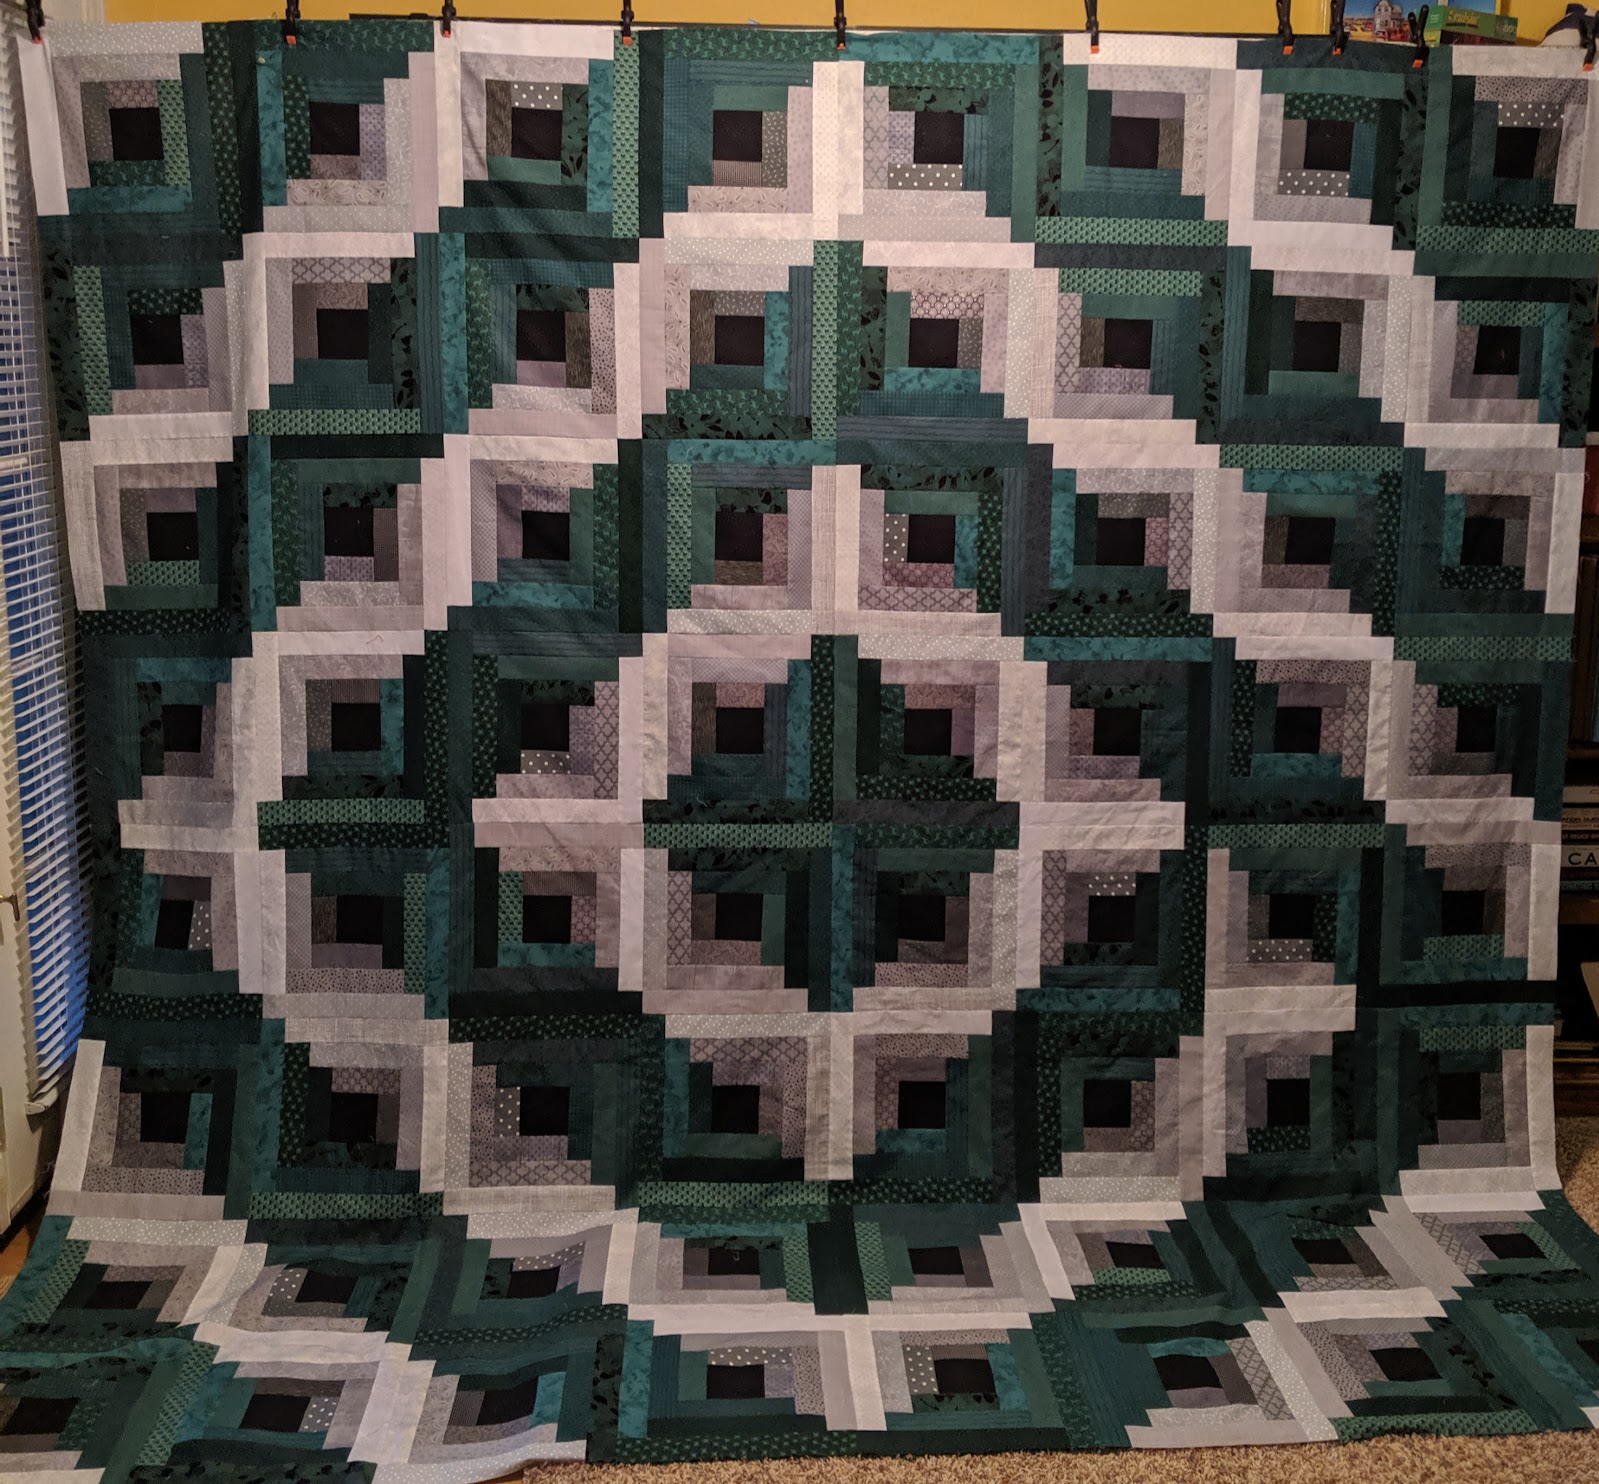 |
| This is BEFORE I fixed the 2 turned blocks... |
 |
| Labeled and wrapped! |
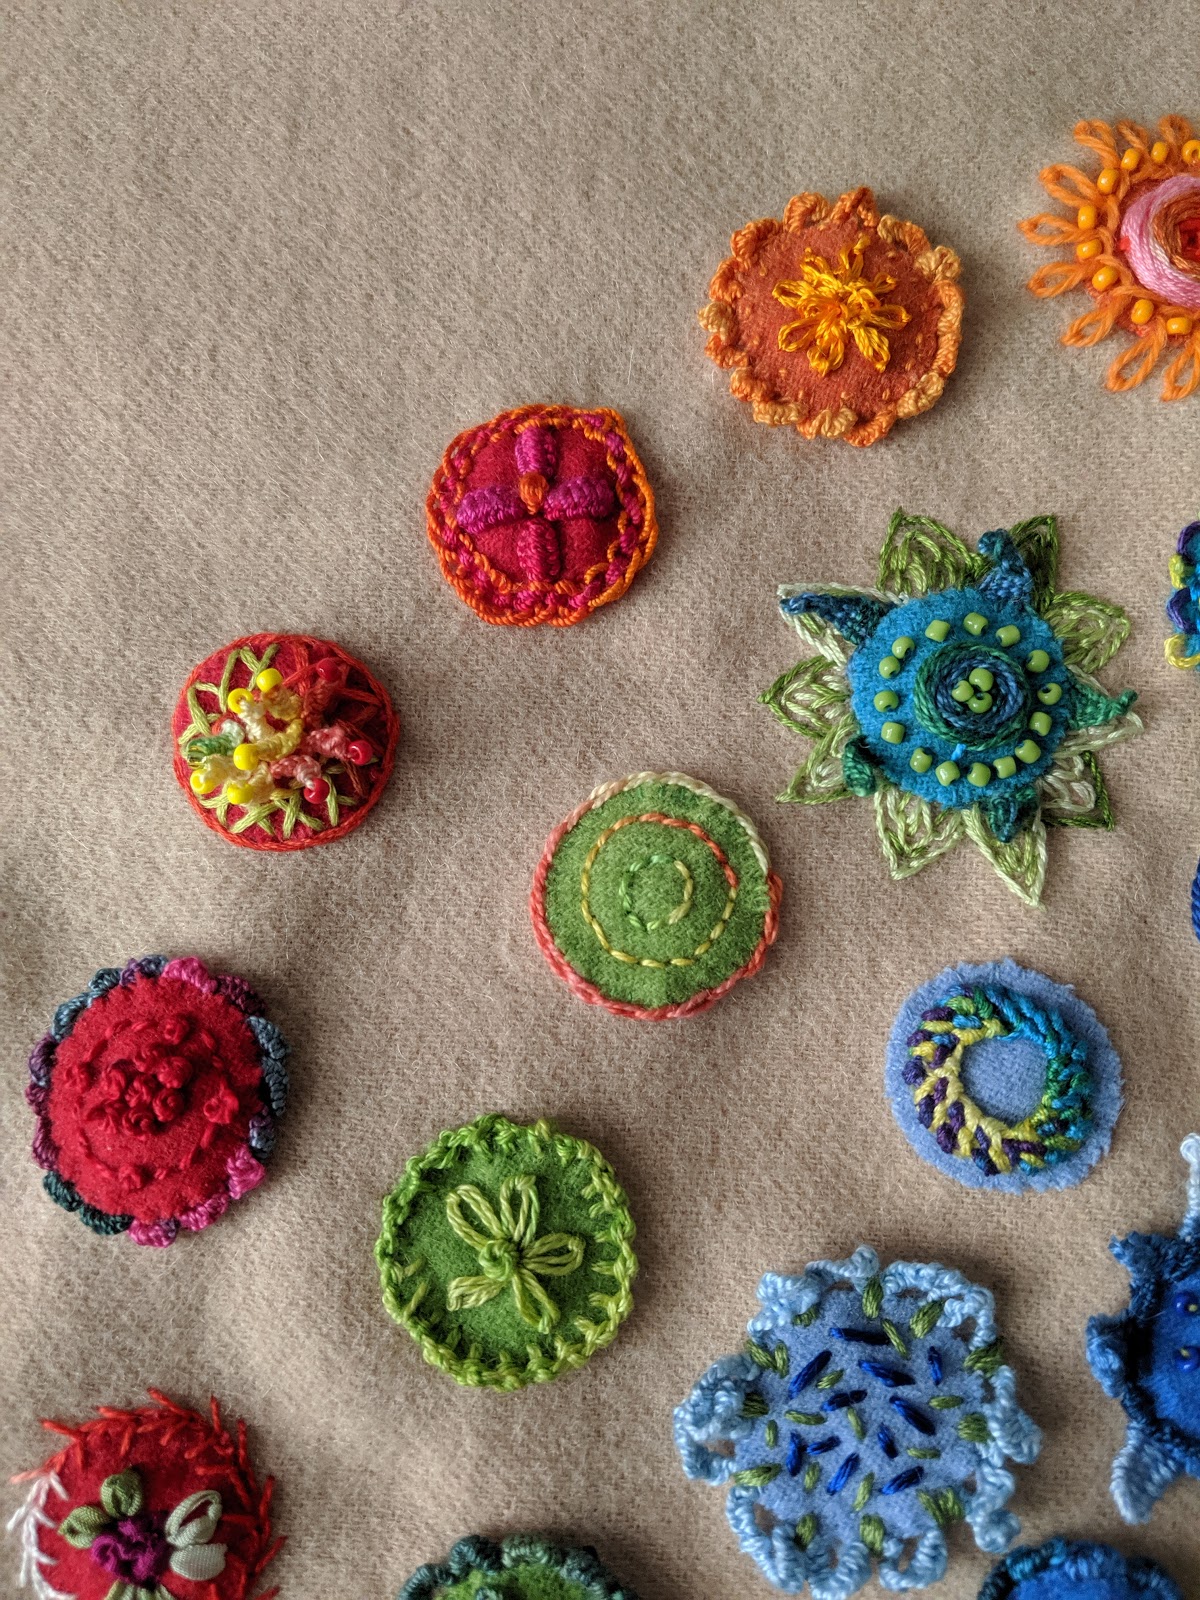
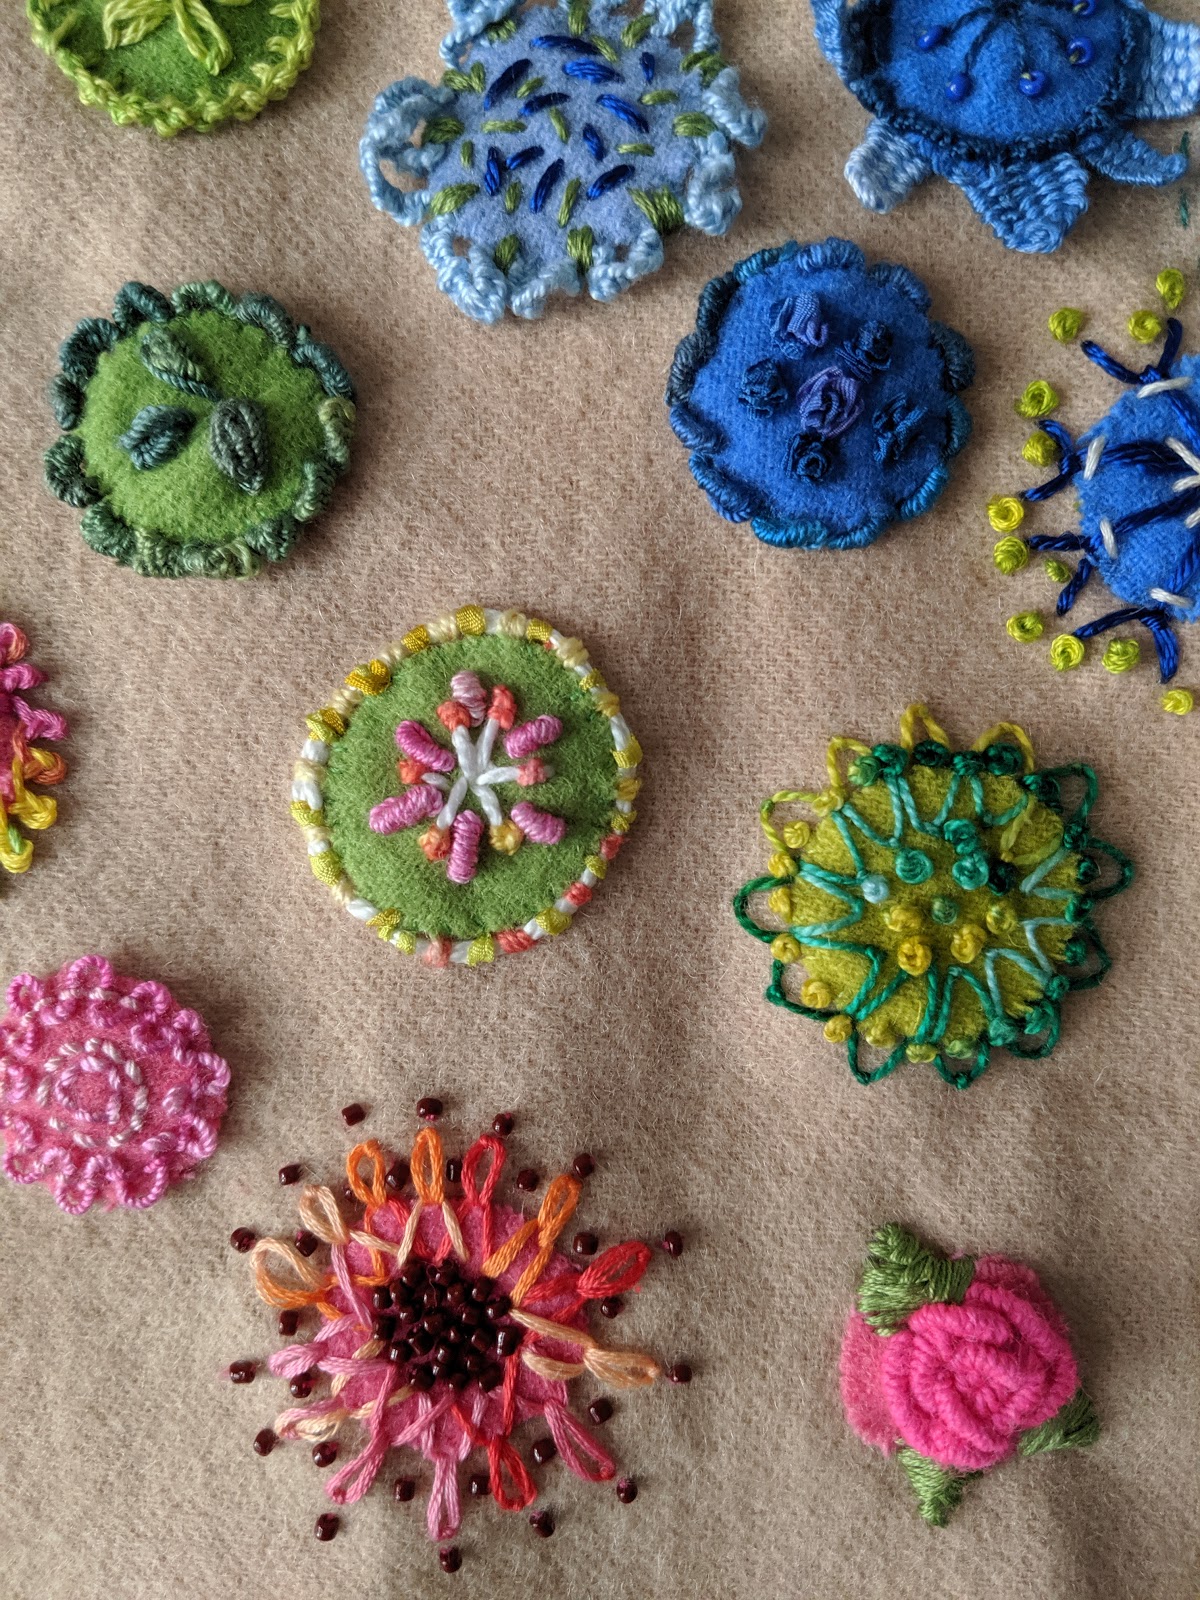
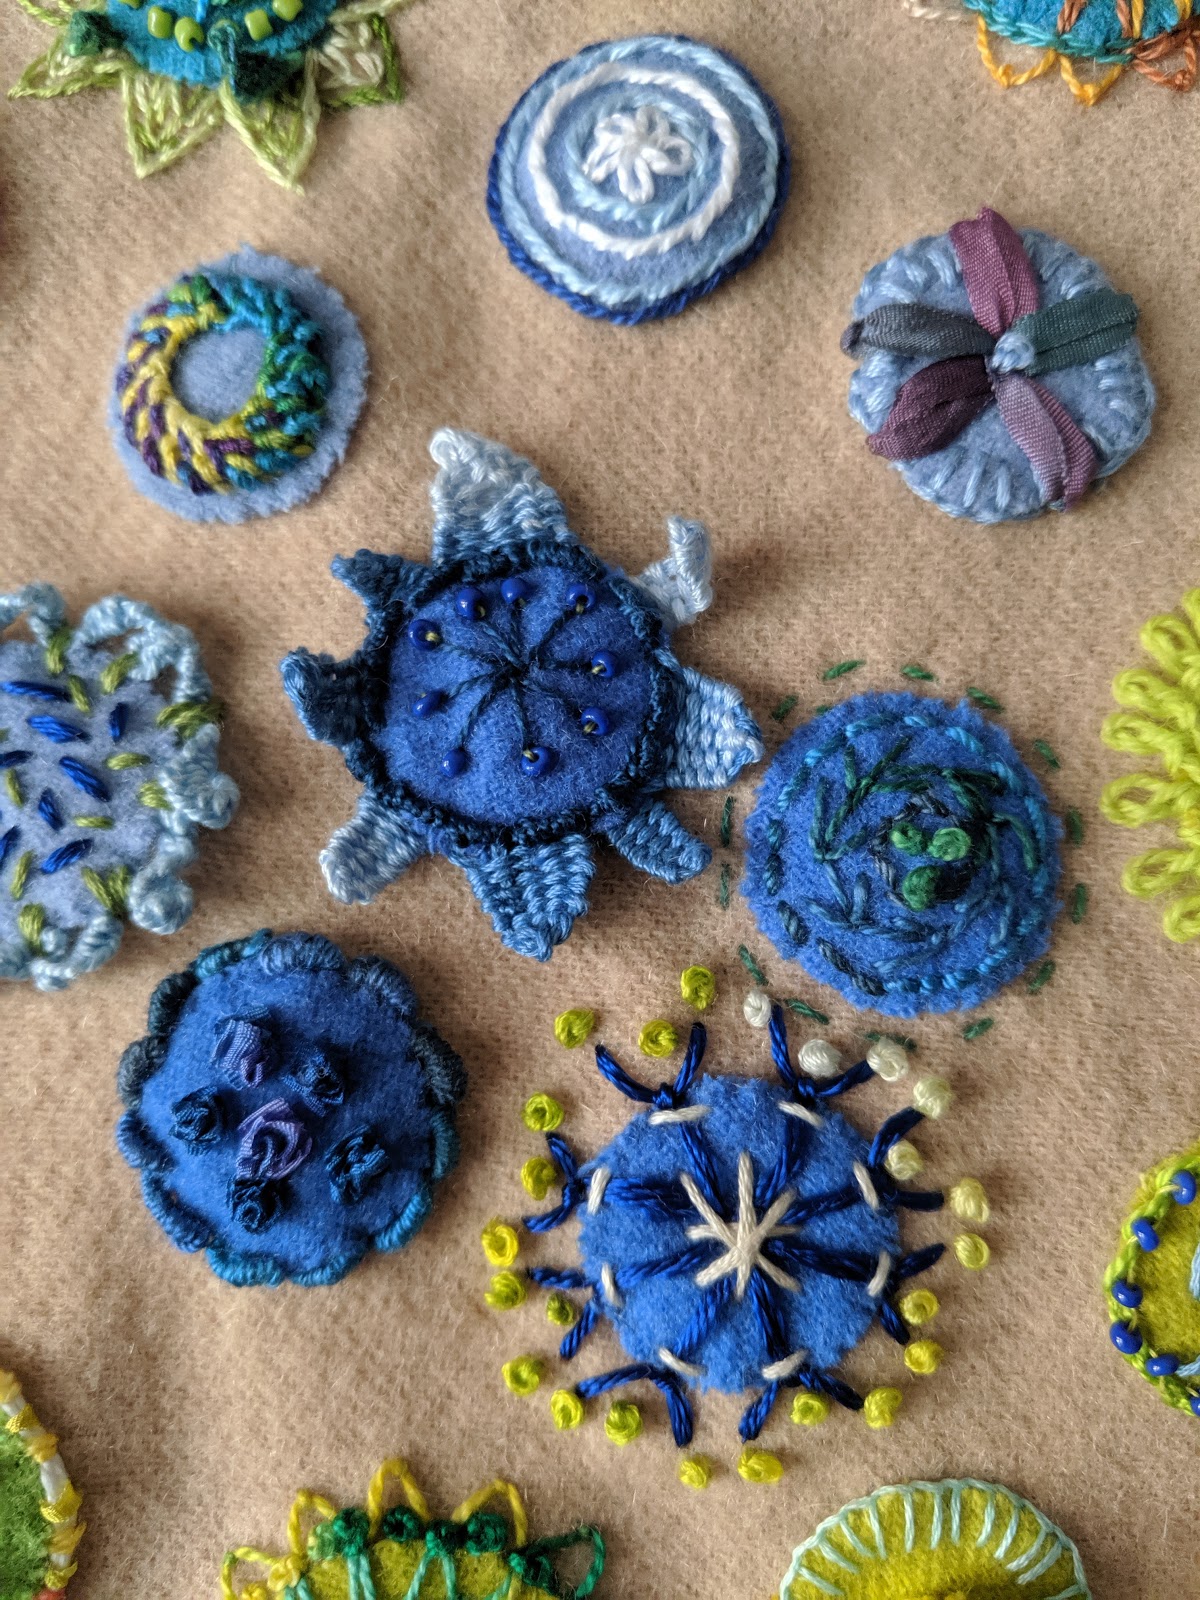
Some hand stitching happened this fall!
Last spring, Sue Spargo did a workshop here in Portland. I didn't take the workshop, but I did purchase her book and one of the extra kits that was available.
I then later, found a class at one of my local quilt stores that was based on Sue Spargo's embroidery. I had the kit, and I had the book.... so I took the class.
I had done some wool work prior, but it had been applique with basic buttonhole stitching. All the different textures and effects from threads and stitches is addicting!
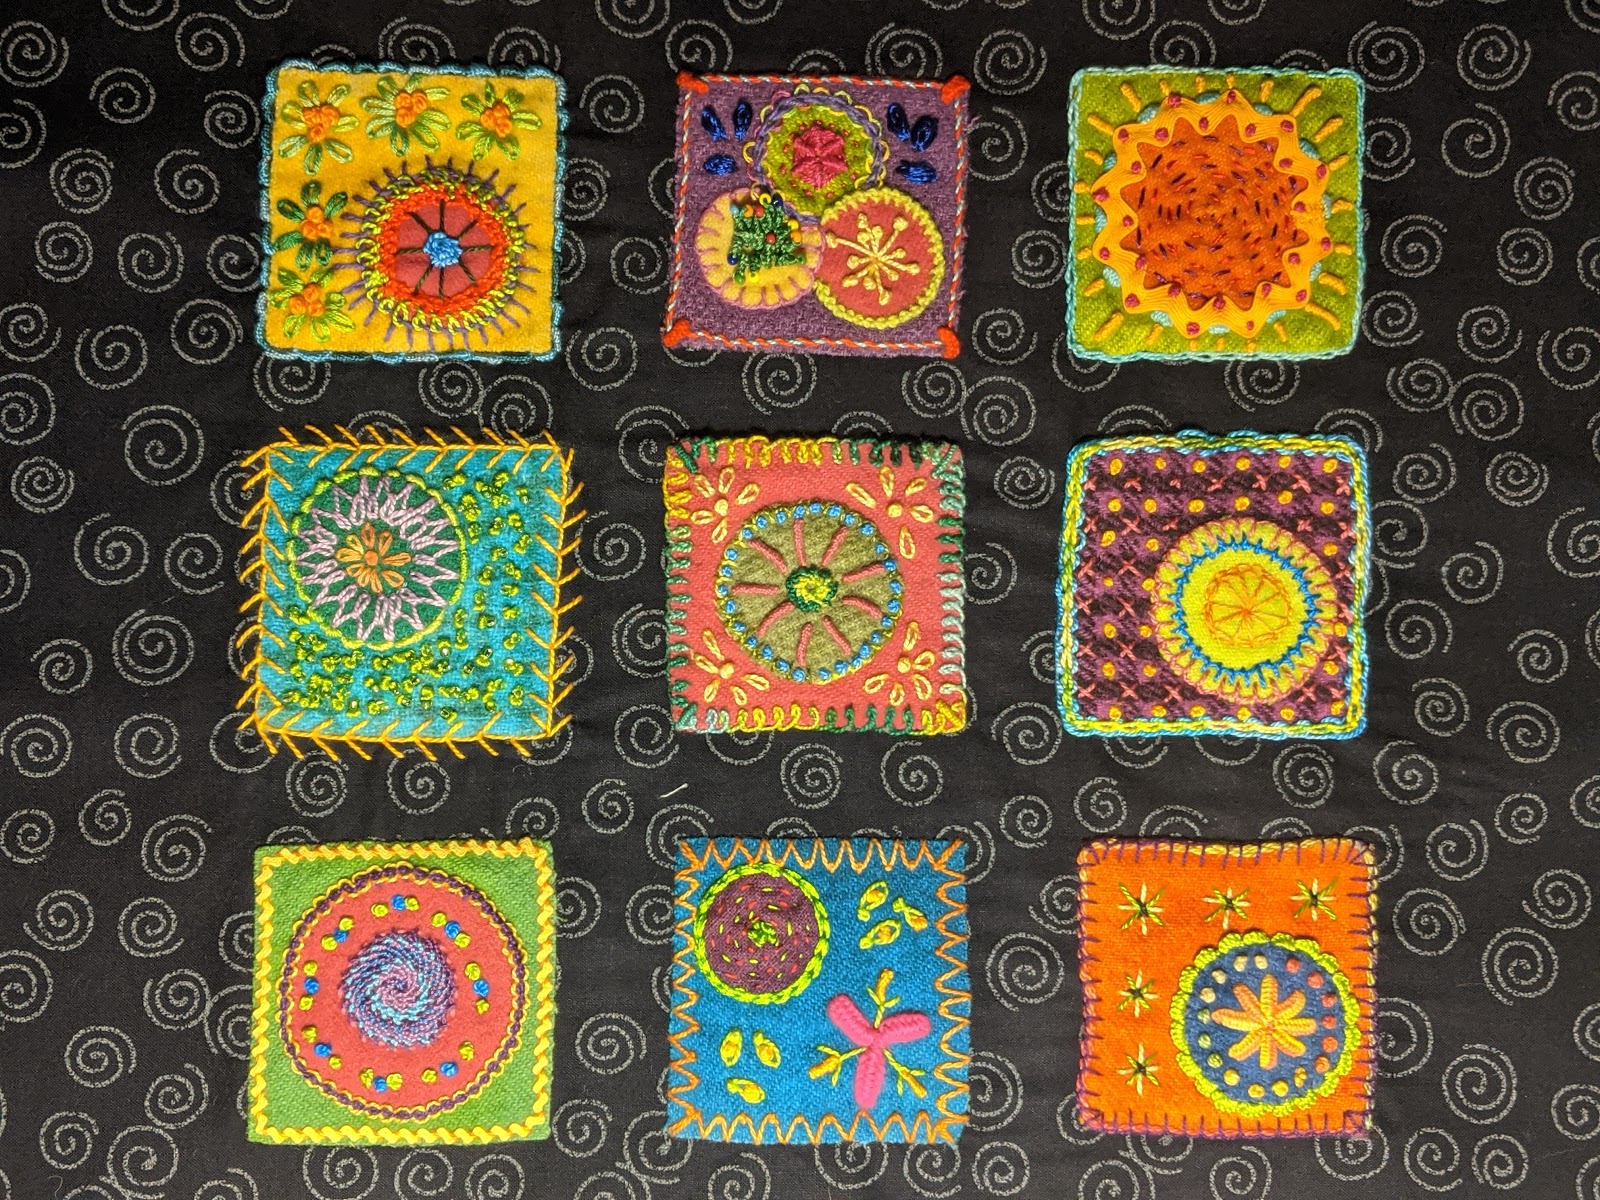
Here are a few of my hand stitching projects that were done this fall.
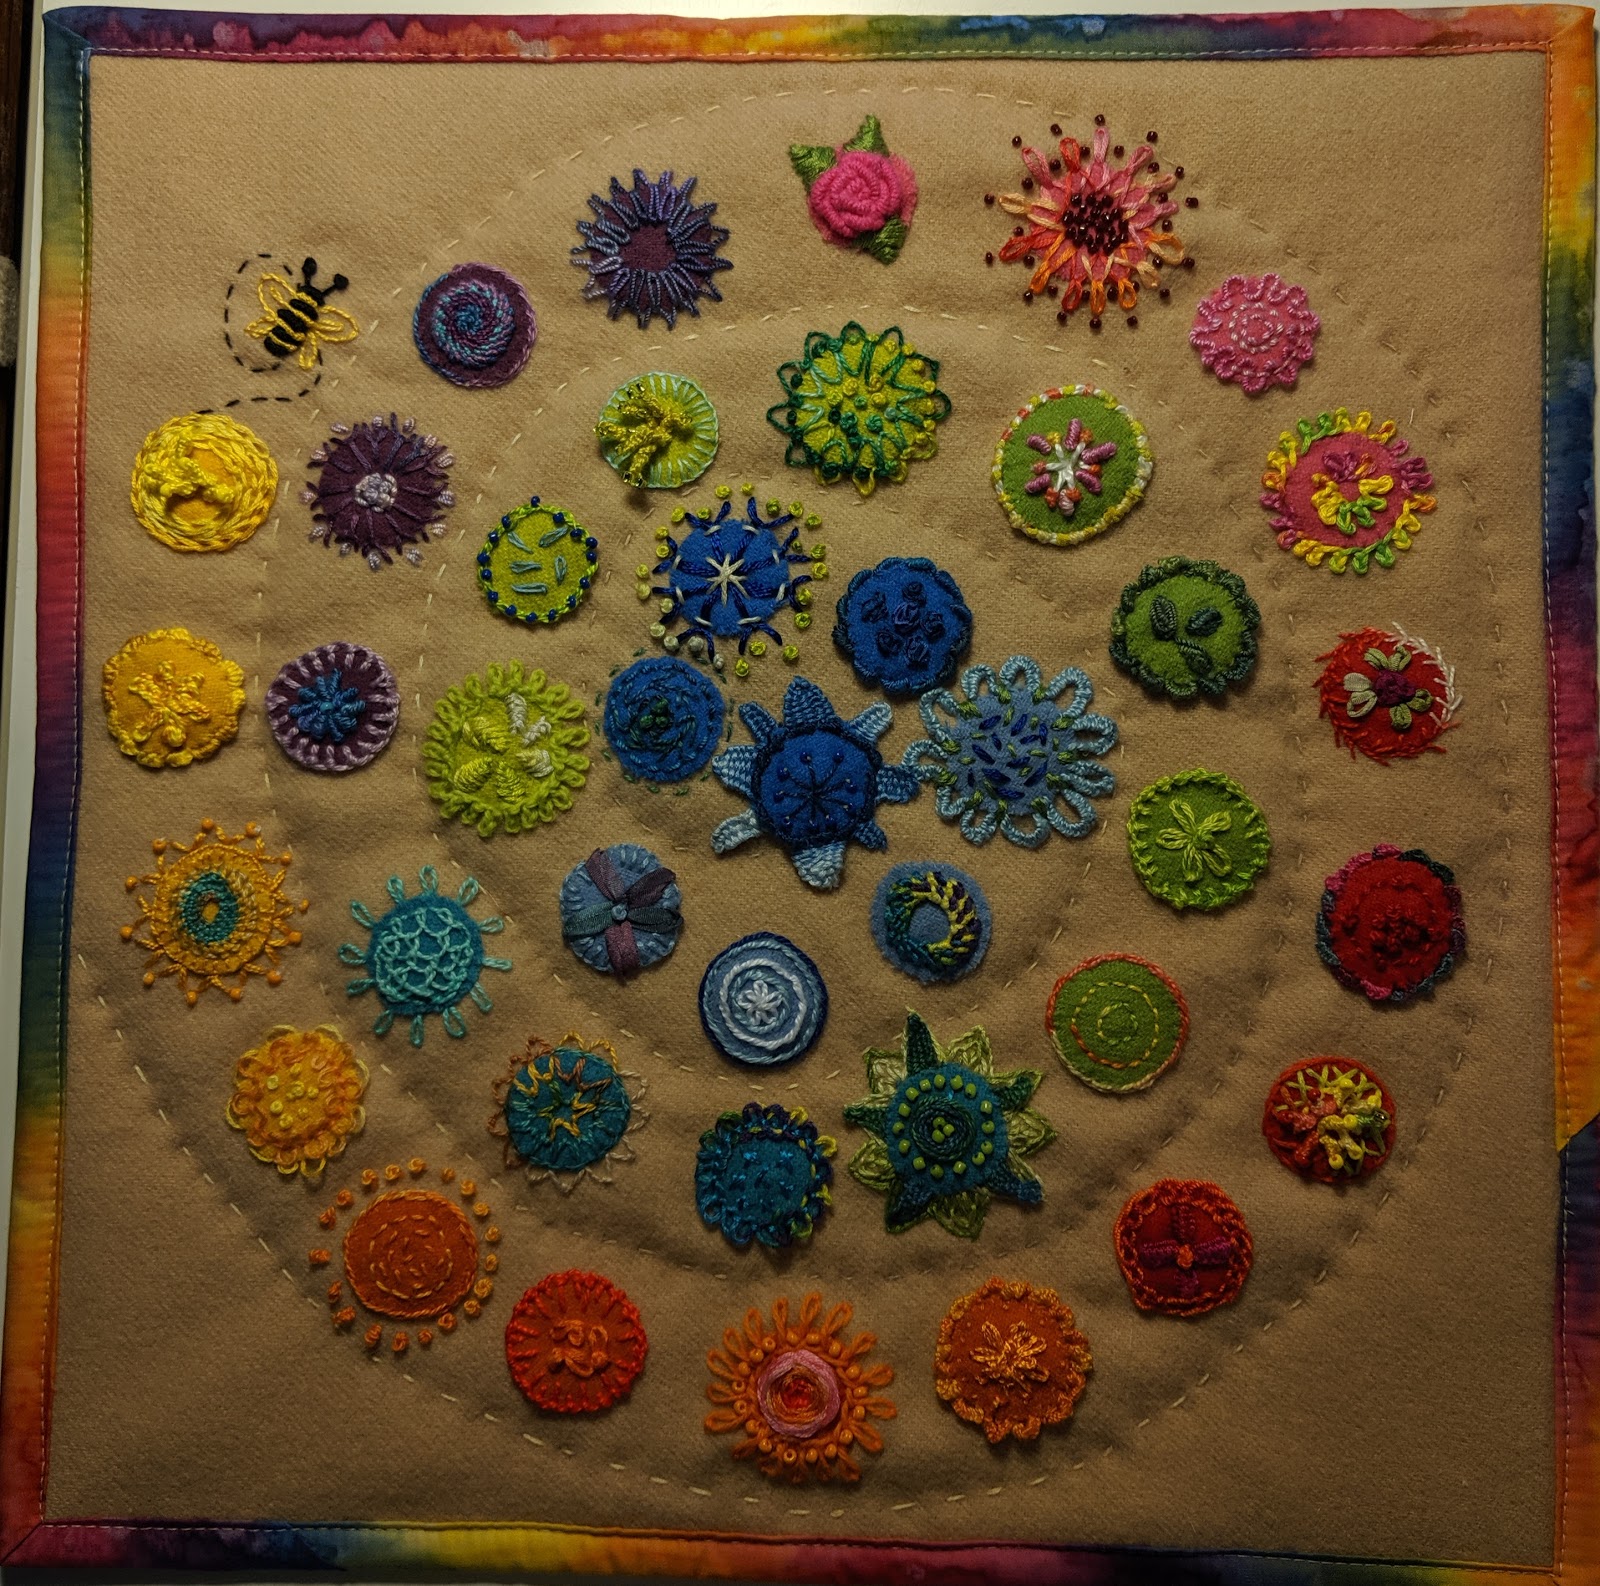 |
| Rainbow Spiral |
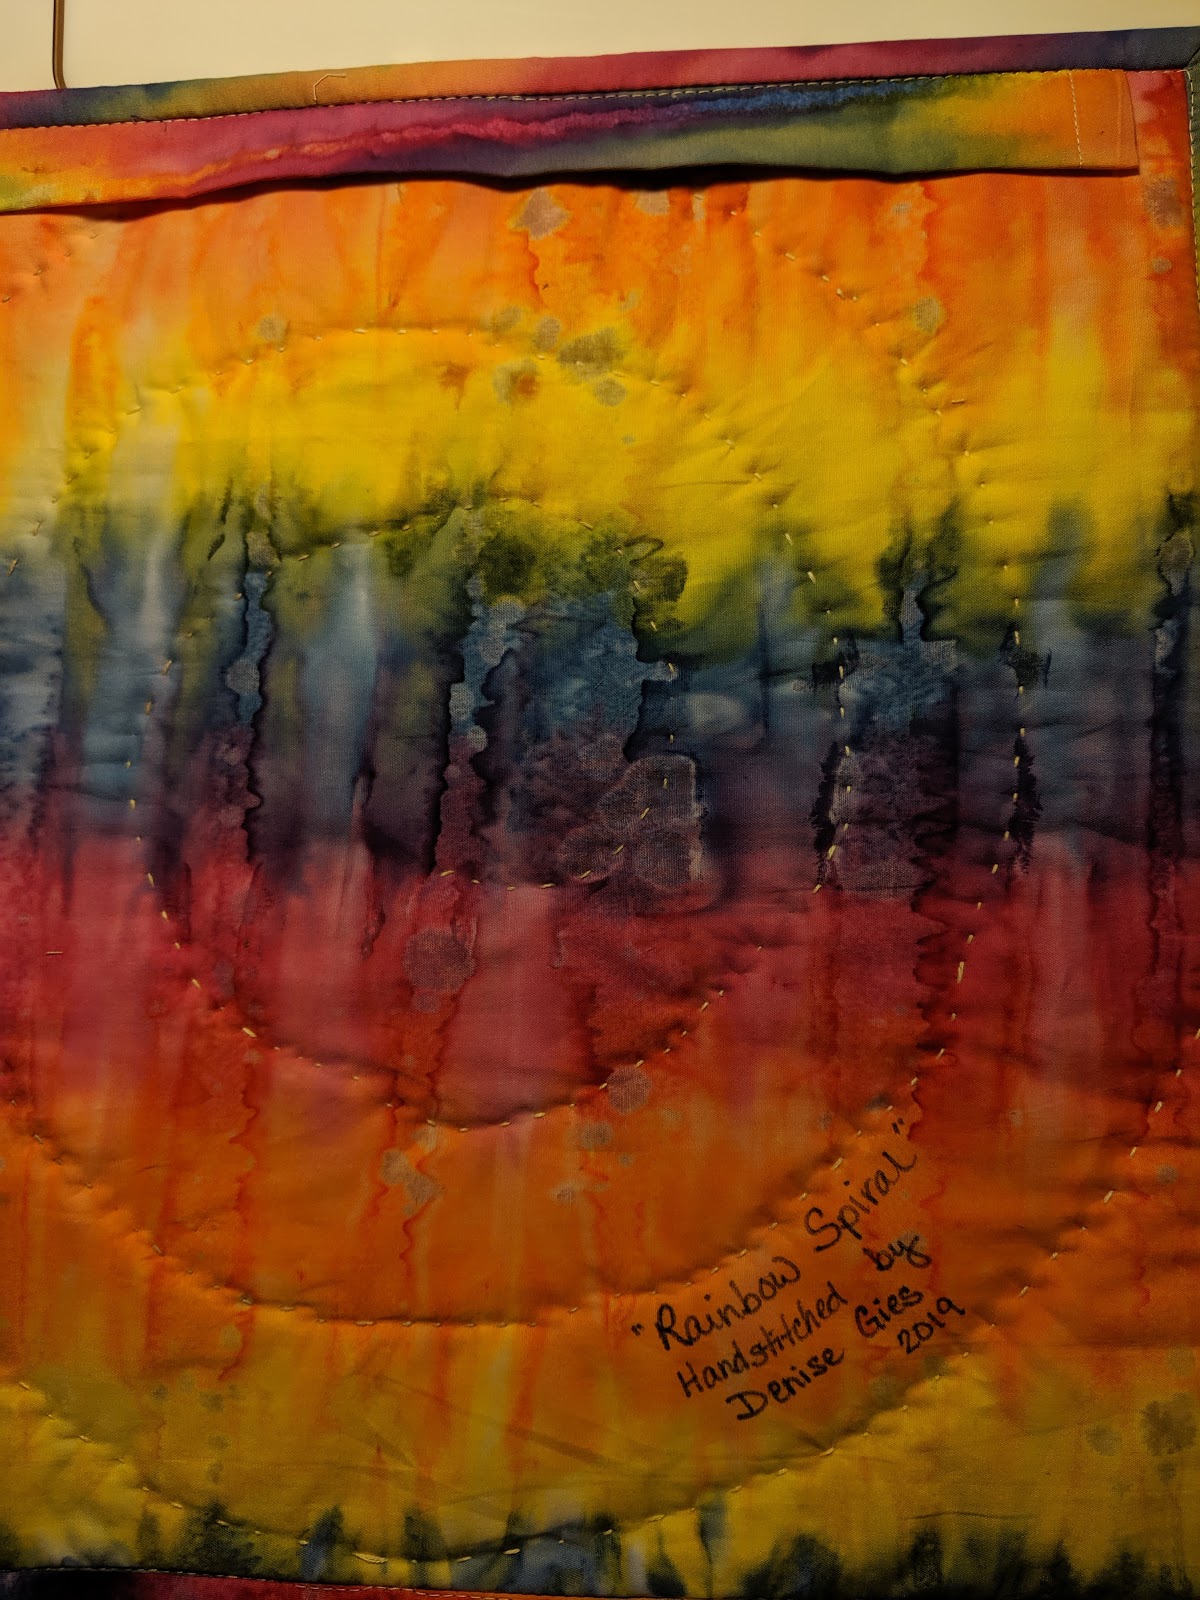 |
| Rainbow Spiral - back |
 |
| Stitching Detail |


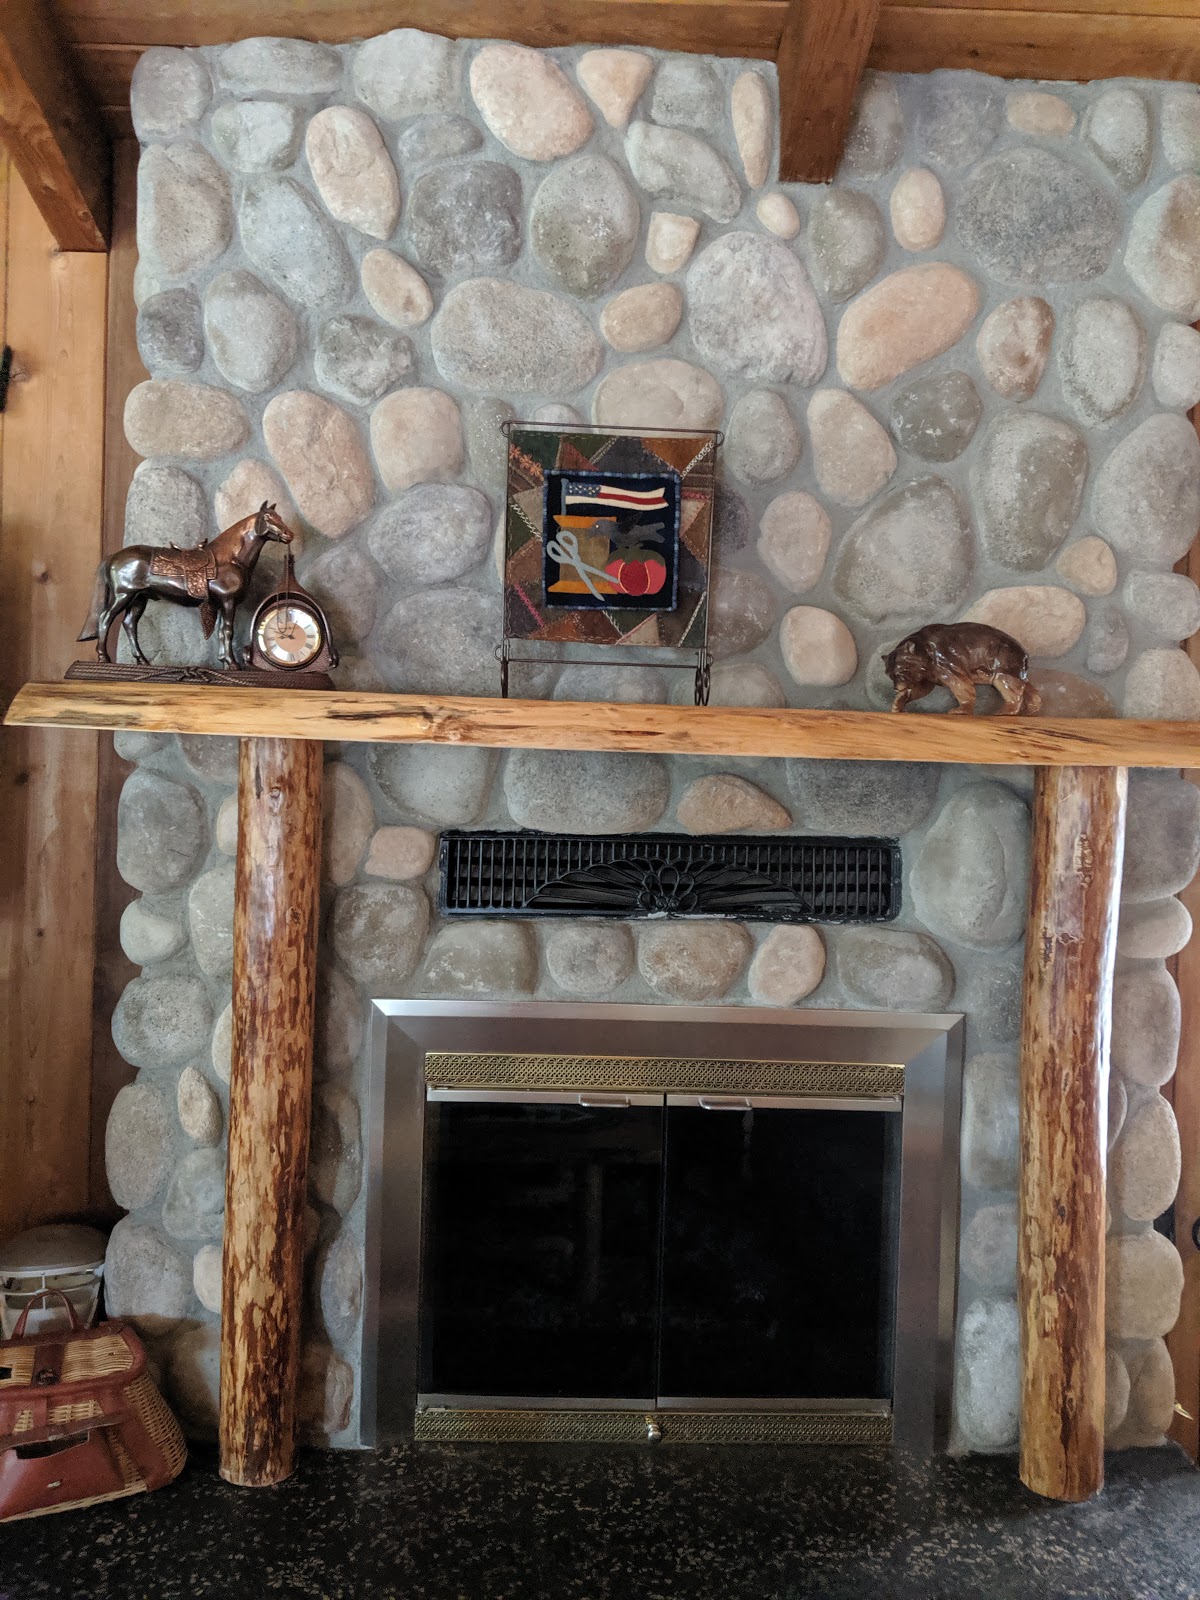 |
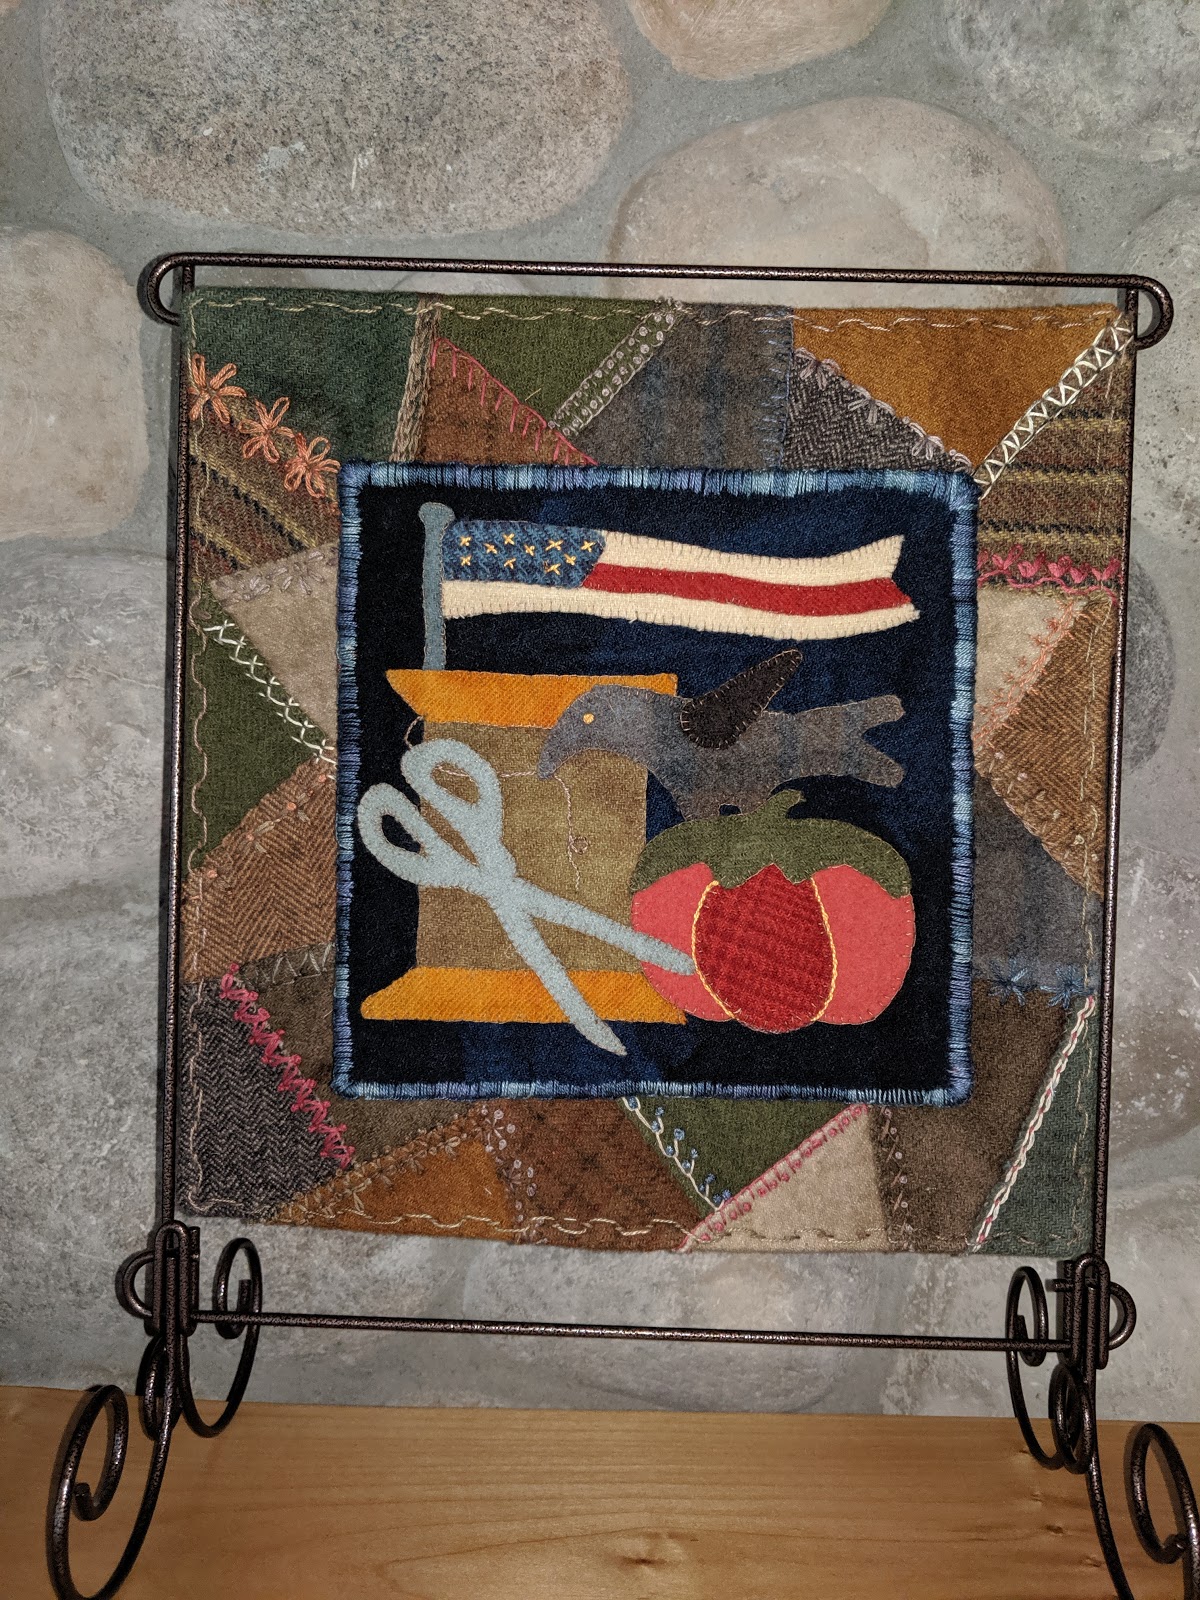
| Seasons in Wool - on our mantle |
I also finished a long term project in wool that is a seasonal project. Pattern is by Buttermilk Basin and was a Block of the month. Knowing just how bad I am at changing seasonal items here at home, I opted to do Seasons, rather than Months. I did a lot of this stitching in the car while traveling. Wool is so forgiving.
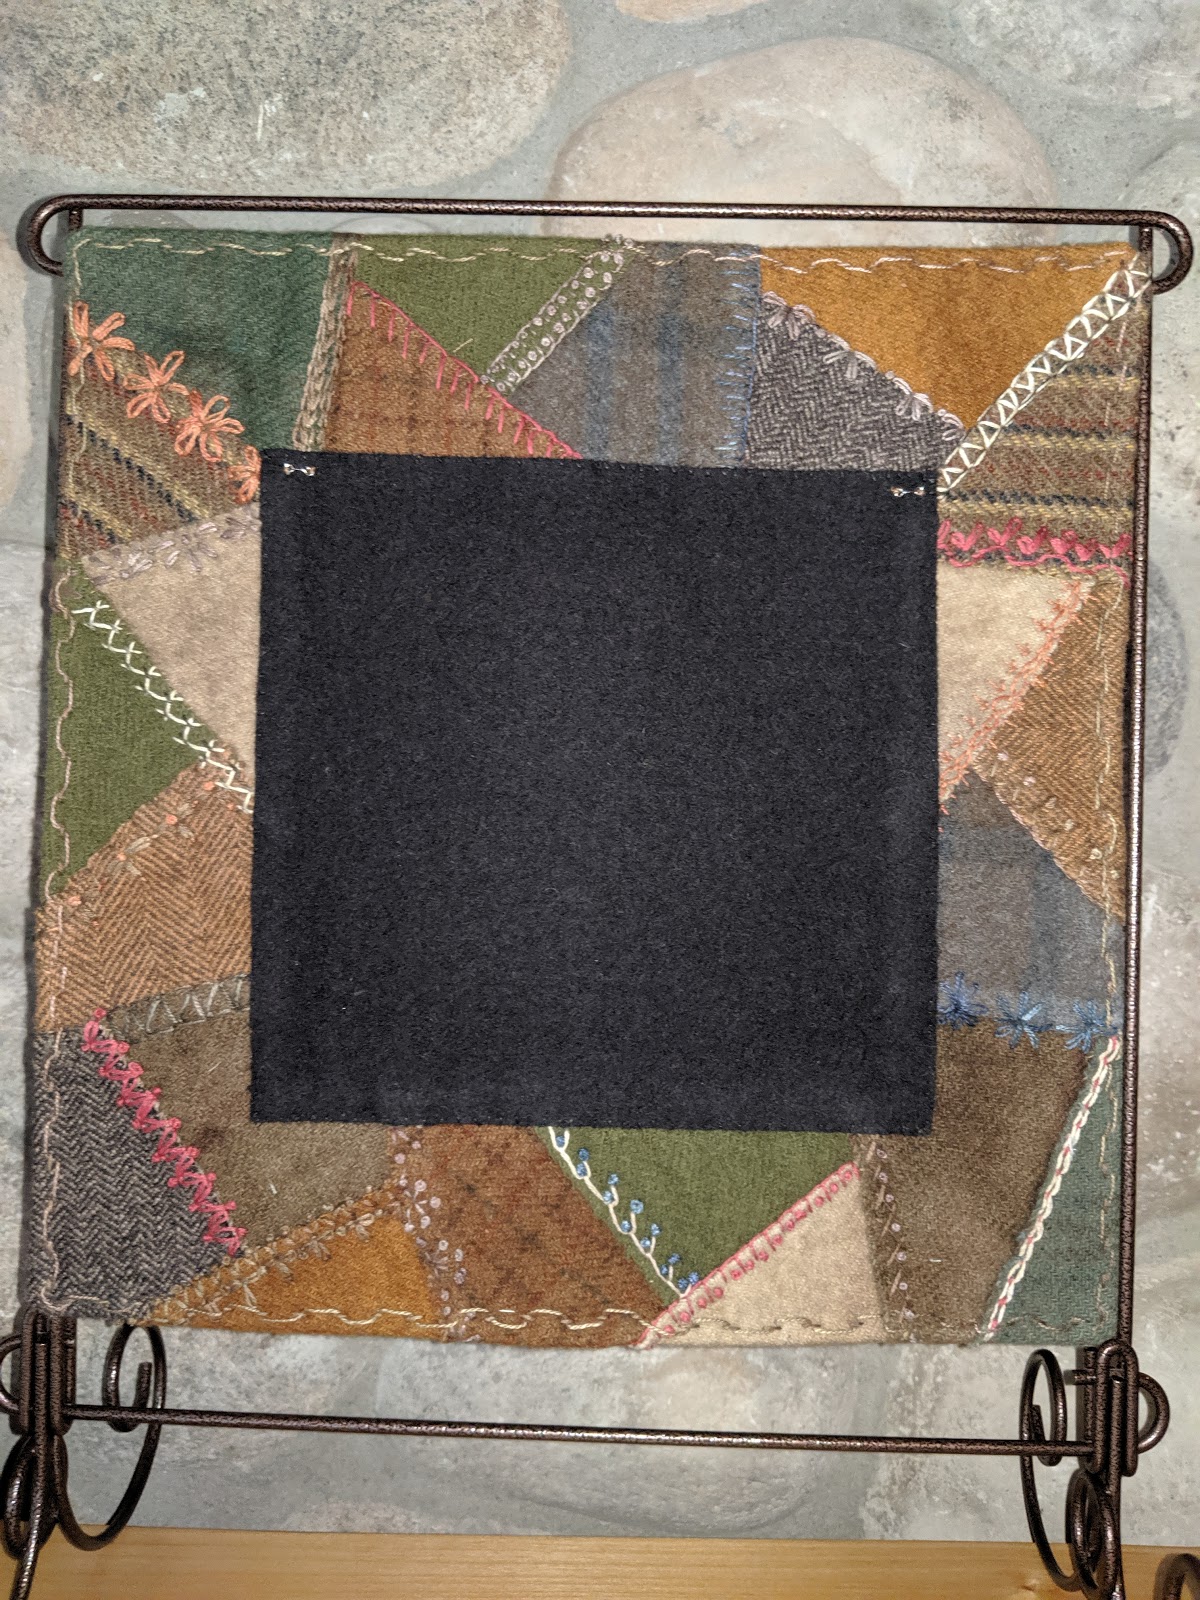 |
| Seasons in Wool - background crazy patch block - 12" x 12" |
The background block is always there, and then a smaller 8 x 8" block hooks with hook and eyes over the black area so you can change and switch them up as you want.
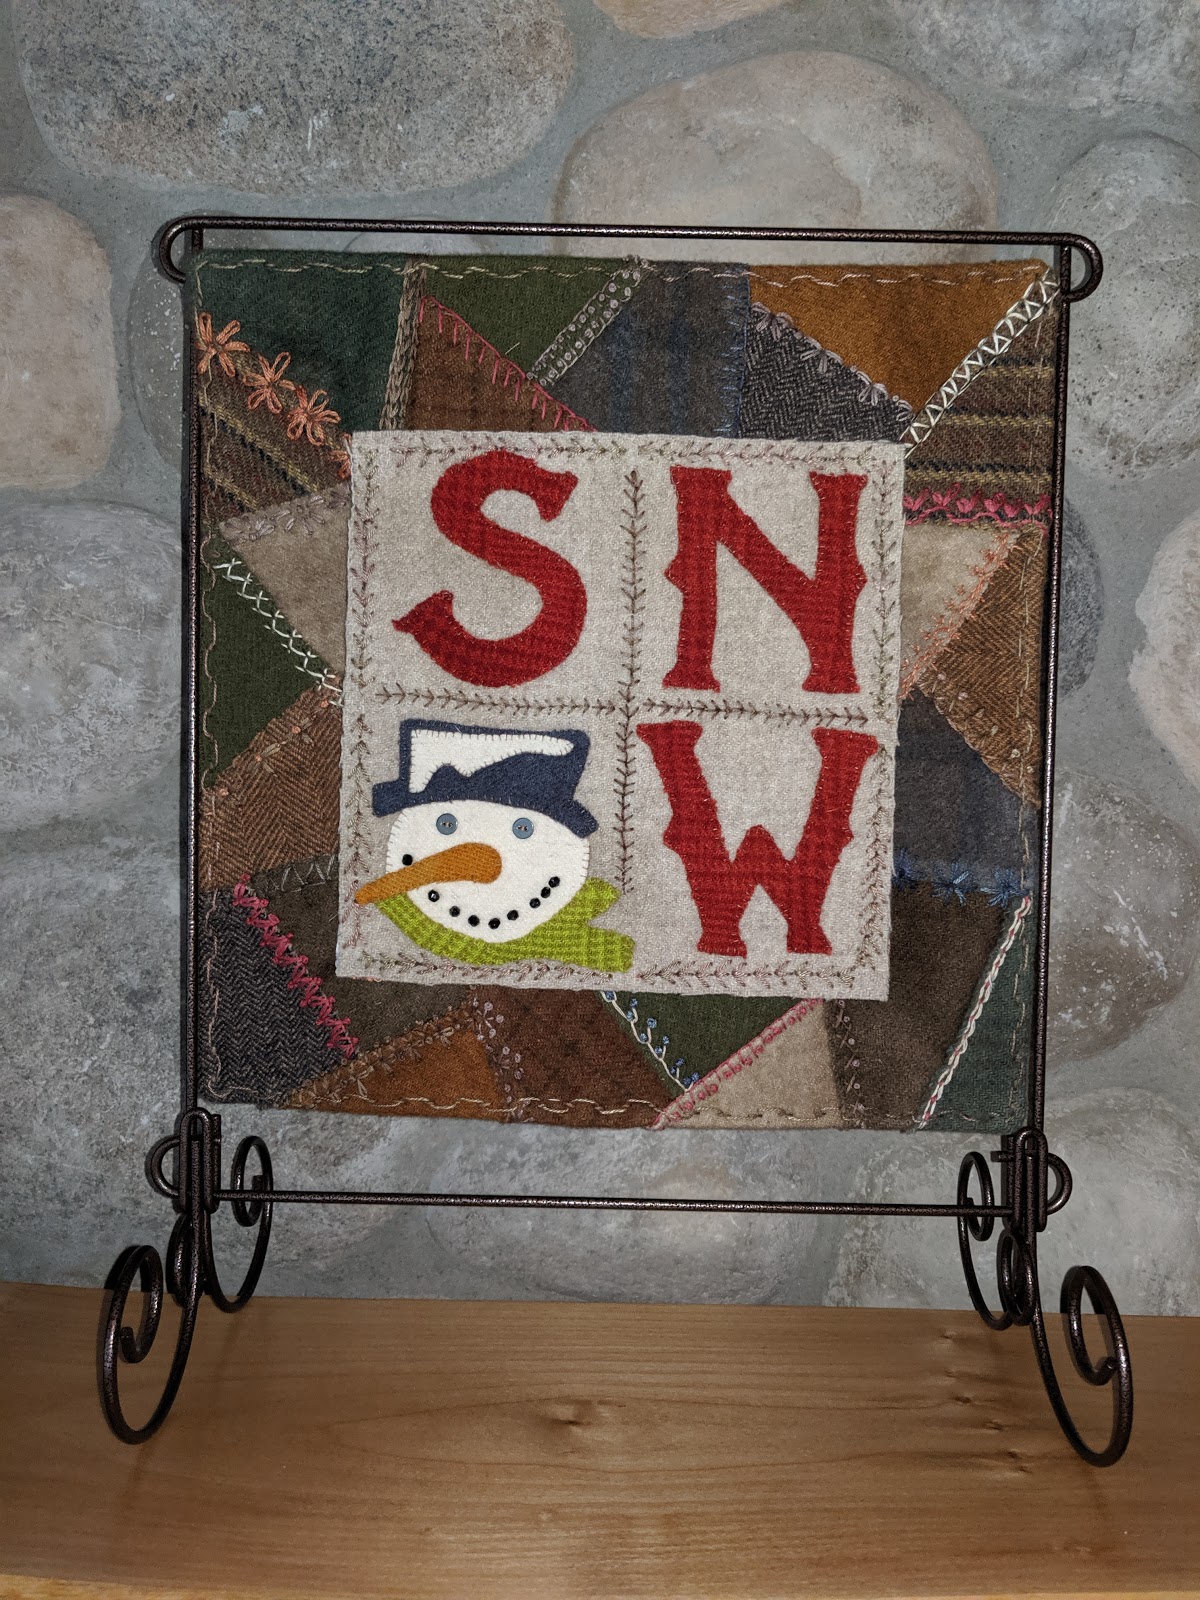 |
| Seasons in Wool - Winter |
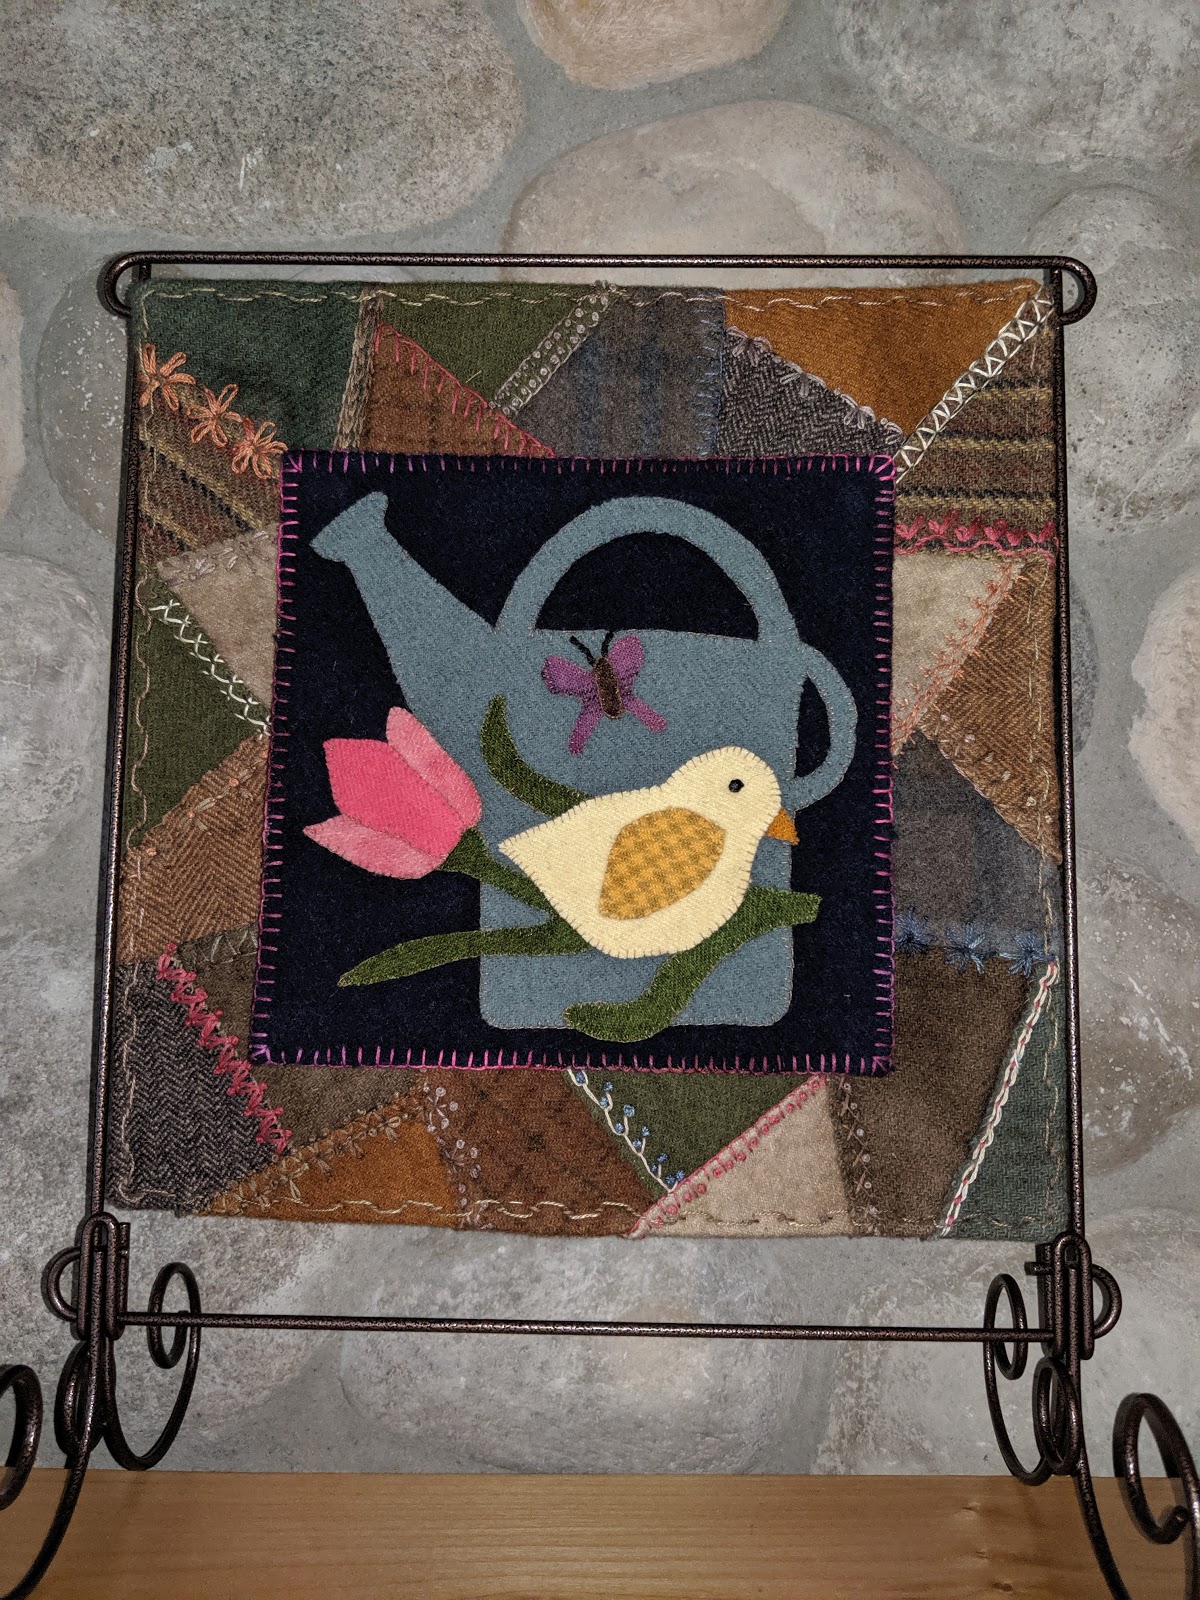 |
| Seasons in Wool - Spring |
 |
| Seasons in Wool - Summer |
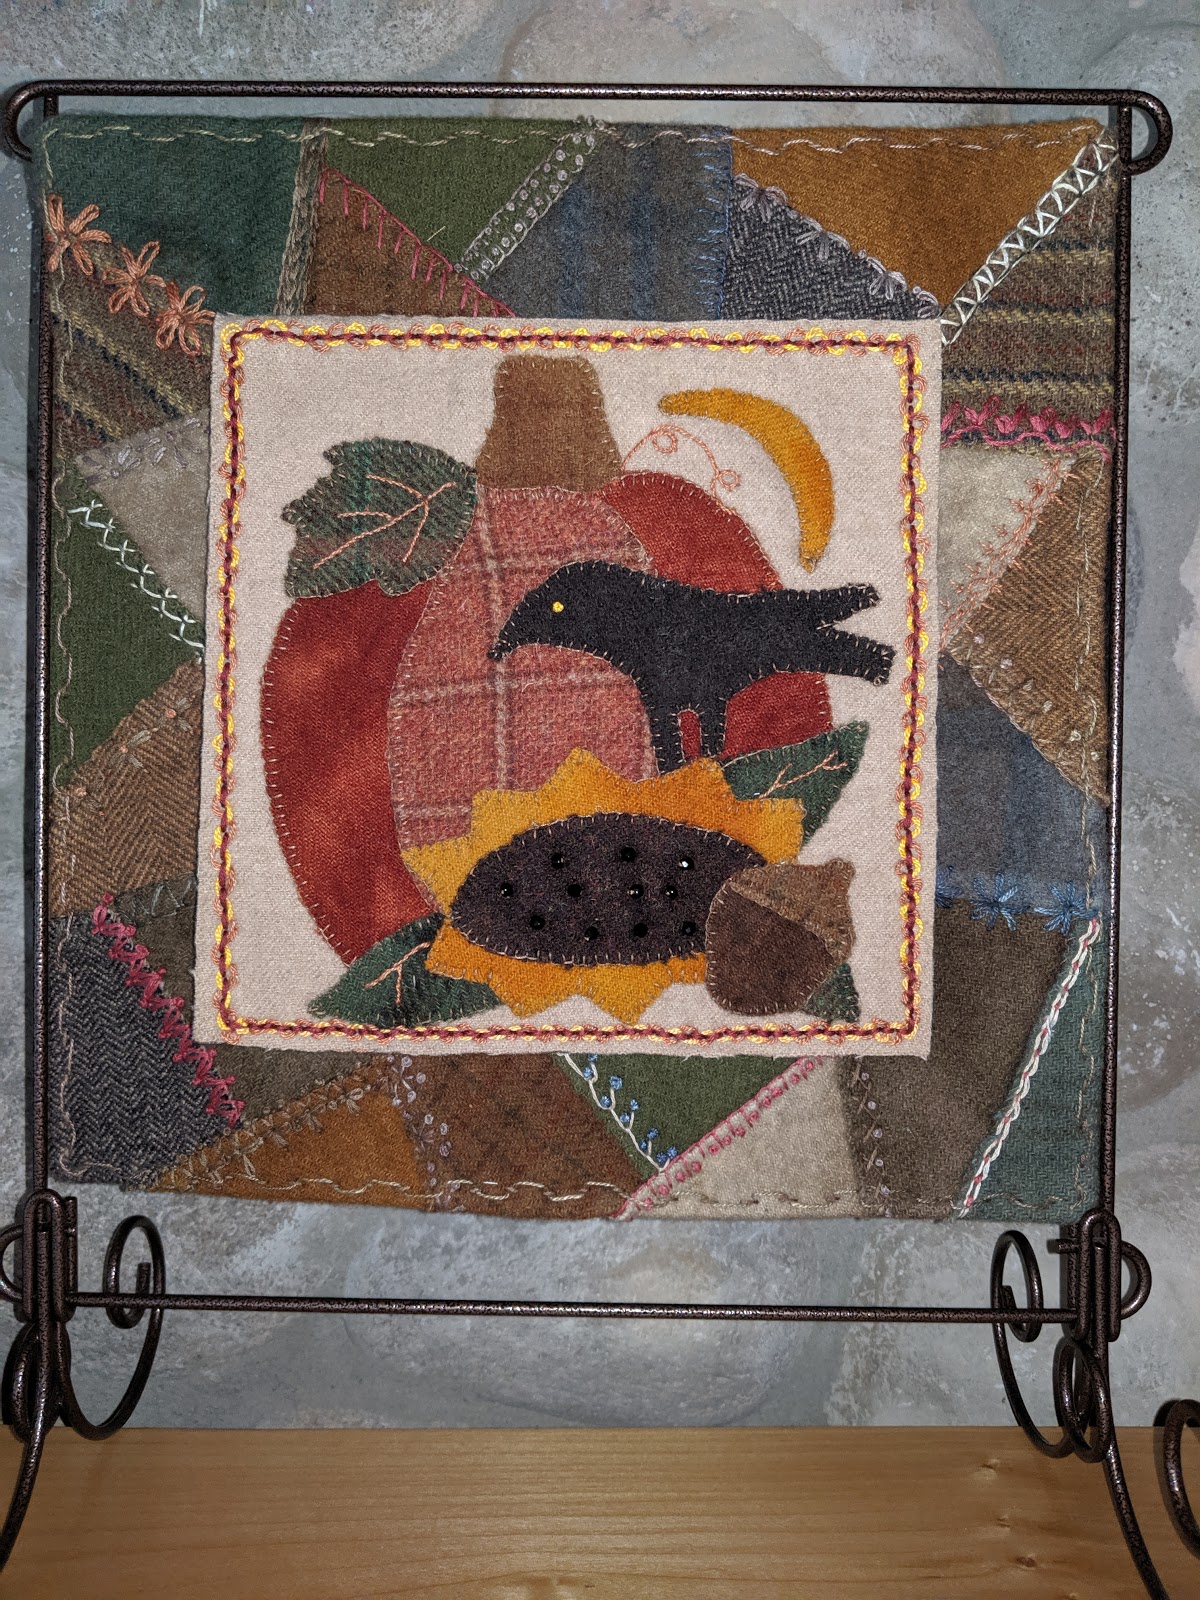 |
| Seasons in Wool - Autumn |
 |
| Seasons in Wool - Christmas |
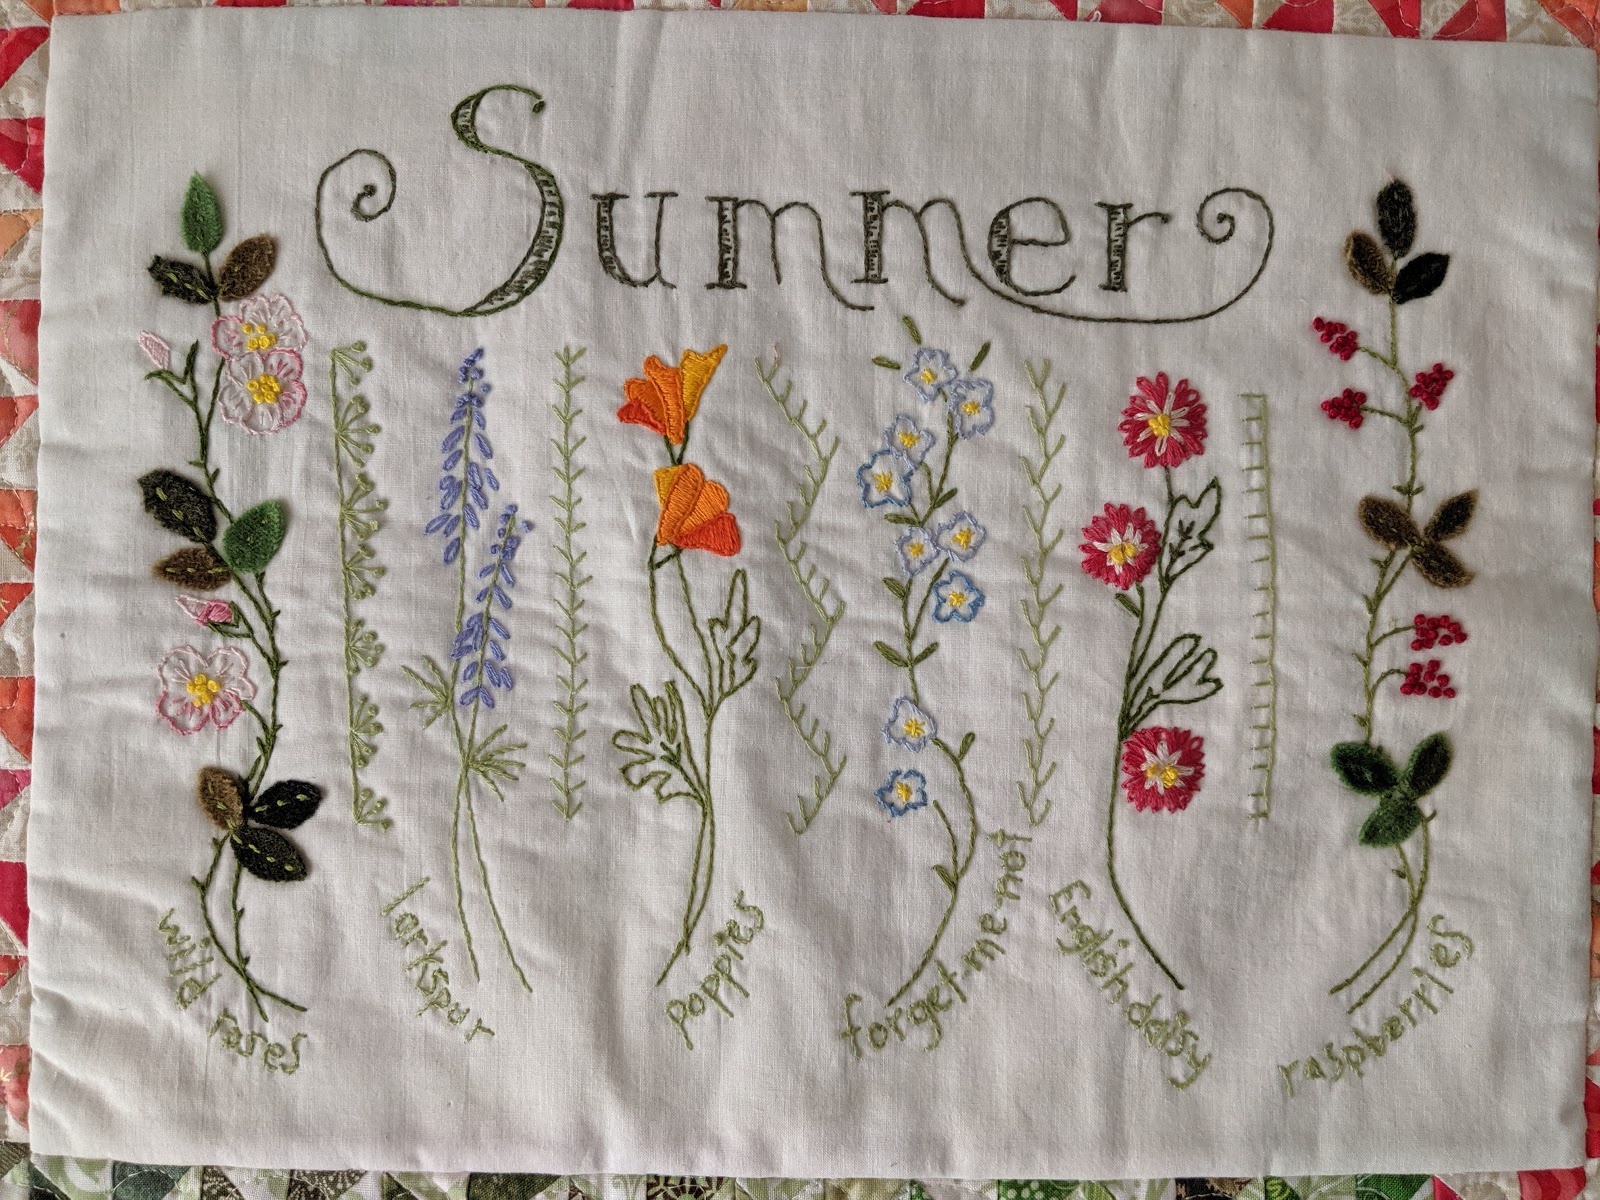
A few other projects that I worked on were a quartet of seasonal embroidery patterns by Crabapple Hill. I had finished the Autumn one back in approximately 2011. The other three were in varying stages of finished. These are all small wall hangings the approximate size of a fat quarter.
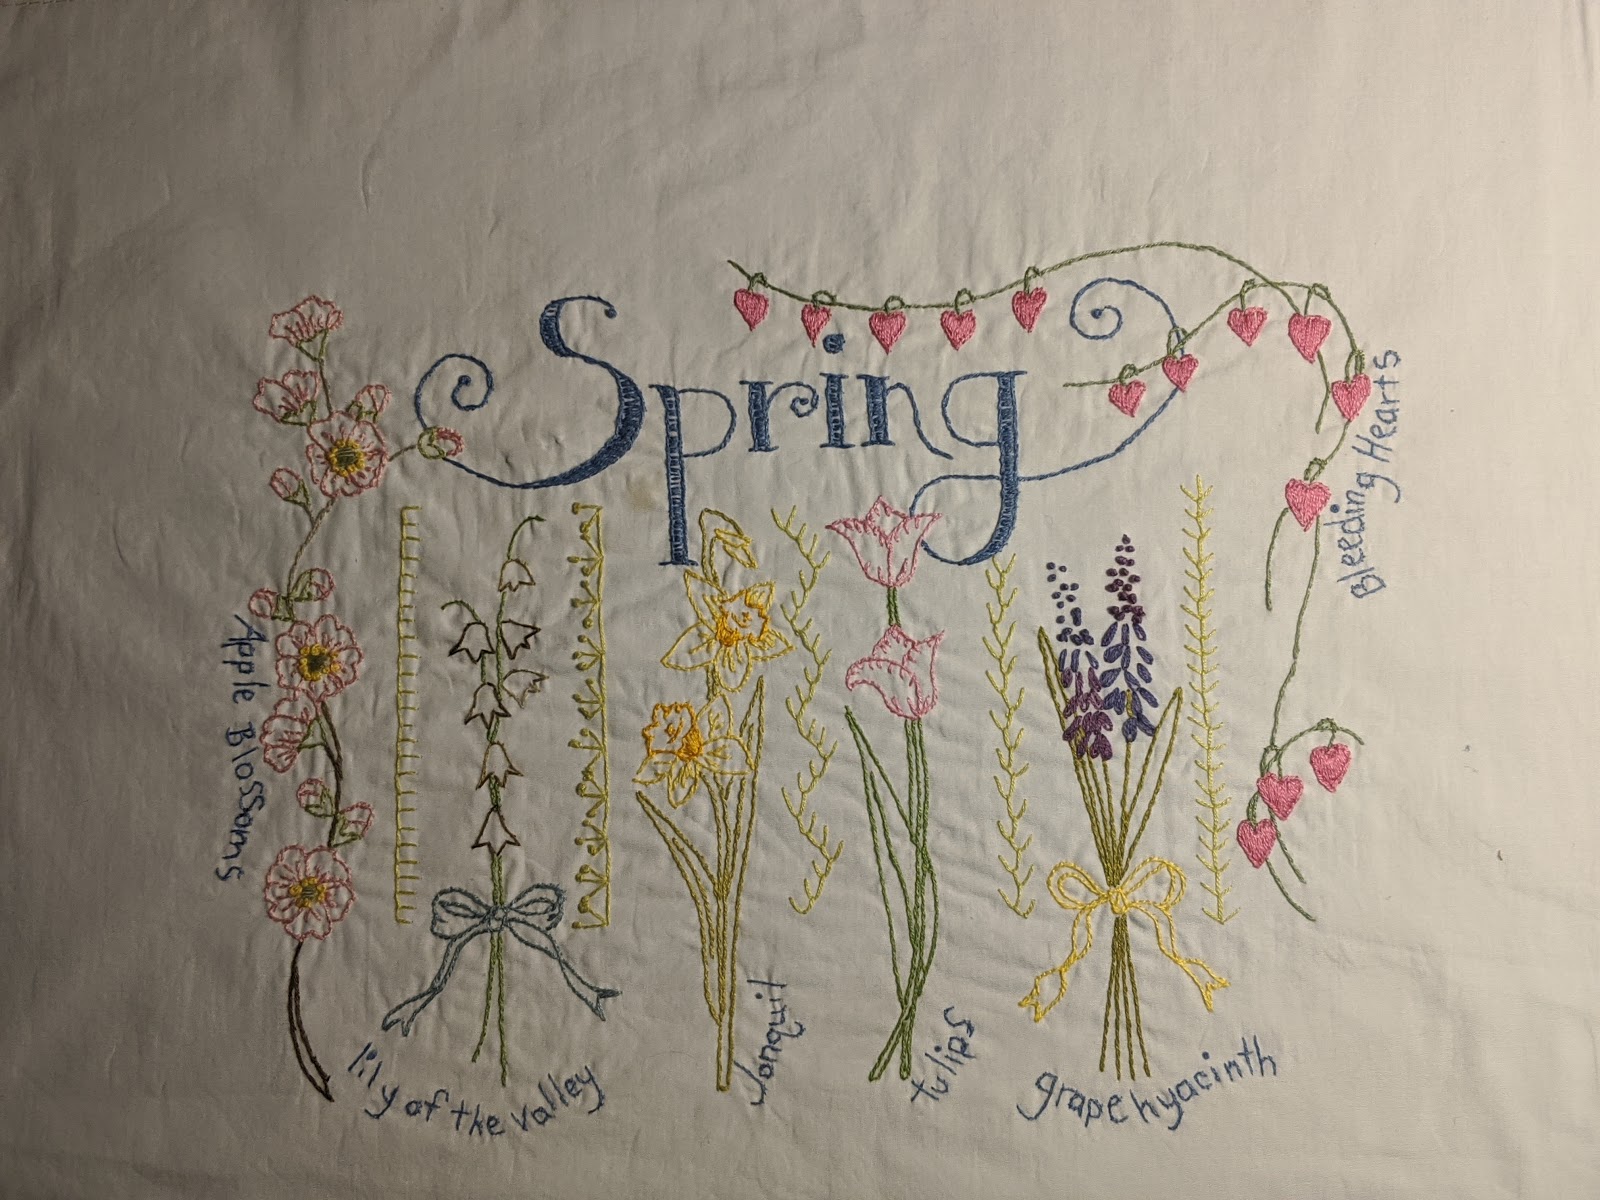 |
| Spring - now waiting for borders and embellishments and the quilting |
For the Summer project, I used a baggie of tiny corner triangles that were gifted to me from a friend. The colors were perfect! I machine quilted this one because there were so many seams in the pinwheel borders.
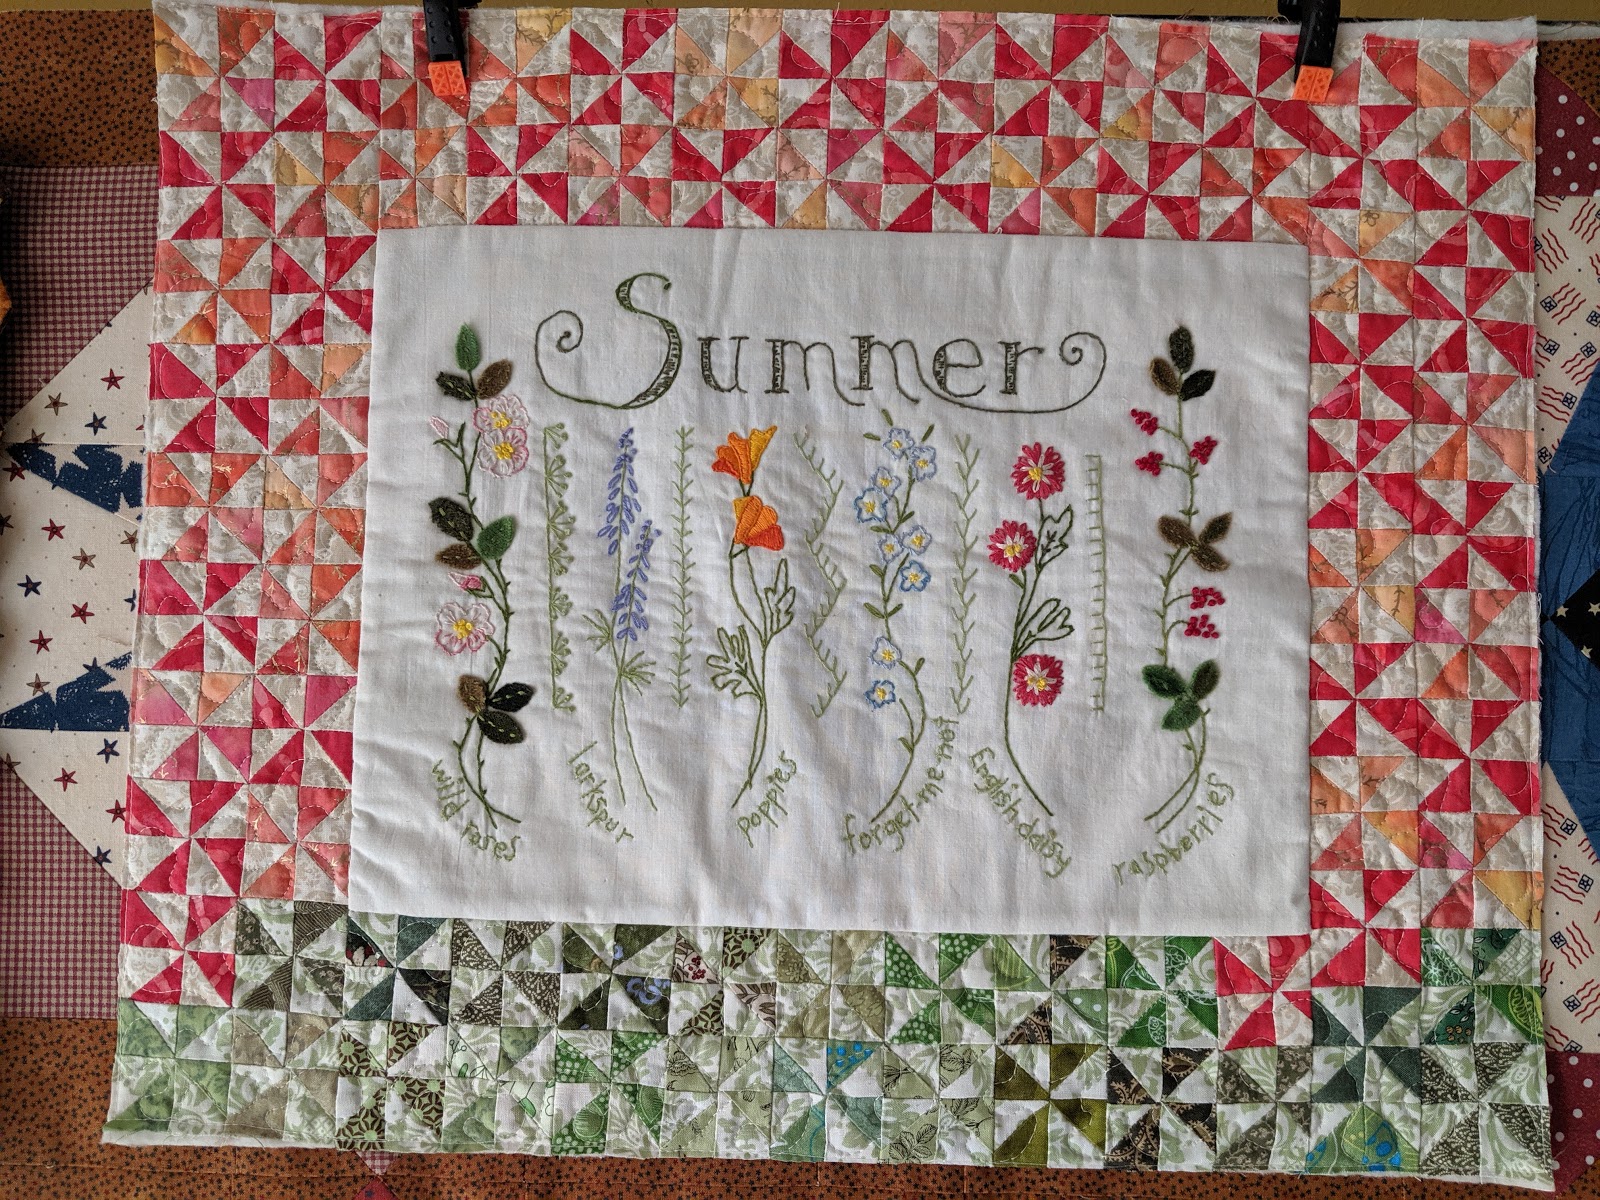 |
| Summer Pinwheels |
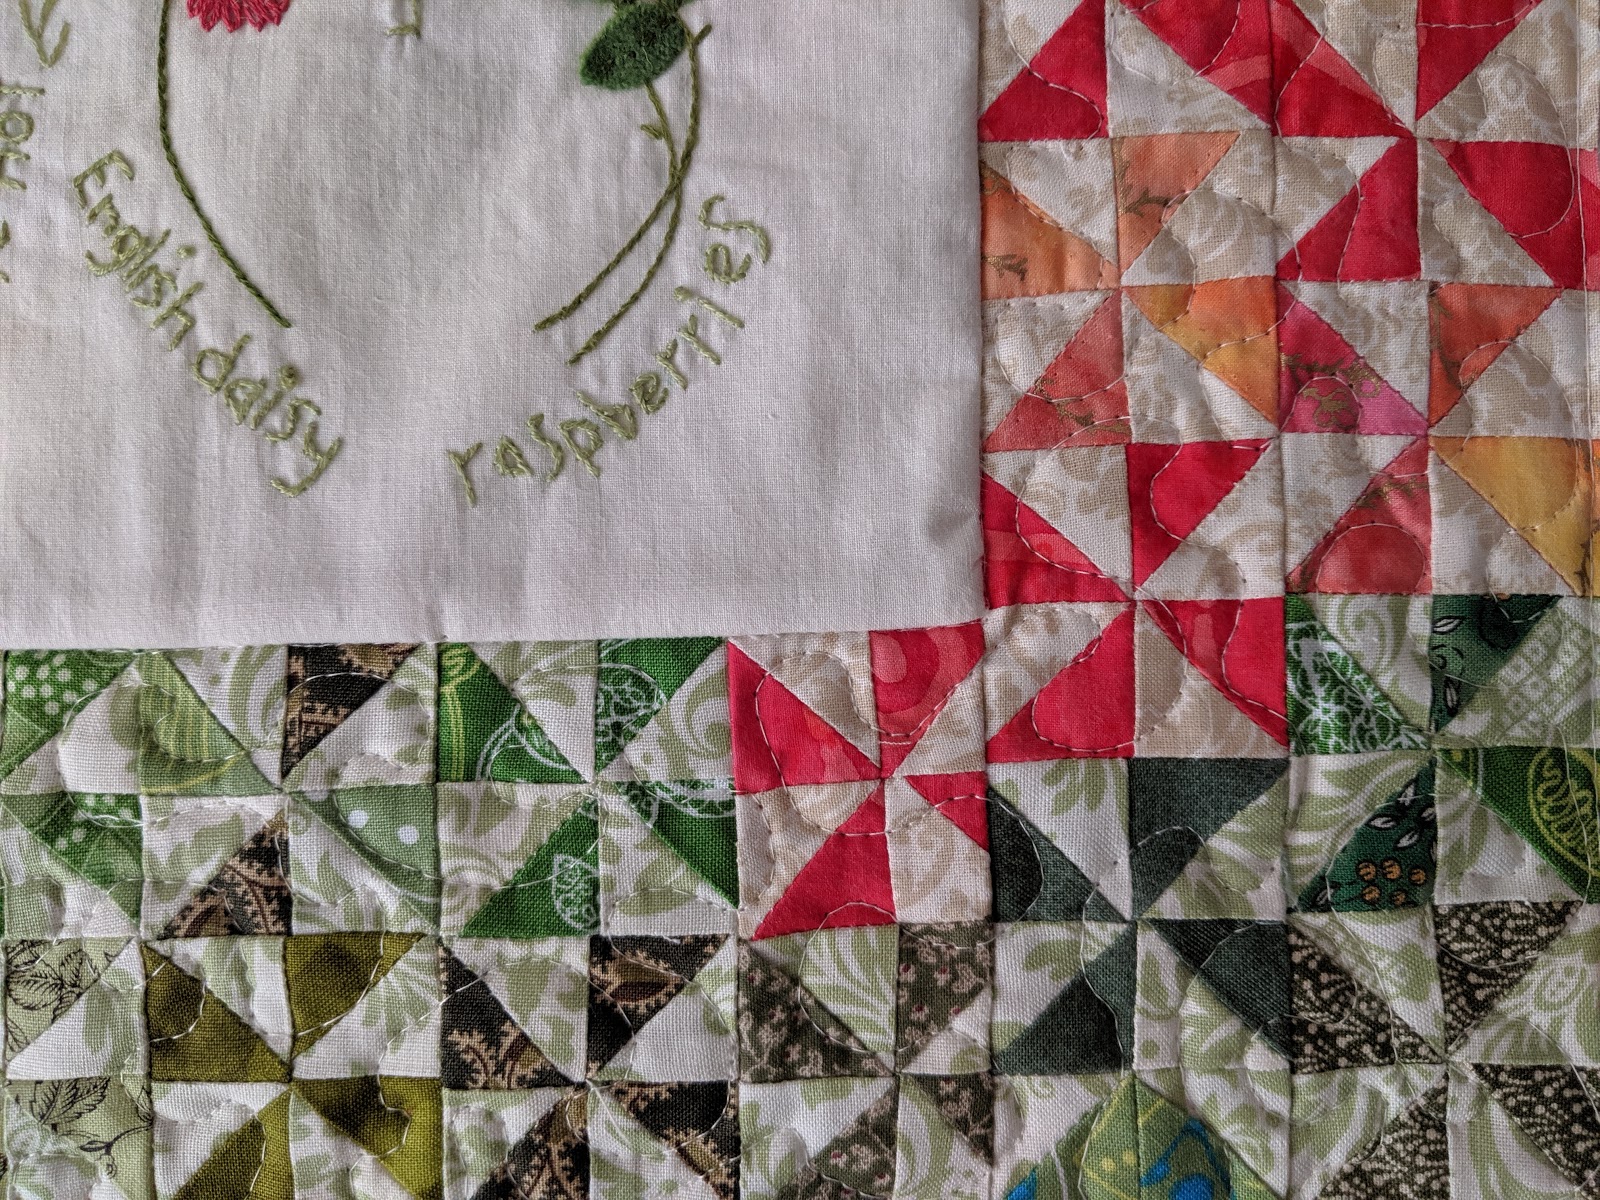 |
| Summer Pinwheels |
 |
| Summer Pinwheels |
The Winter project is one that I had finished the embroidery on several years ago. I had even started to make the wonky crumb scrap borders. They needed to attached. I hand quilted this one.
 |
| Winter |
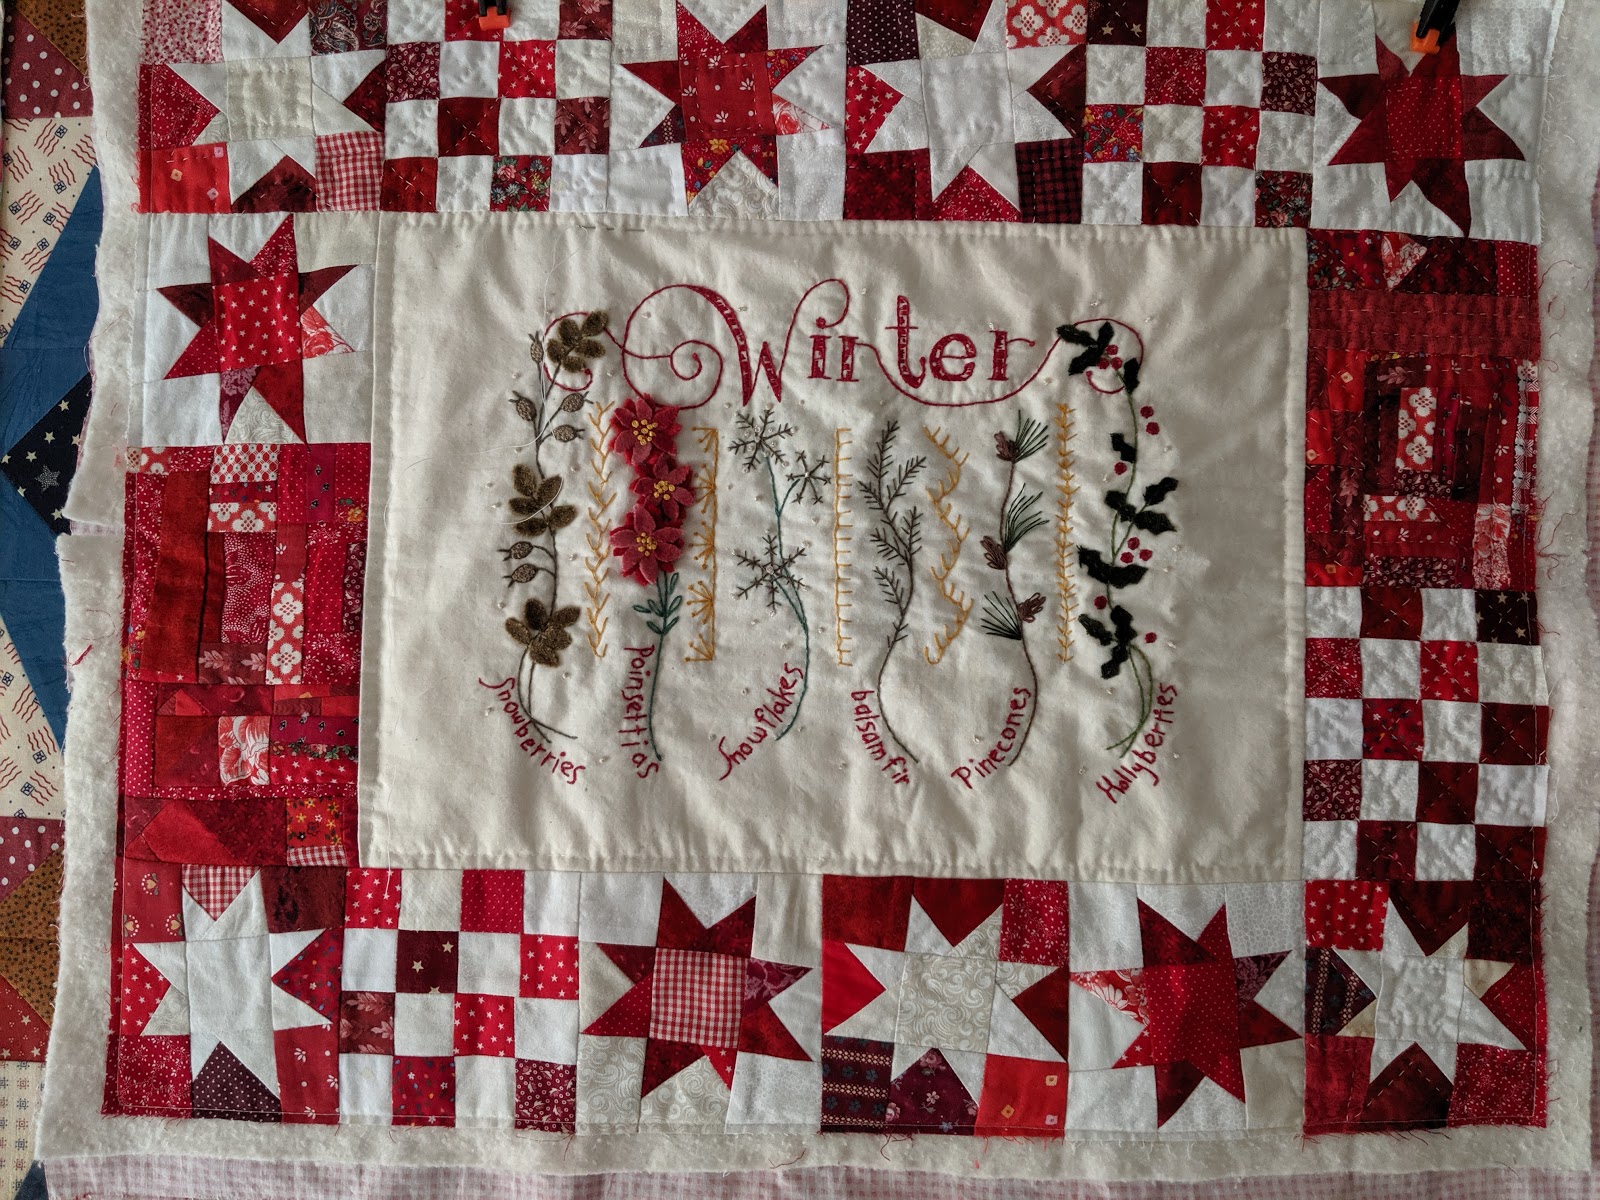 |
| Winter |
 |
| Winter - Before Binding |
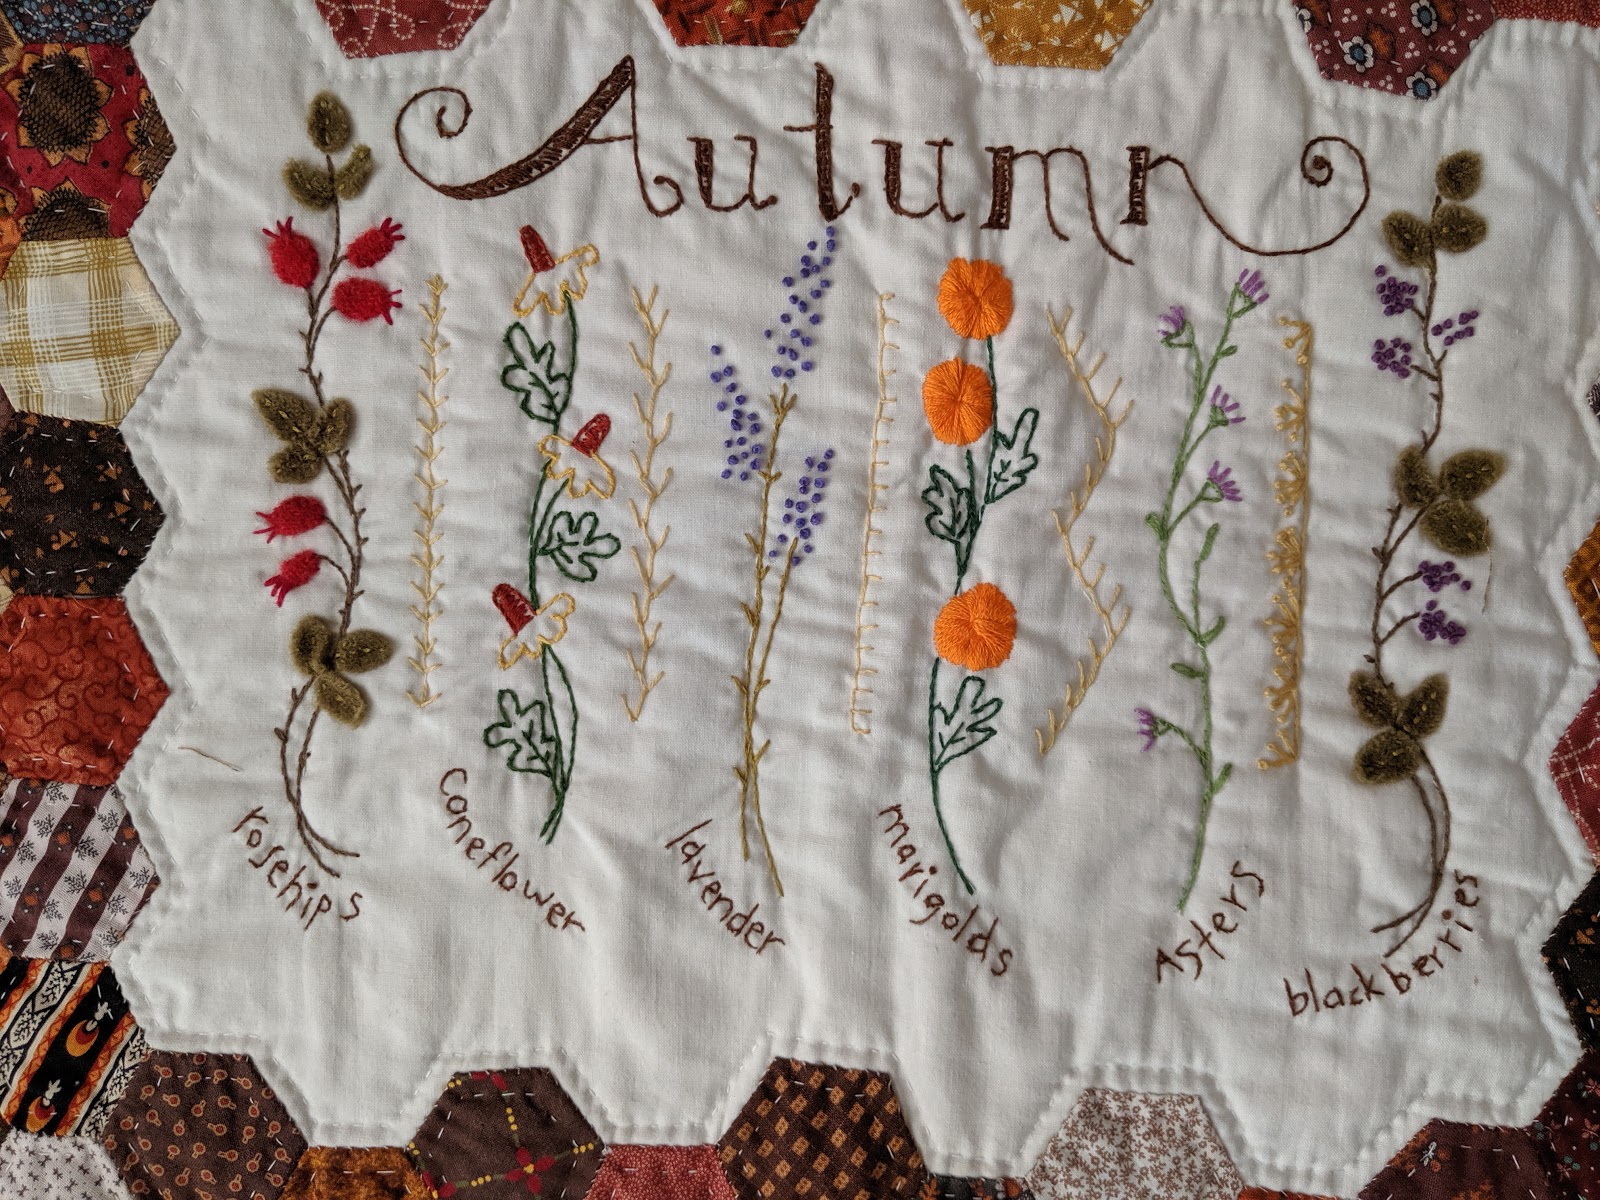 |
| Autumn Hexies |
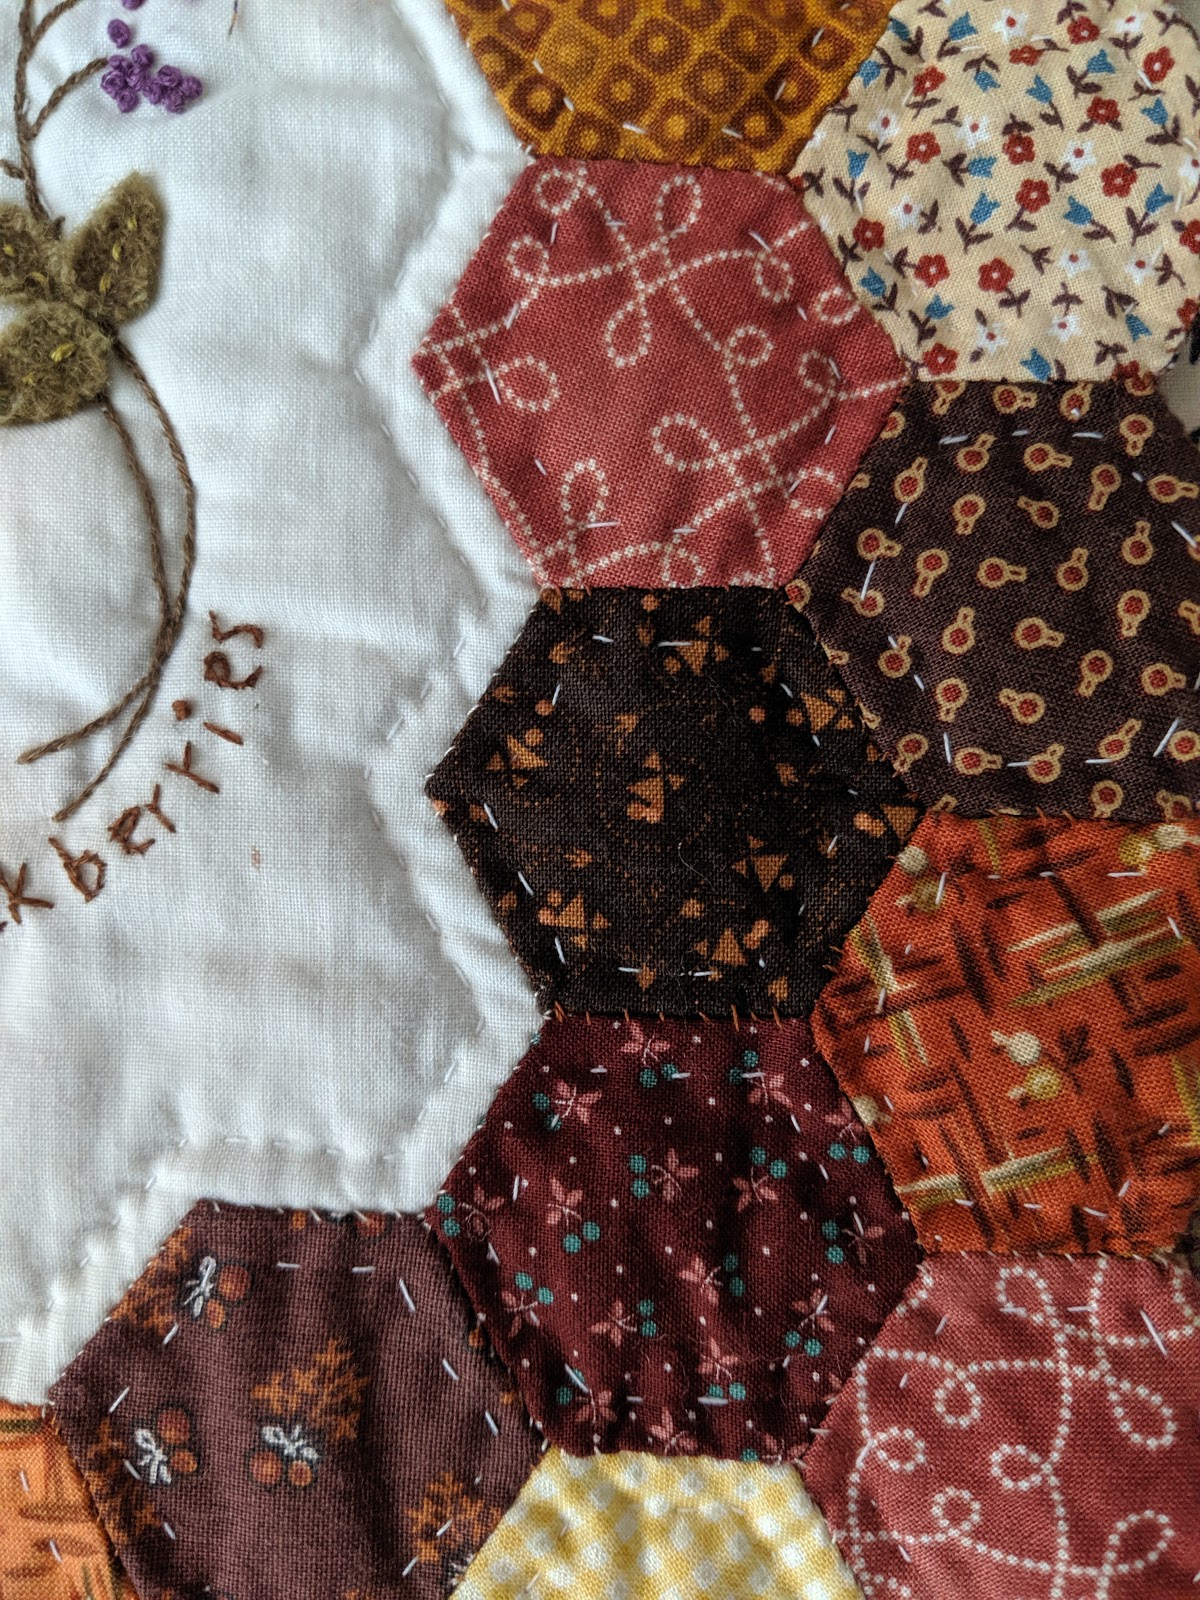 |
| Autumn Hexies |
After finishing "Rainbow Spiral", I couldn't stop playing with stitches and thread... so I started an autumnal leaf project using 3" squares so that I could practice some linear stitches that were difficult to try on those 1-1/4" circles.
This is now ready to be layered and quilted. It is about the size of a fat quarter. I haven't named it yet...
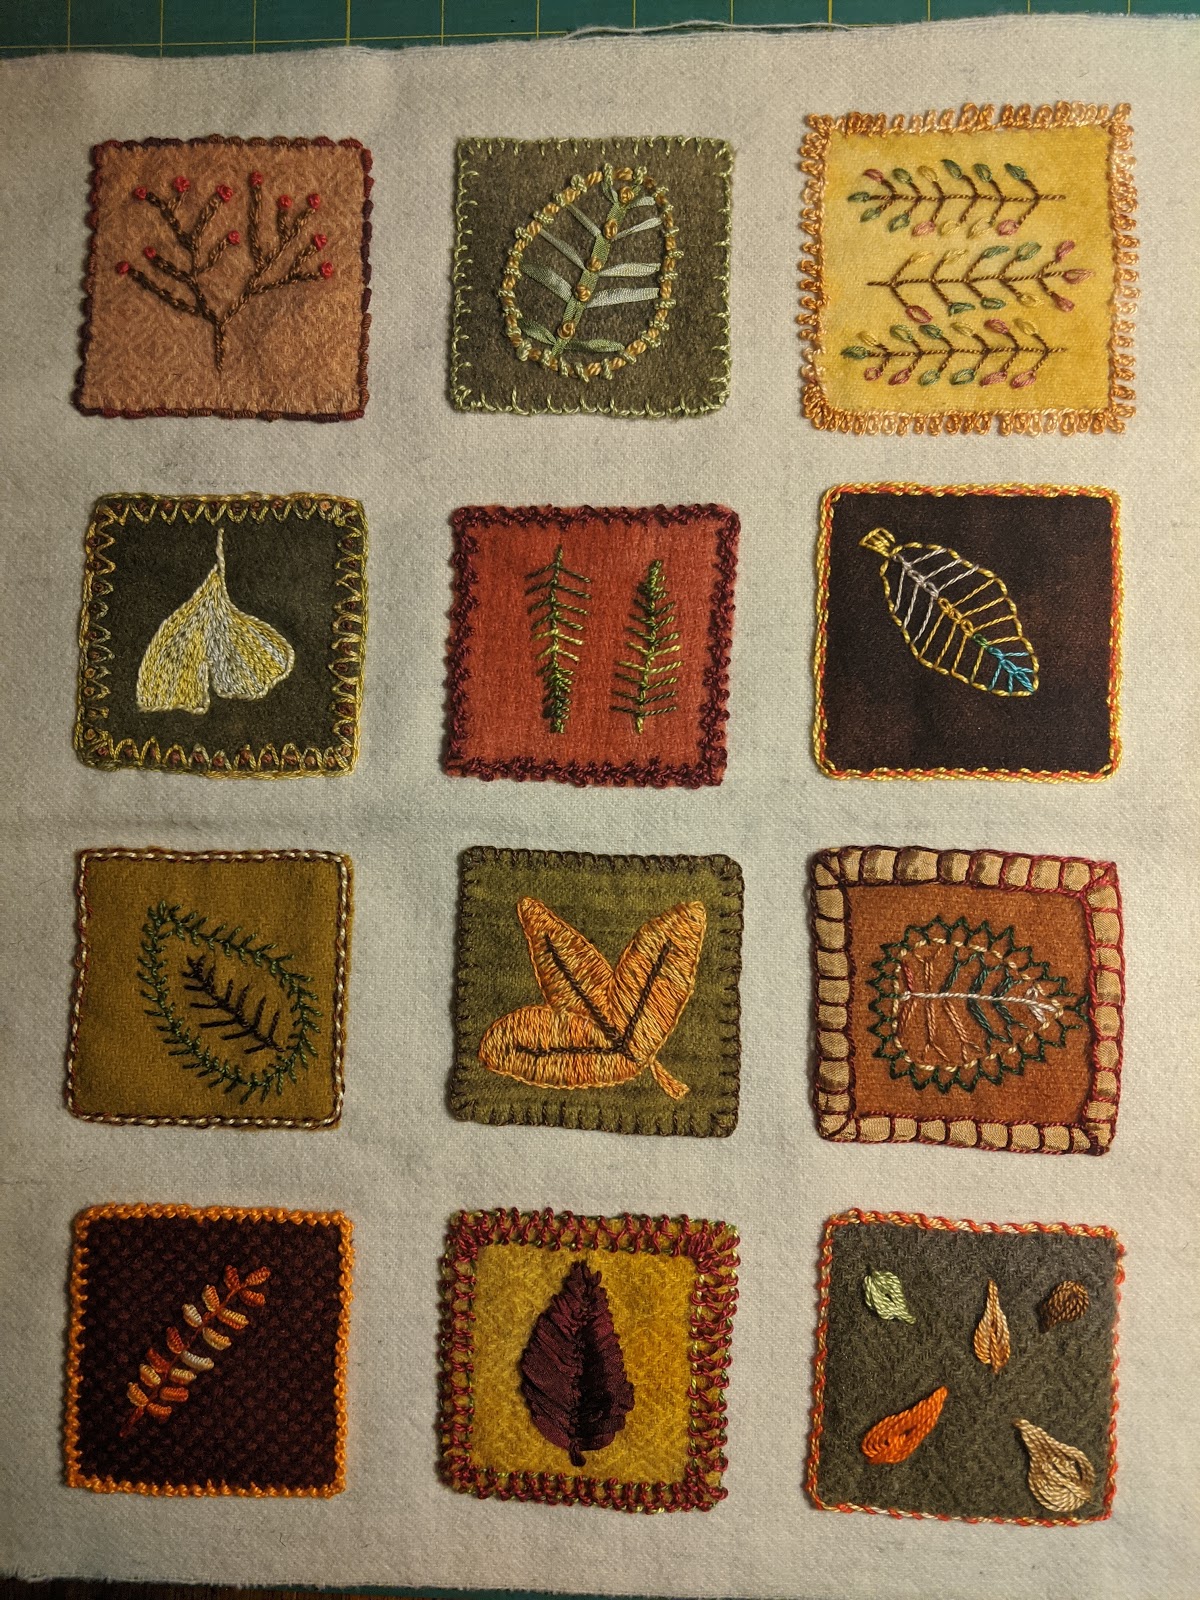 |
| Autumn Leaf Embroidery Project |
With all this stitching, I need a needle roll, correct? This is Sue Spargo's pattern. I made my own labels. This was a fun project.
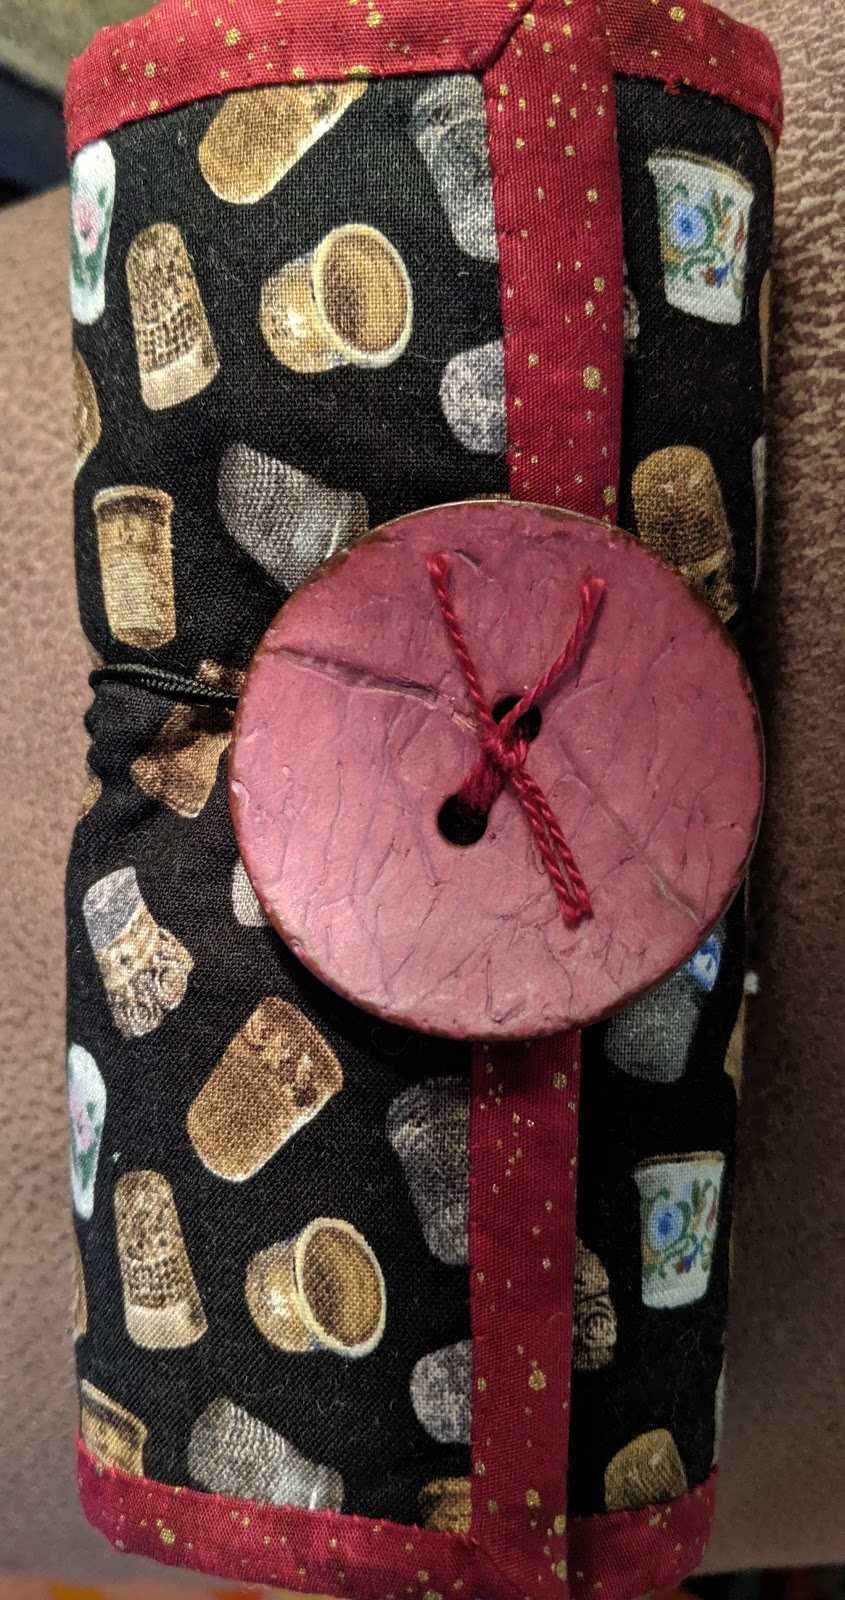 |
| Needle Roll |
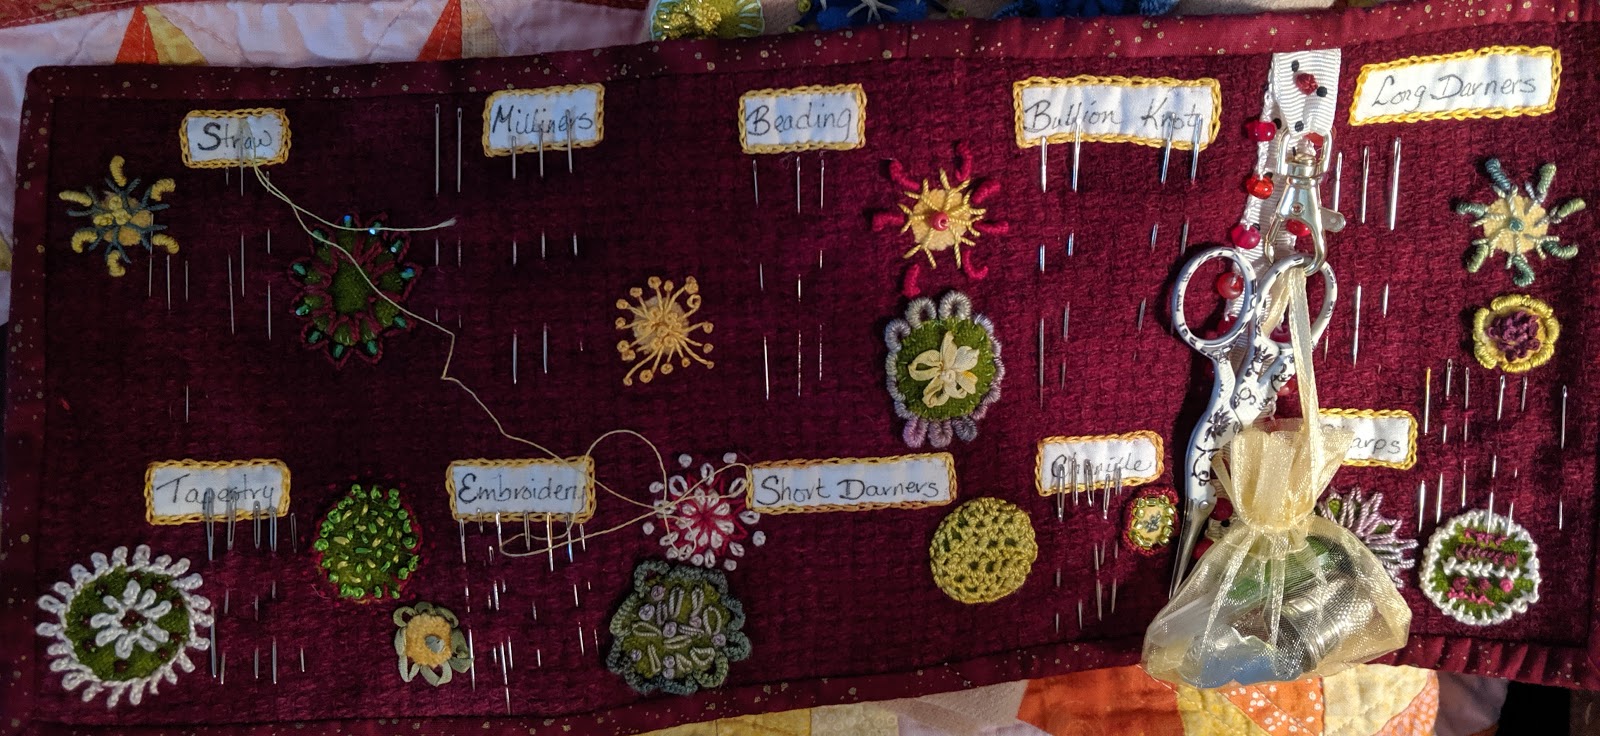 |
| Needle Roll - inside details |
I found some Japanese Cotton at a quilt show this fall and wanted to try some wool on that. This project will become a tote bag. One side with the bright squares the other with the owl. The owl inspiration came from an adult coloring book that was given to me when I retired. I'm nearly done with the owl side, and then it can be finished.
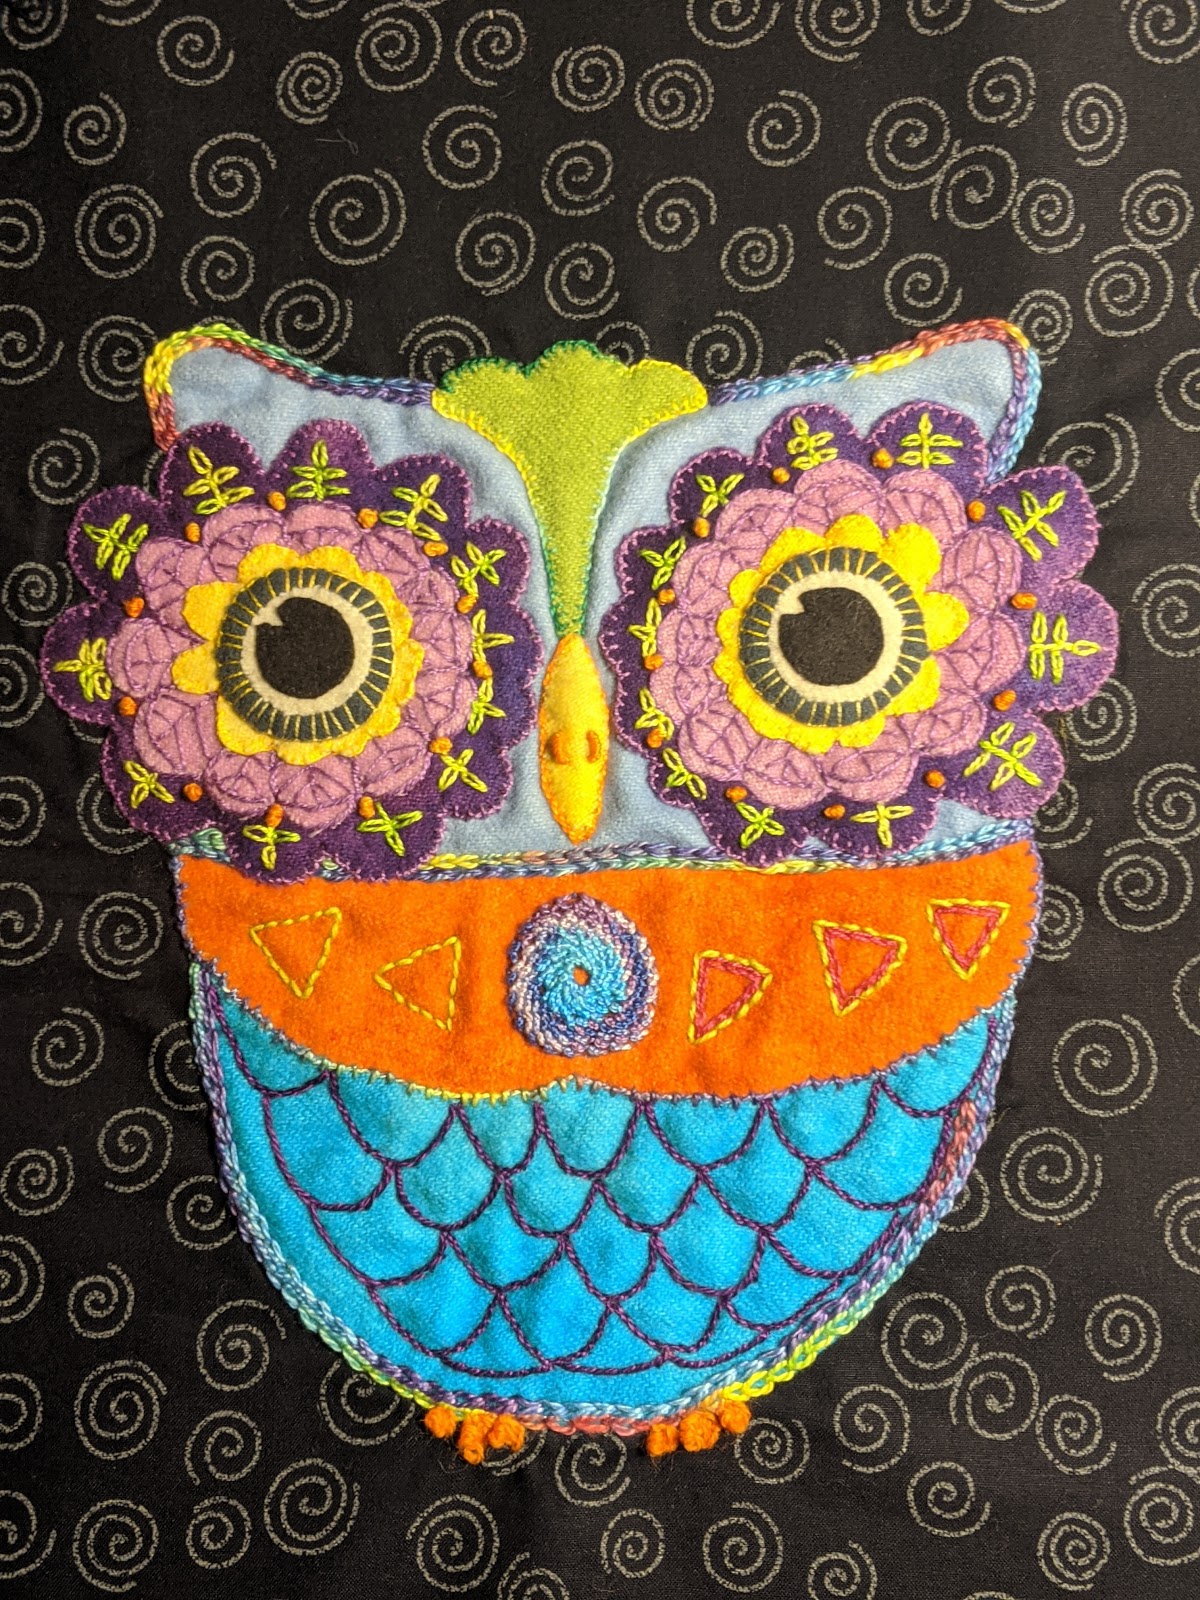 |
| Owl- needs the belt area finished and some details added in body. |
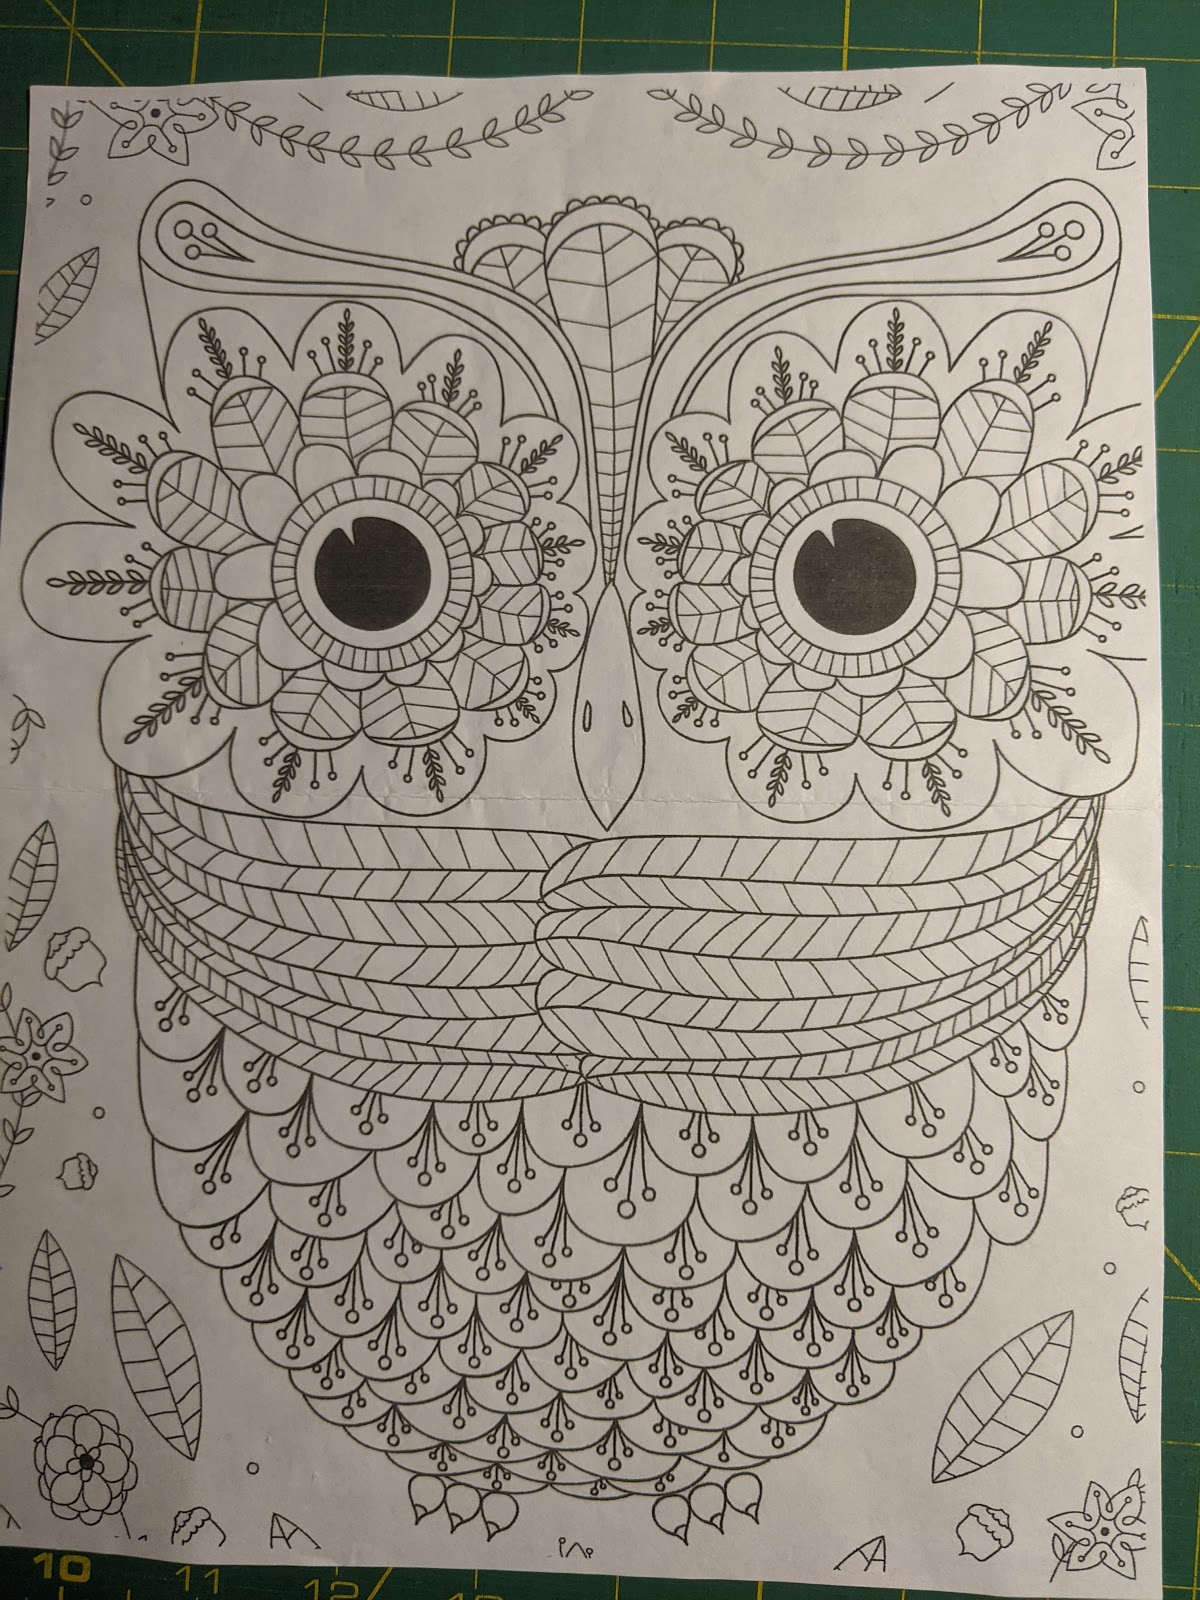 |
| Coloring Sheet I used for inspiration |
A Quilt of Valor -
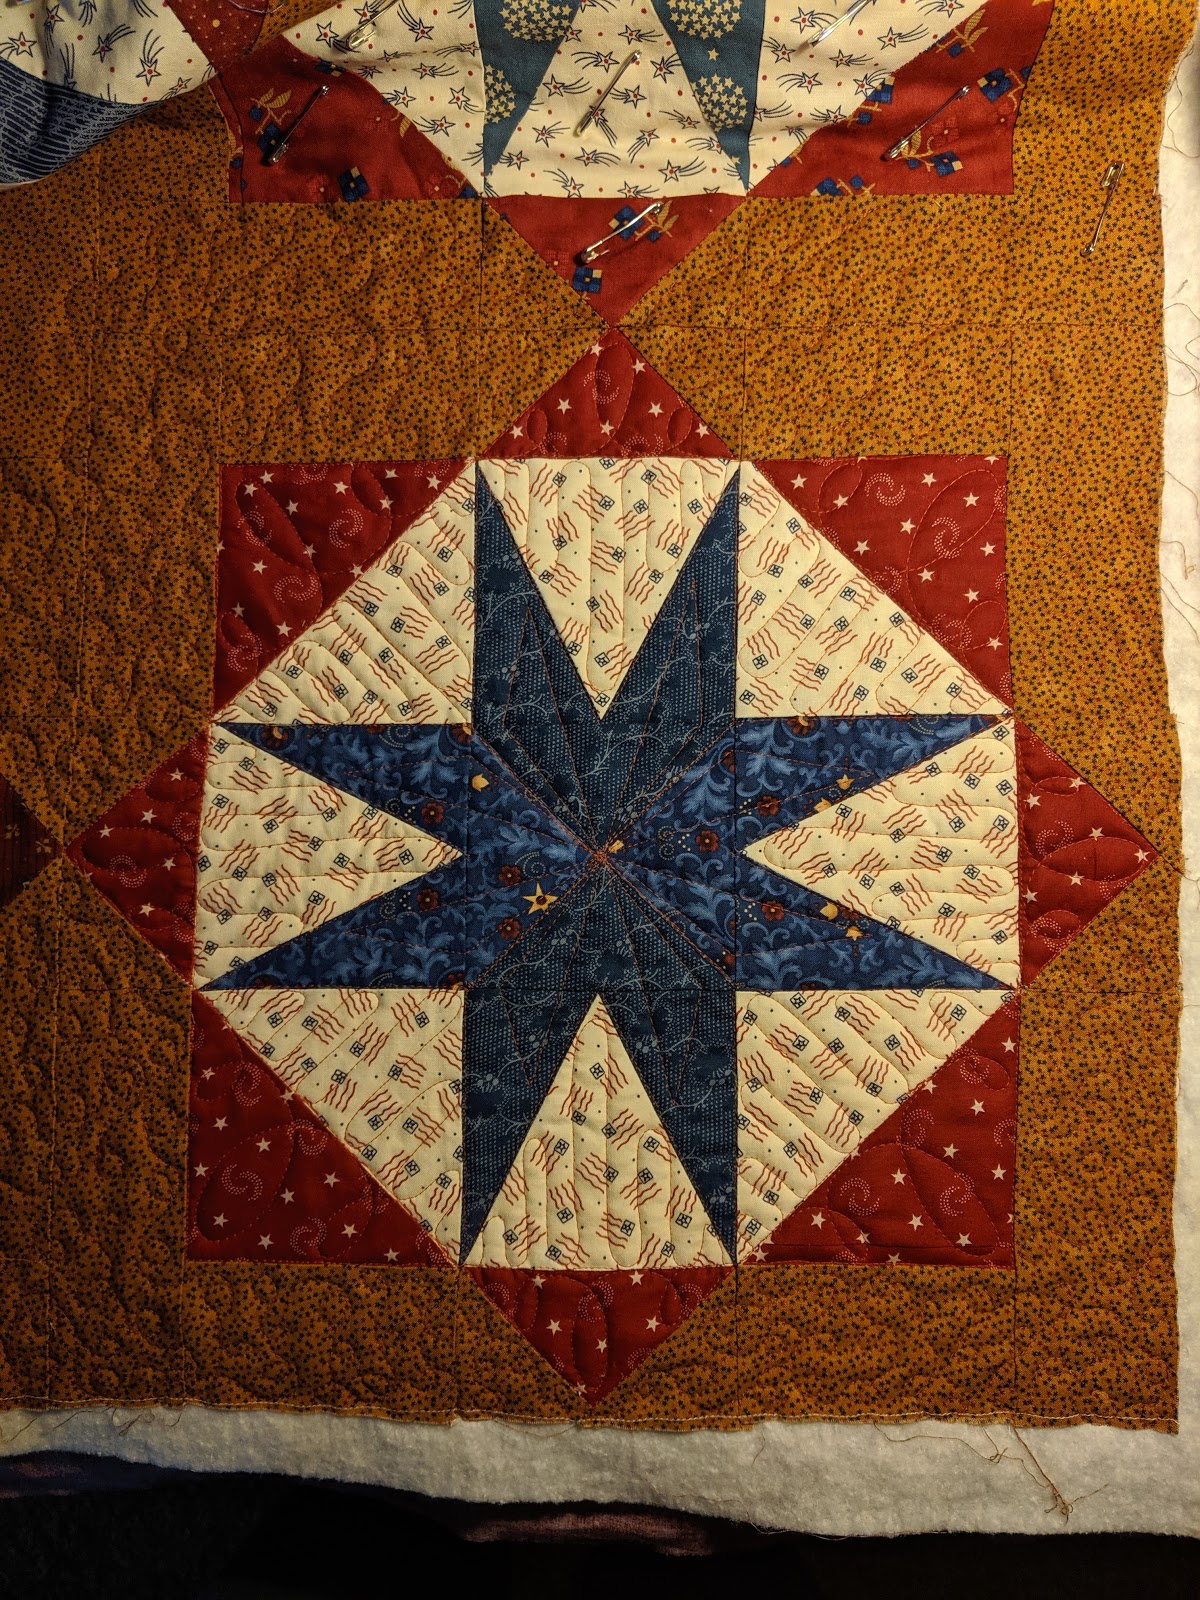
My friend and quilting mentor, HollyAnne Knight over at the String & Story, had a summer quilt along. The pattern was her "Star Island". I chose to do it in darker Americana colors so it can be a Quilt of Valor.
I machine quilted it on "Sophie", my Janome 9400.
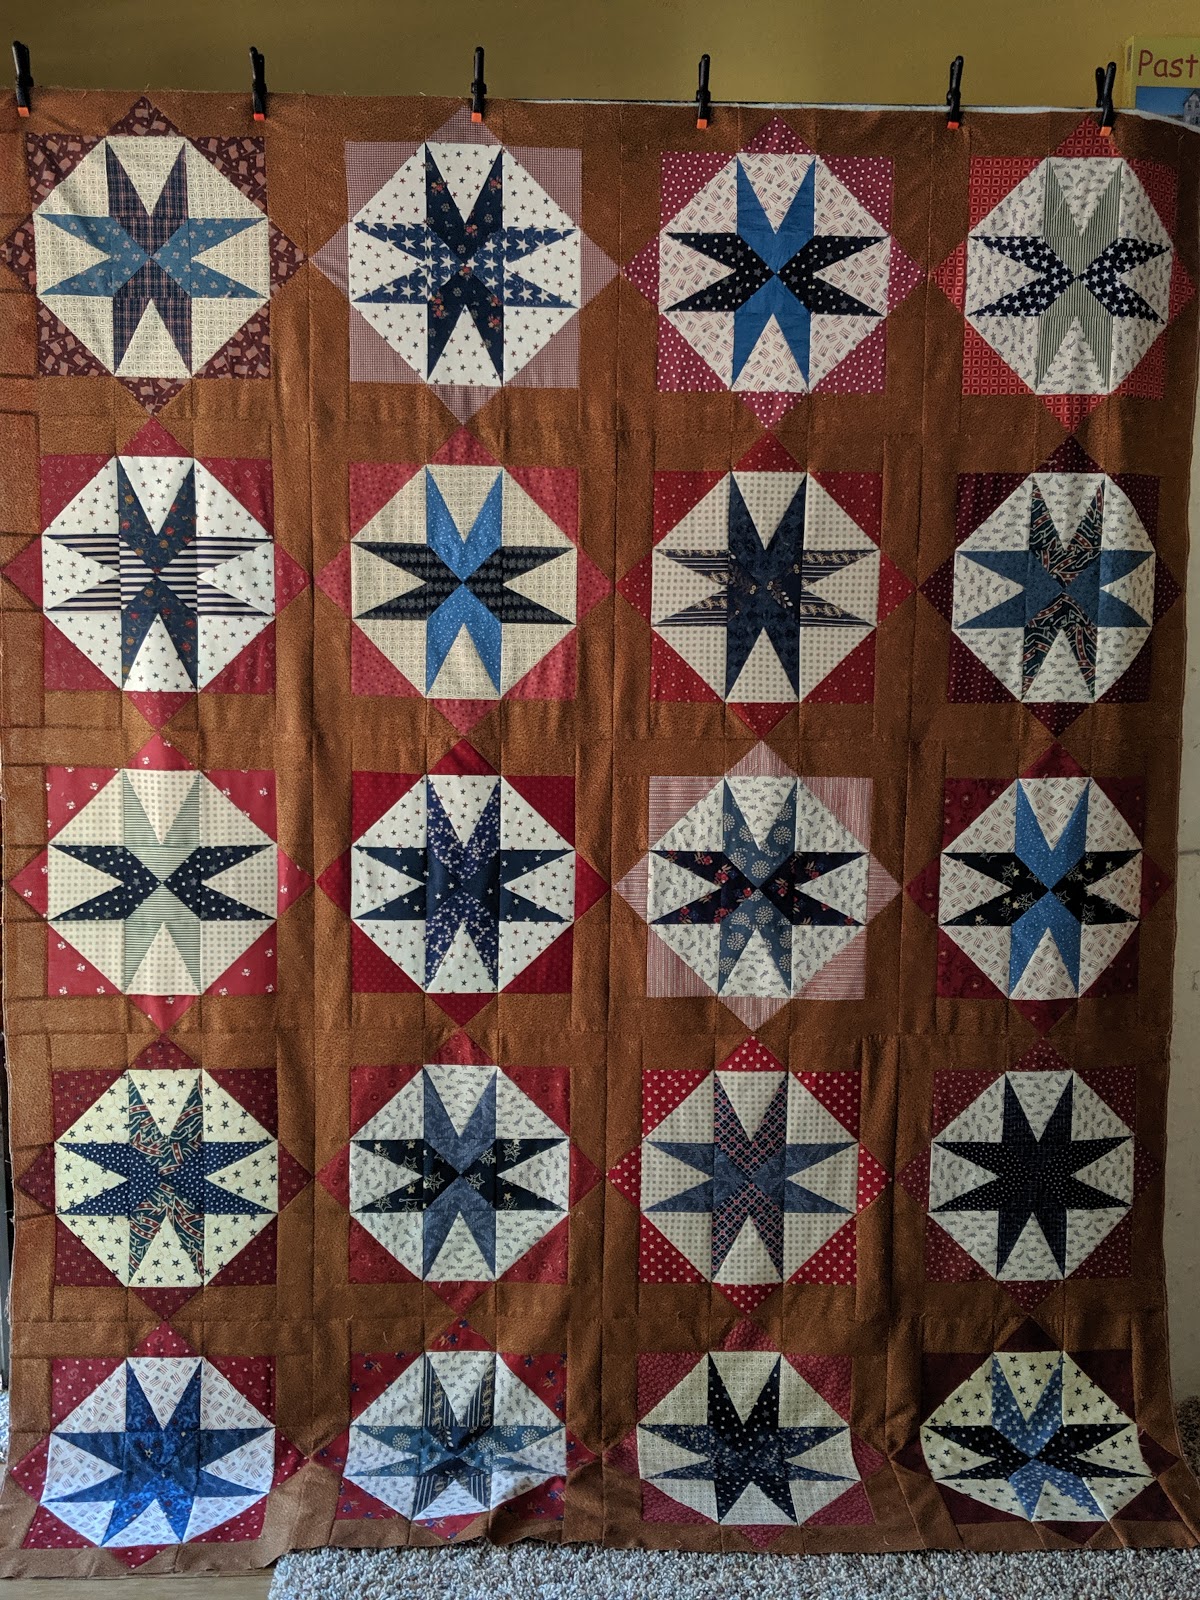 |
| Star Island - Before Quilting |
 |
| Star Island |
 |
| Star Island - Back quilting detail |
 |
| Star Island... The Quilting process begins |
 |
| Star Island - close up quilting detail on back |
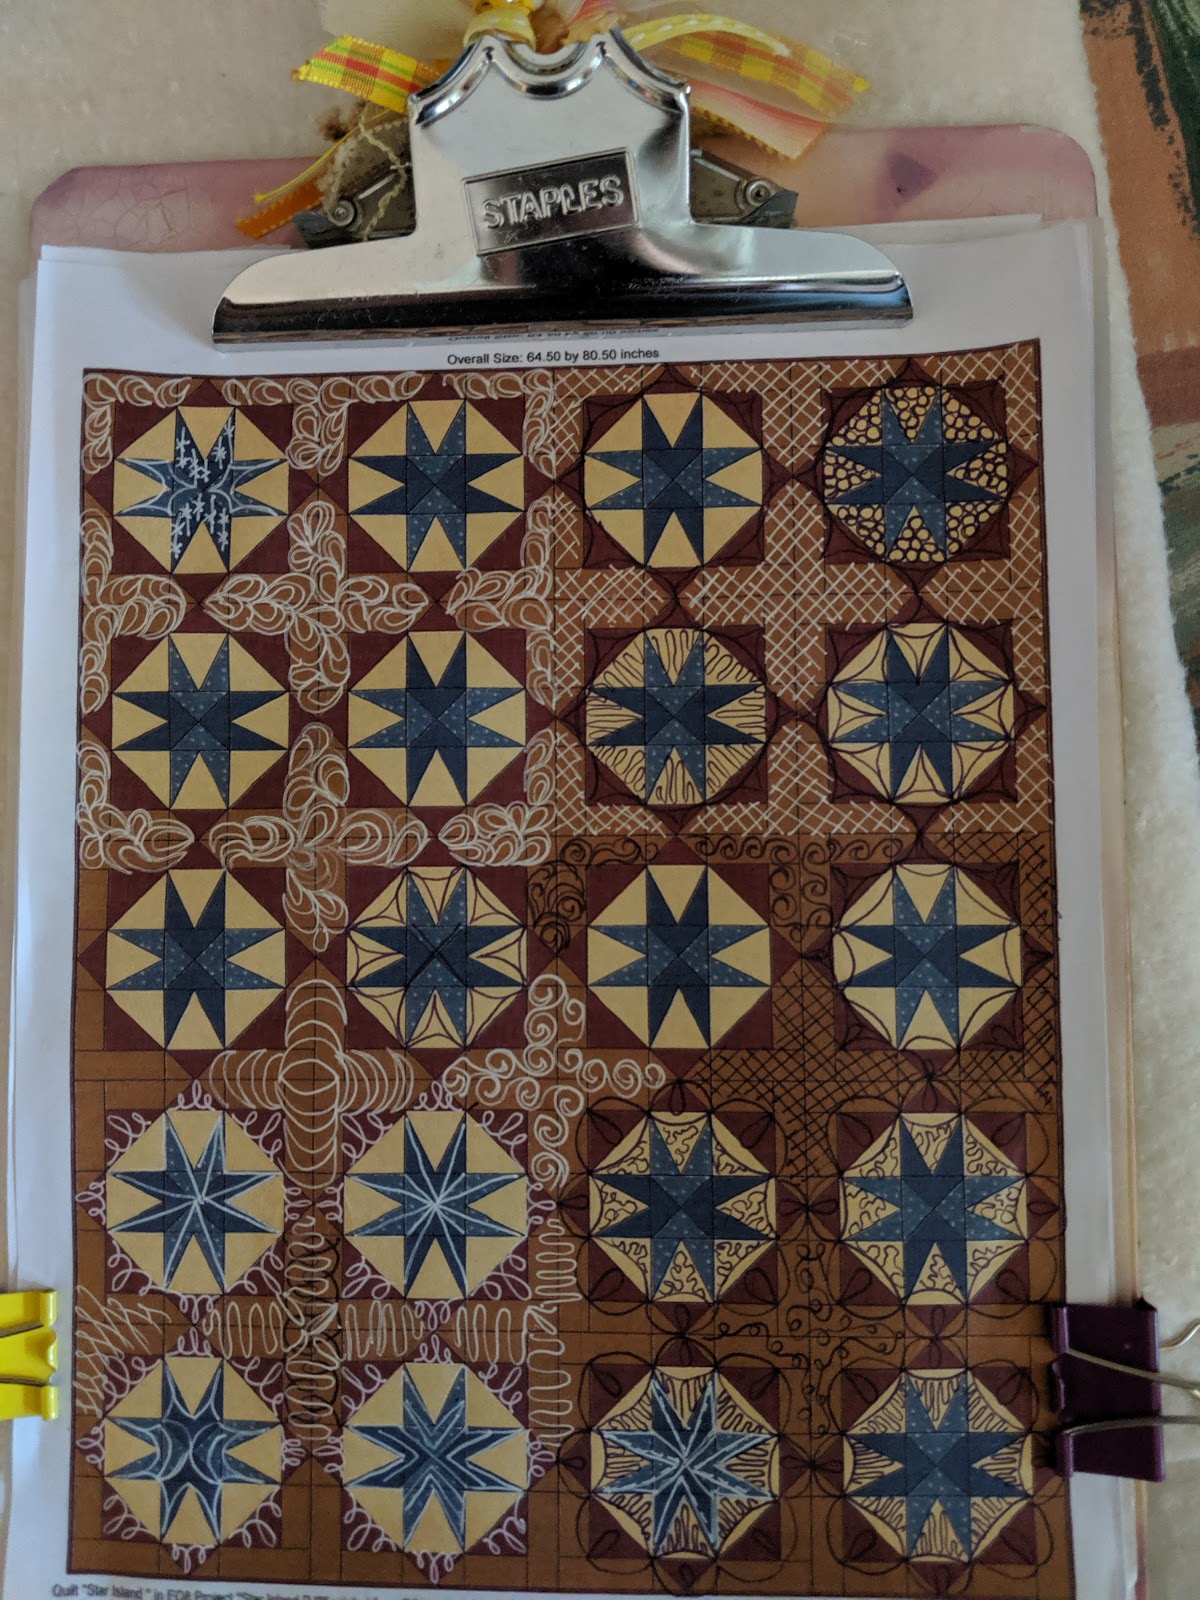 |
| Star Island - Quilt plan ideas |
A Lap Quilt for Comforting Quilts...
One of my UFO items for the year was this little lap quilt made from extra parts from a quilt I made about 10 years ago. I already made another quilt for "Foster Club" a couple of years ago. I think I've used up most all the blocks and pieces that were left over. I finished the quilting while at Summer Retreat in July.
 |
| Marble Madness Lap Quilt |
 |
| Marble Madness Lap Quilt |
 |
| Marble Madness Lap Quilt |
 |
| Marble Madness Lap Quilt |
 |
| Proud to have a finish! |
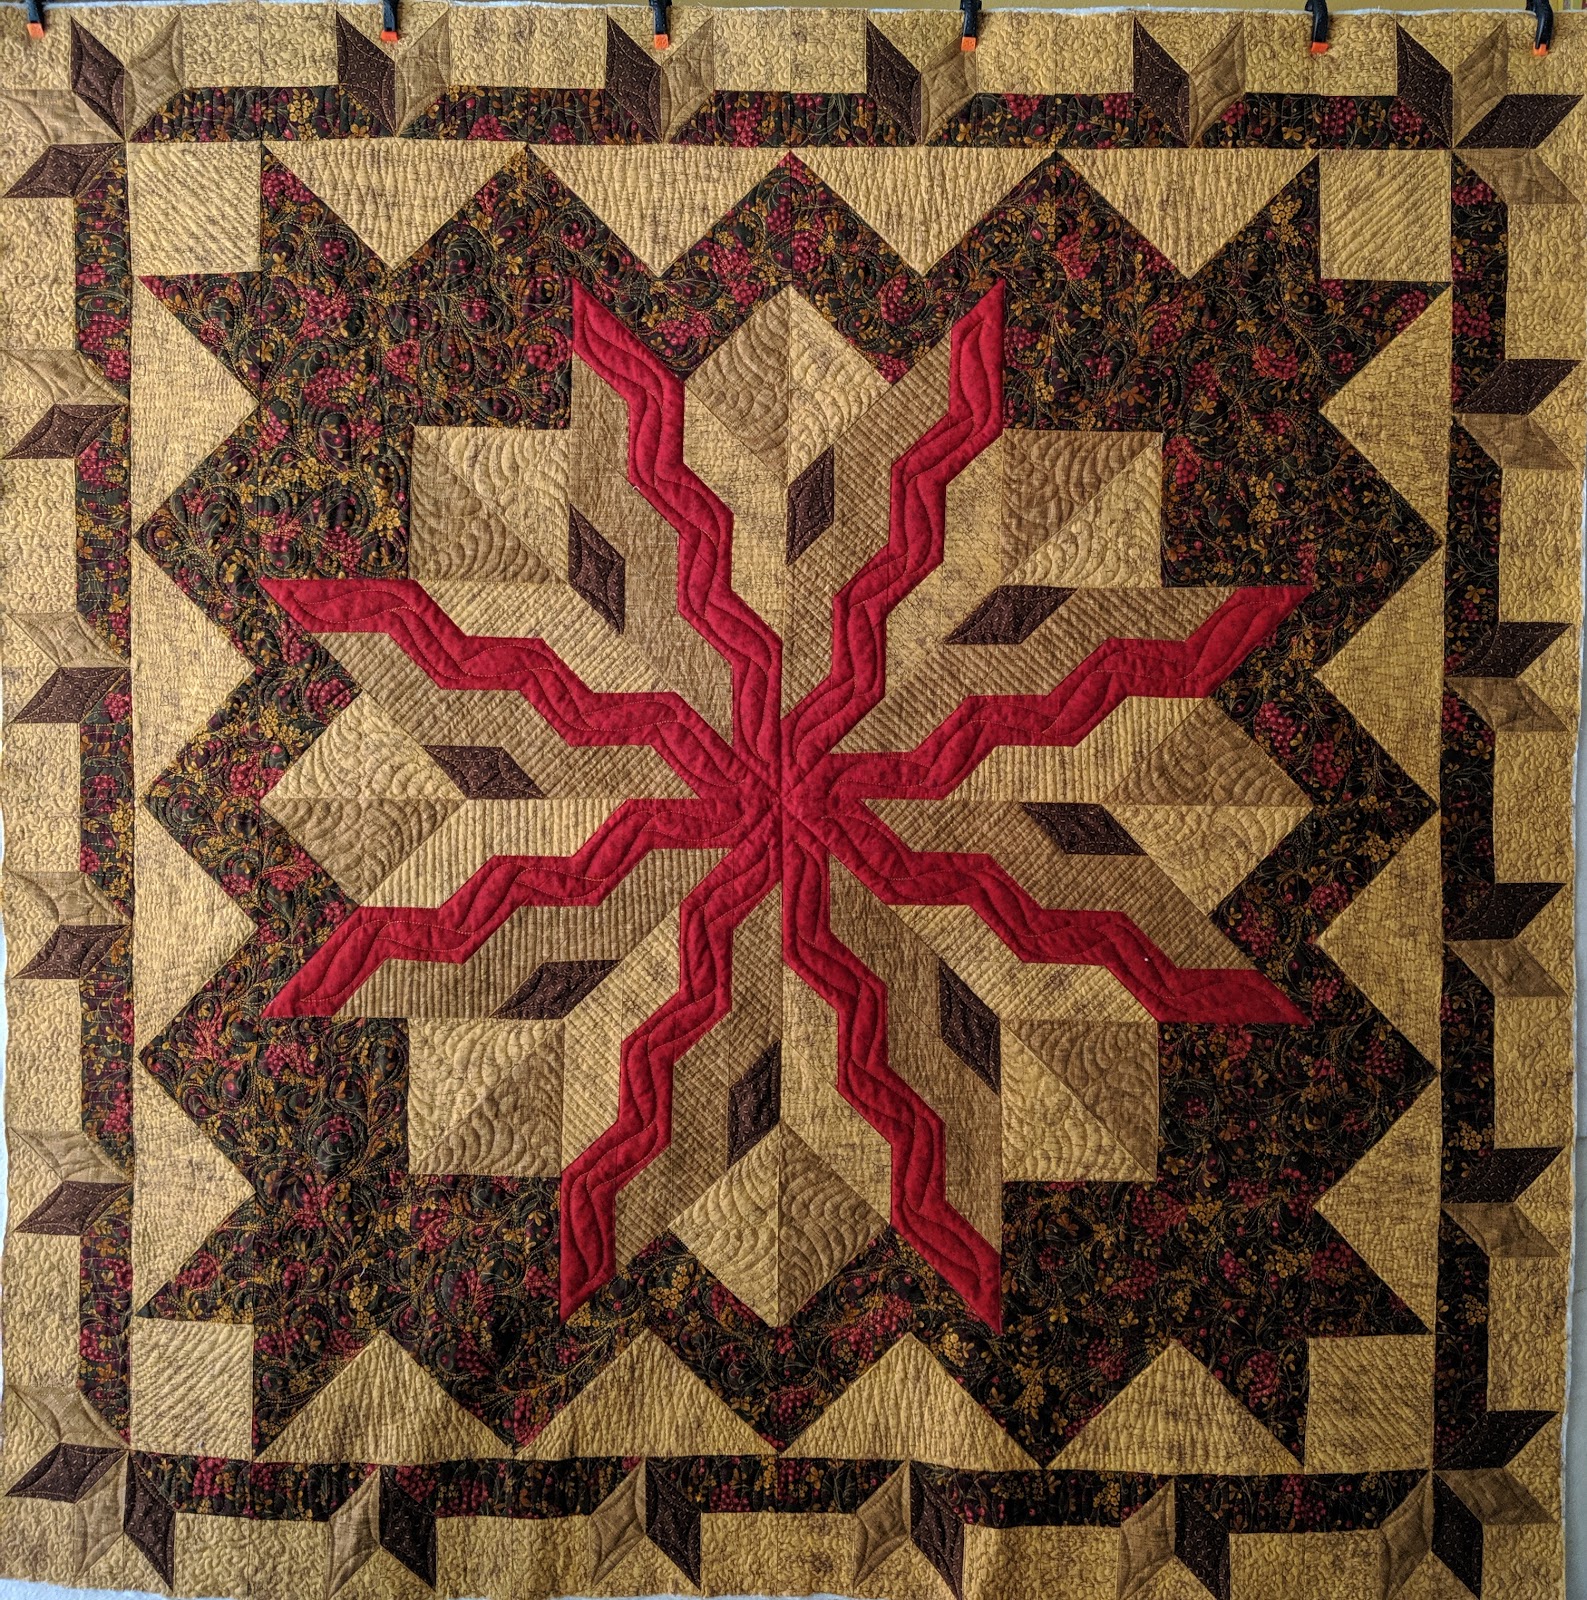
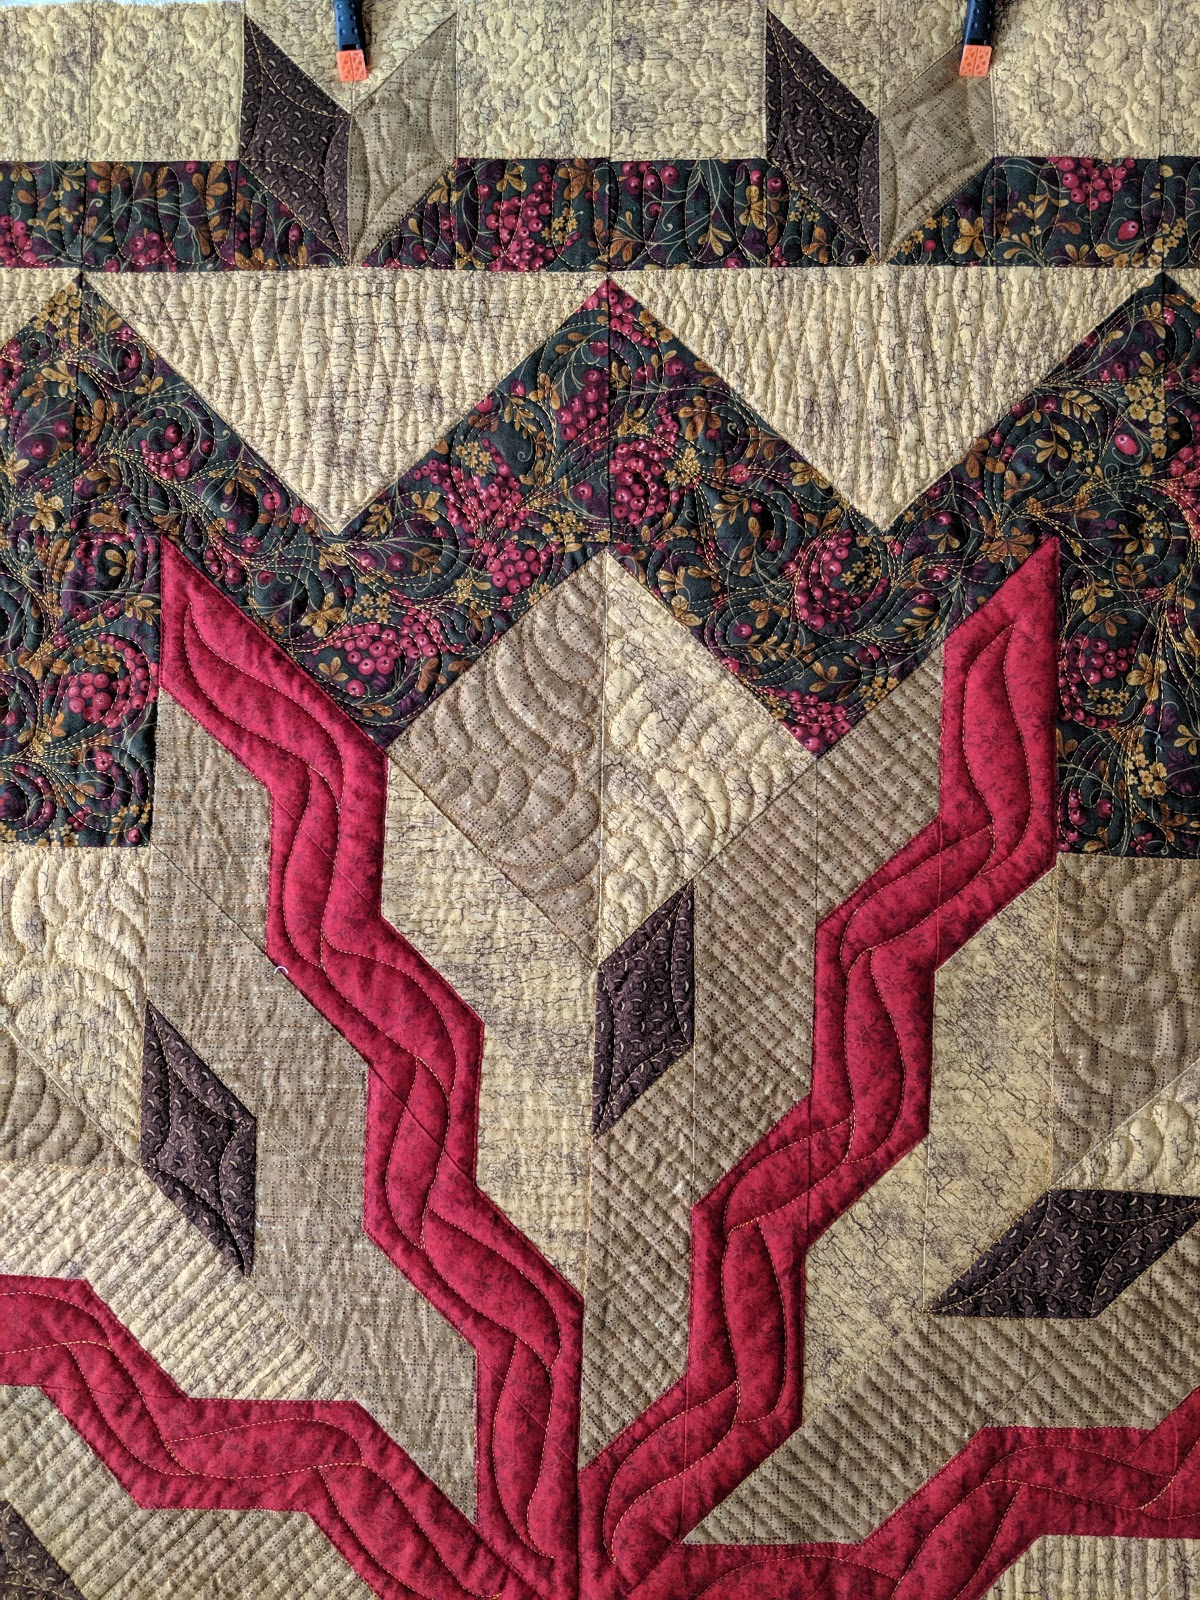
"Phire's Radiance" - another UFO Finish
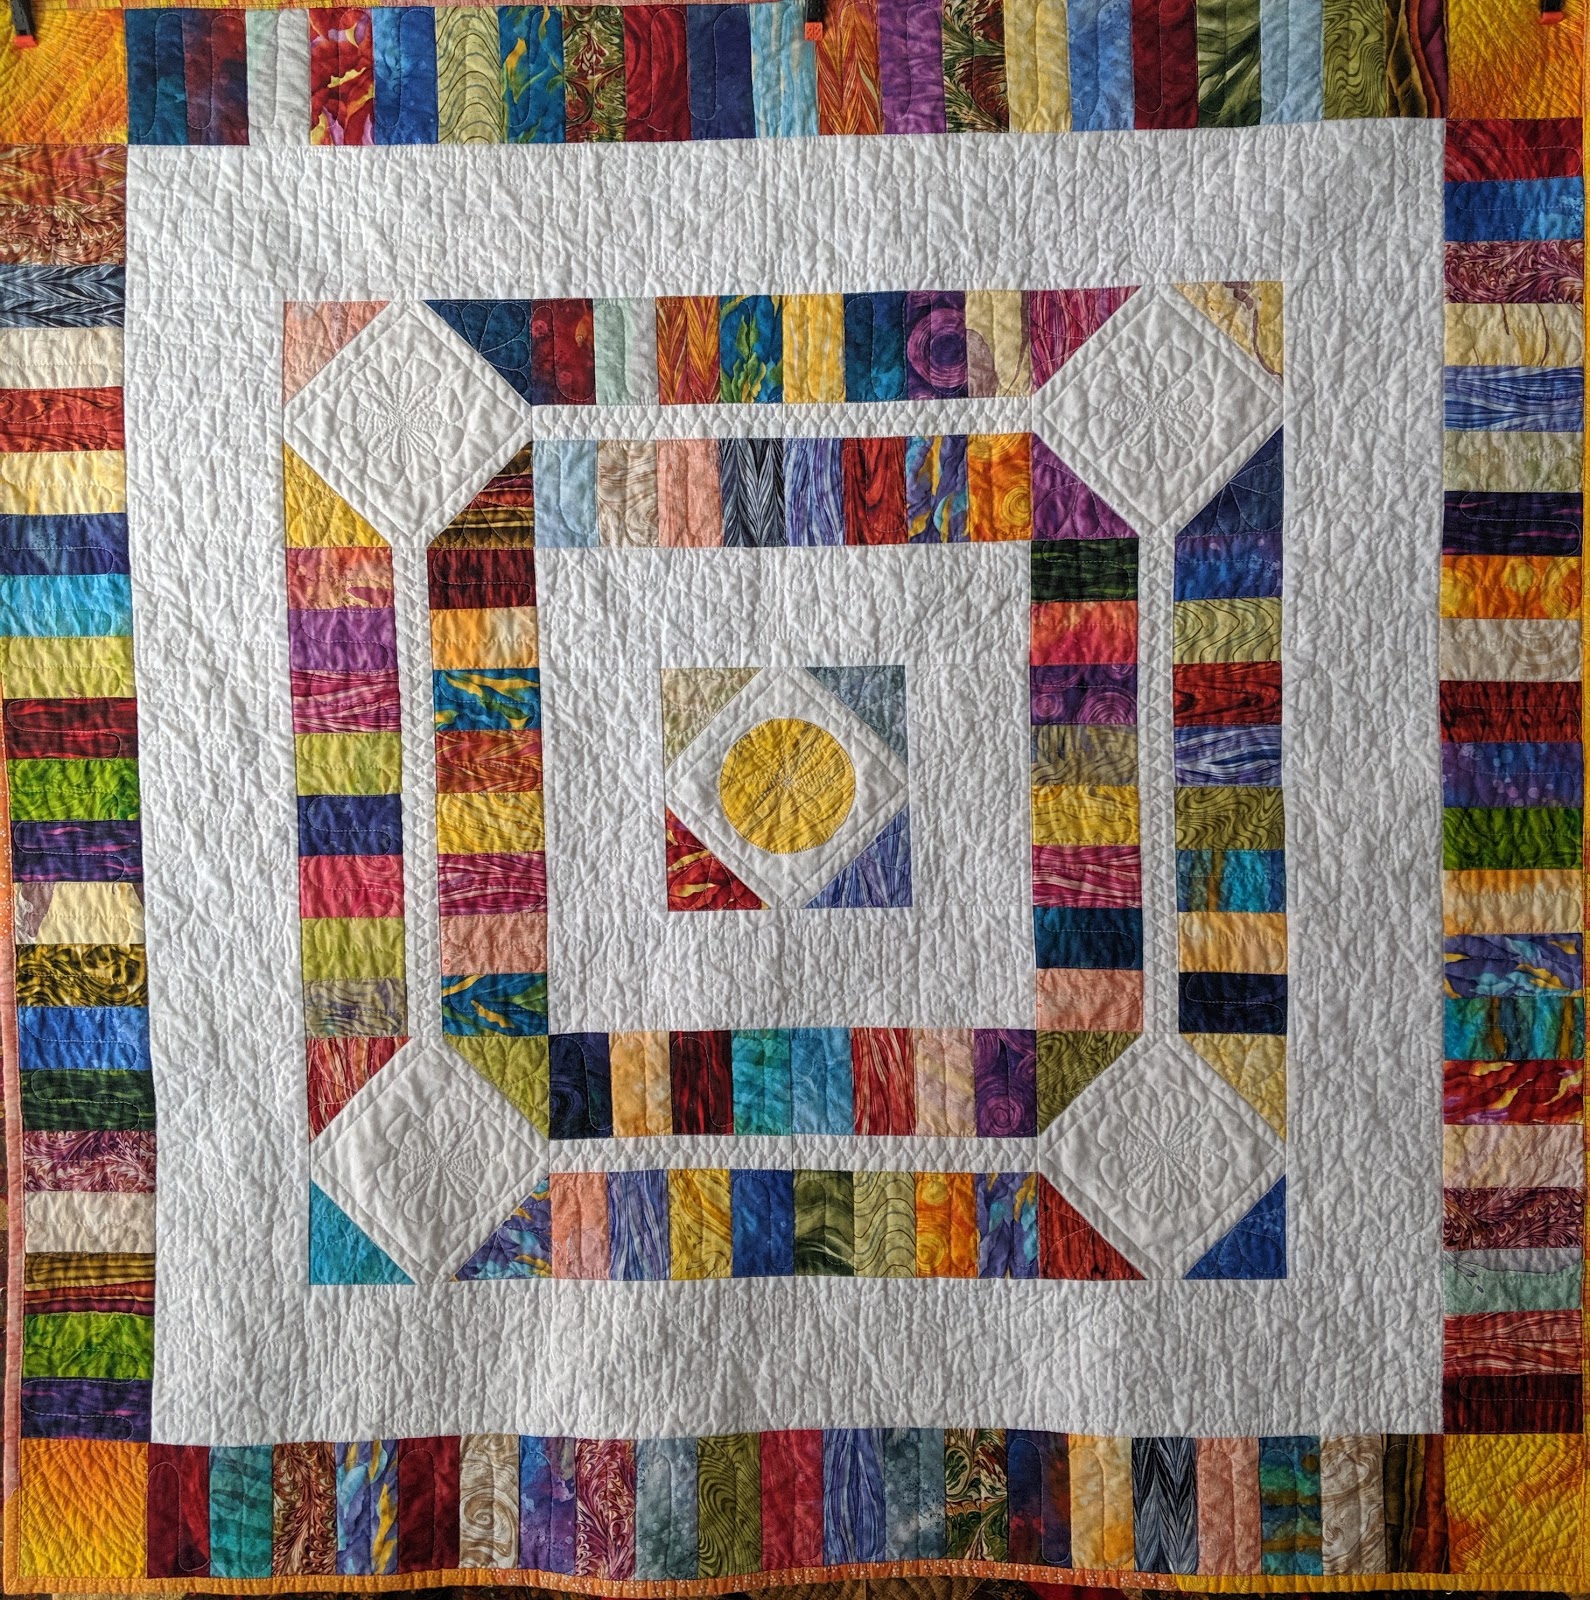
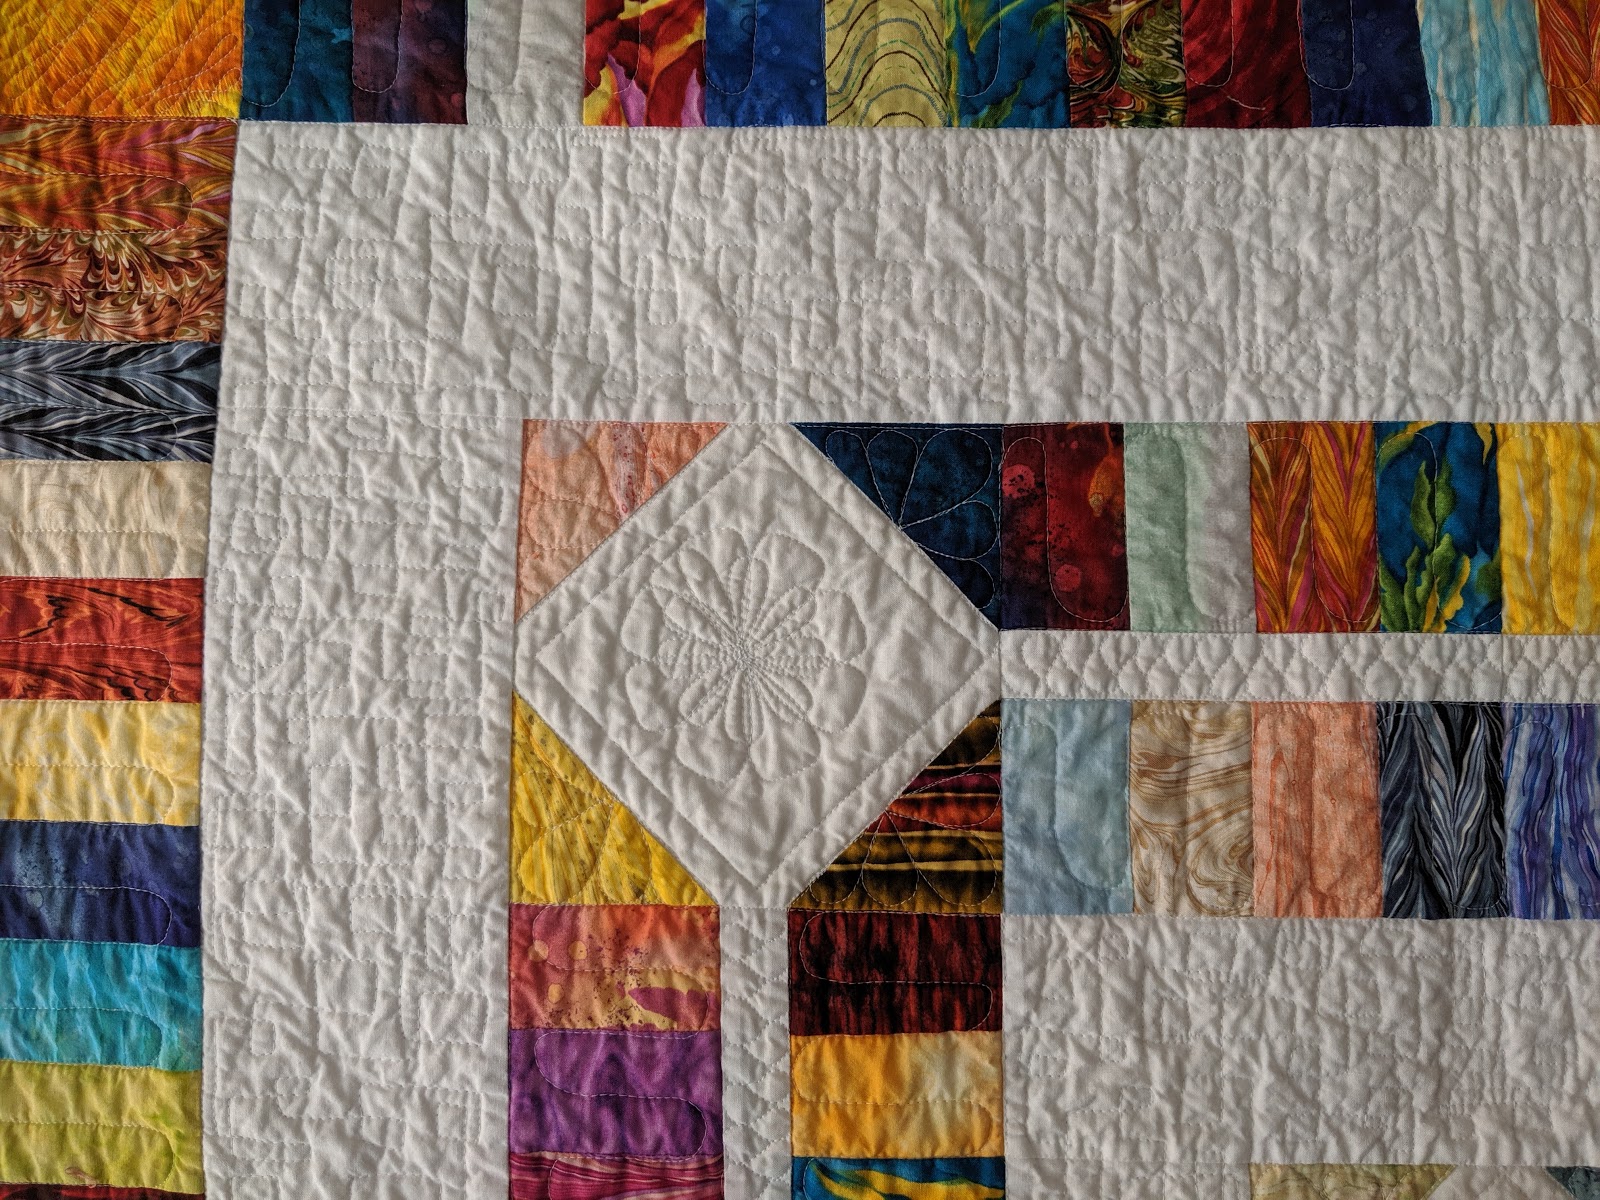
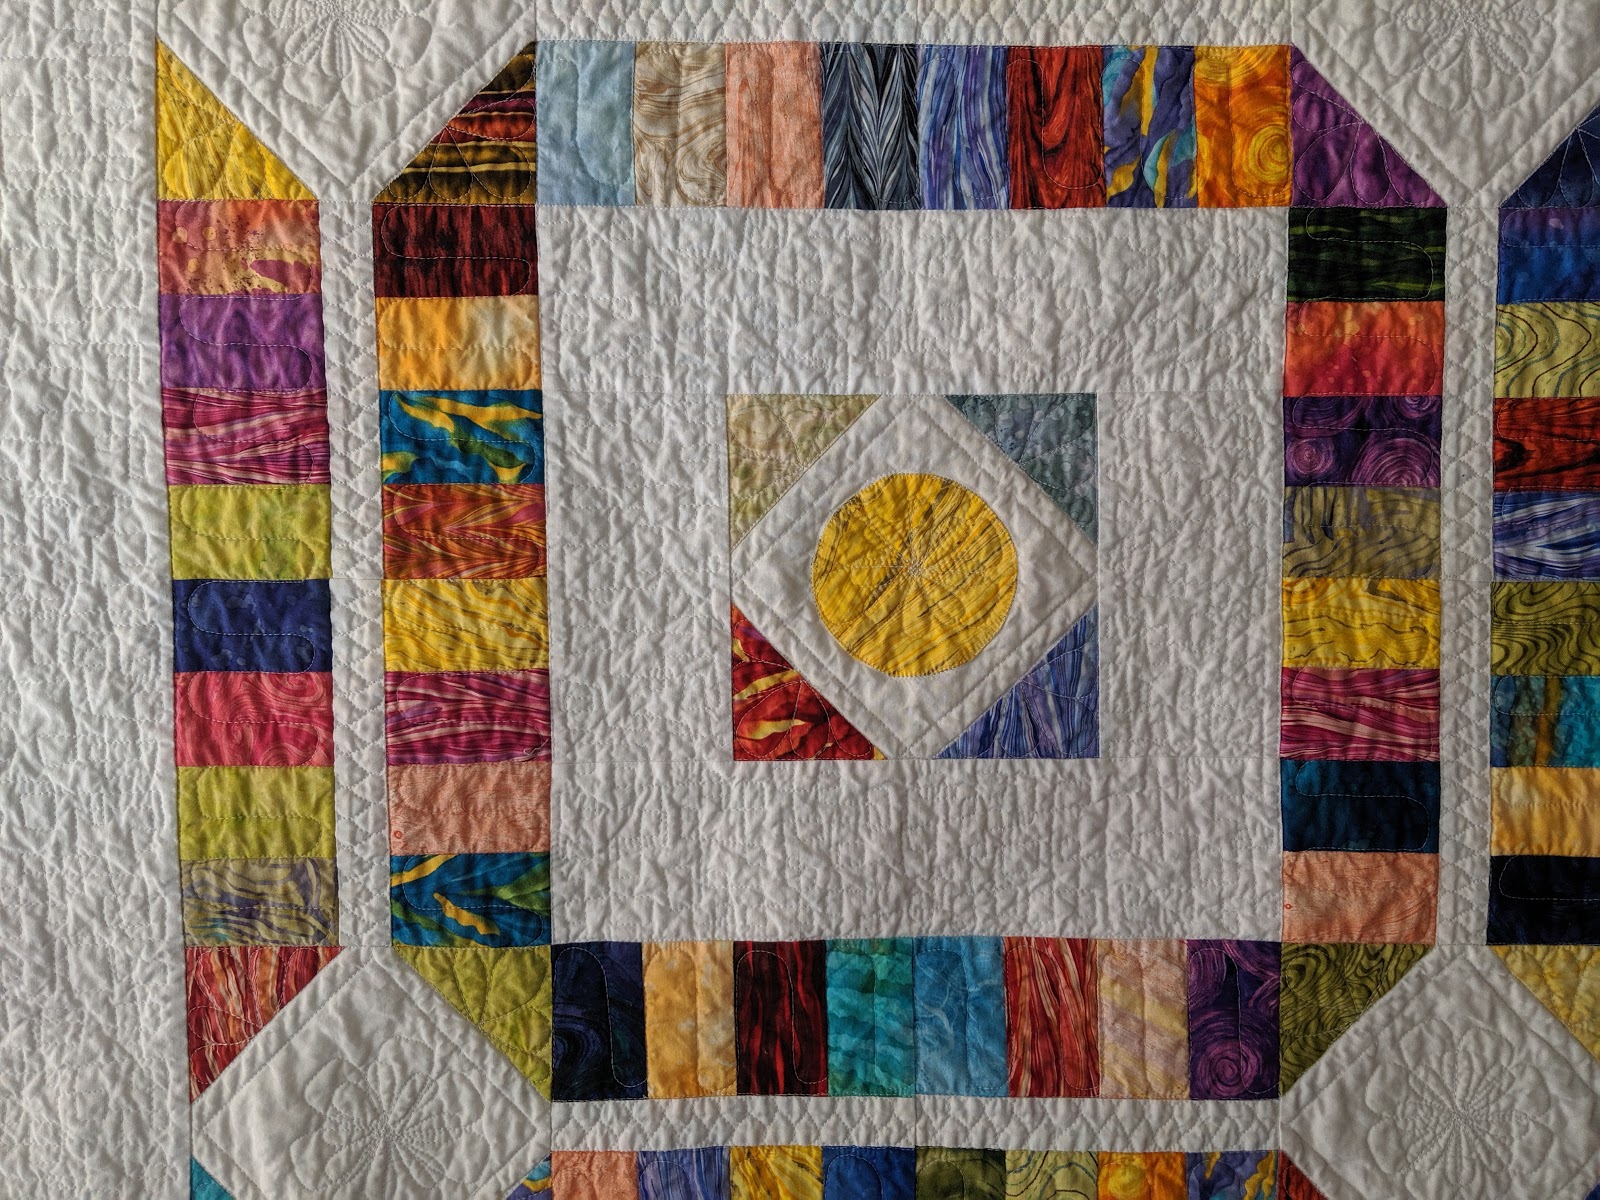
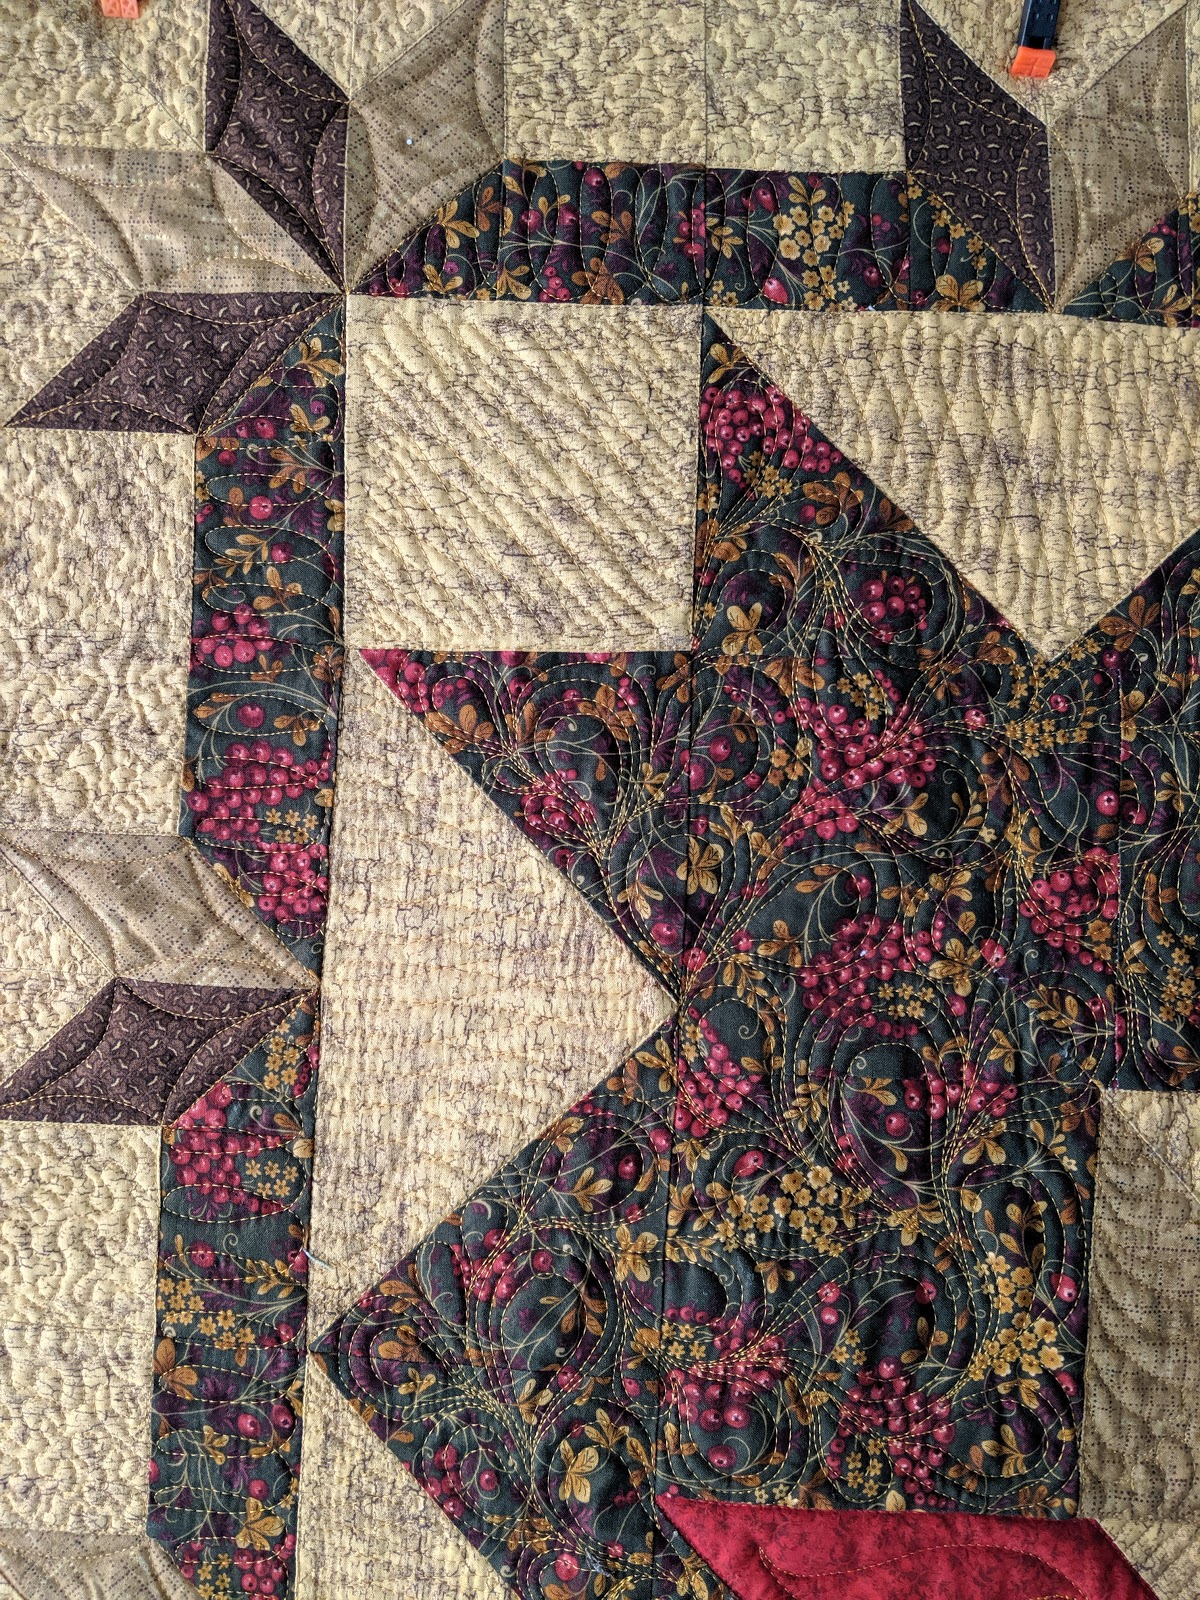
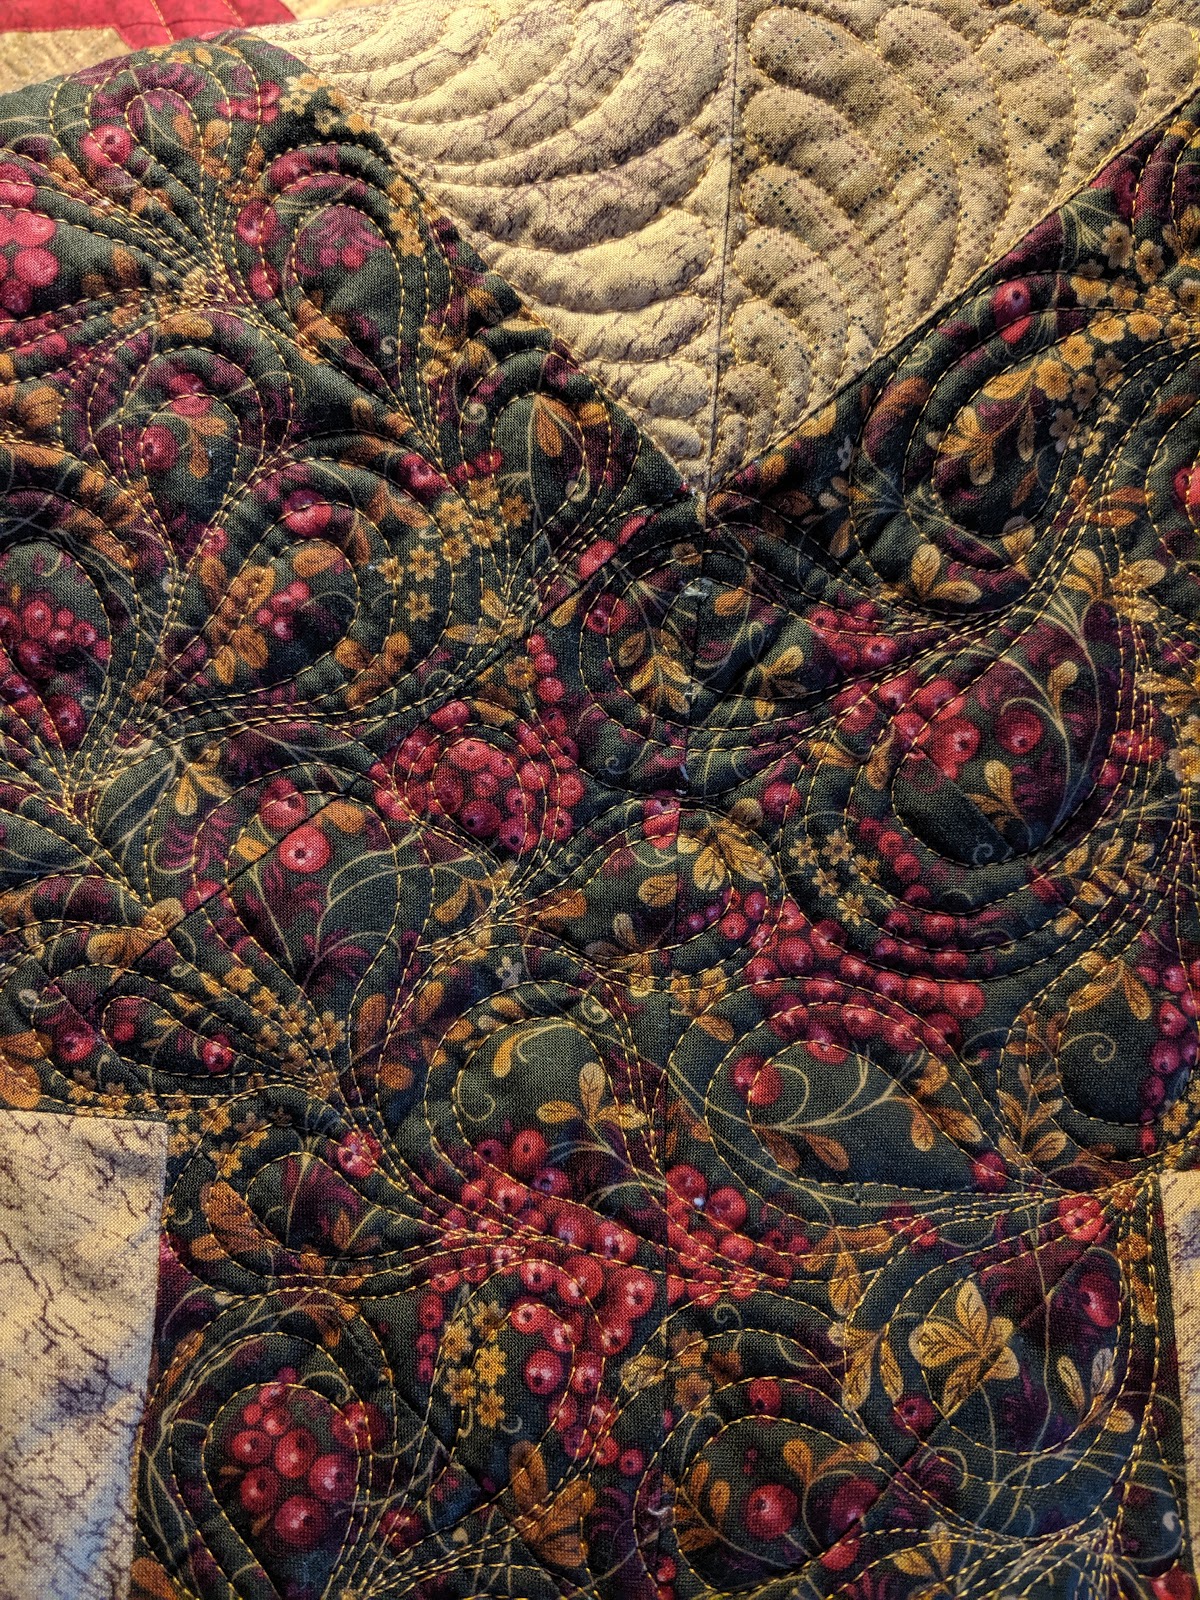
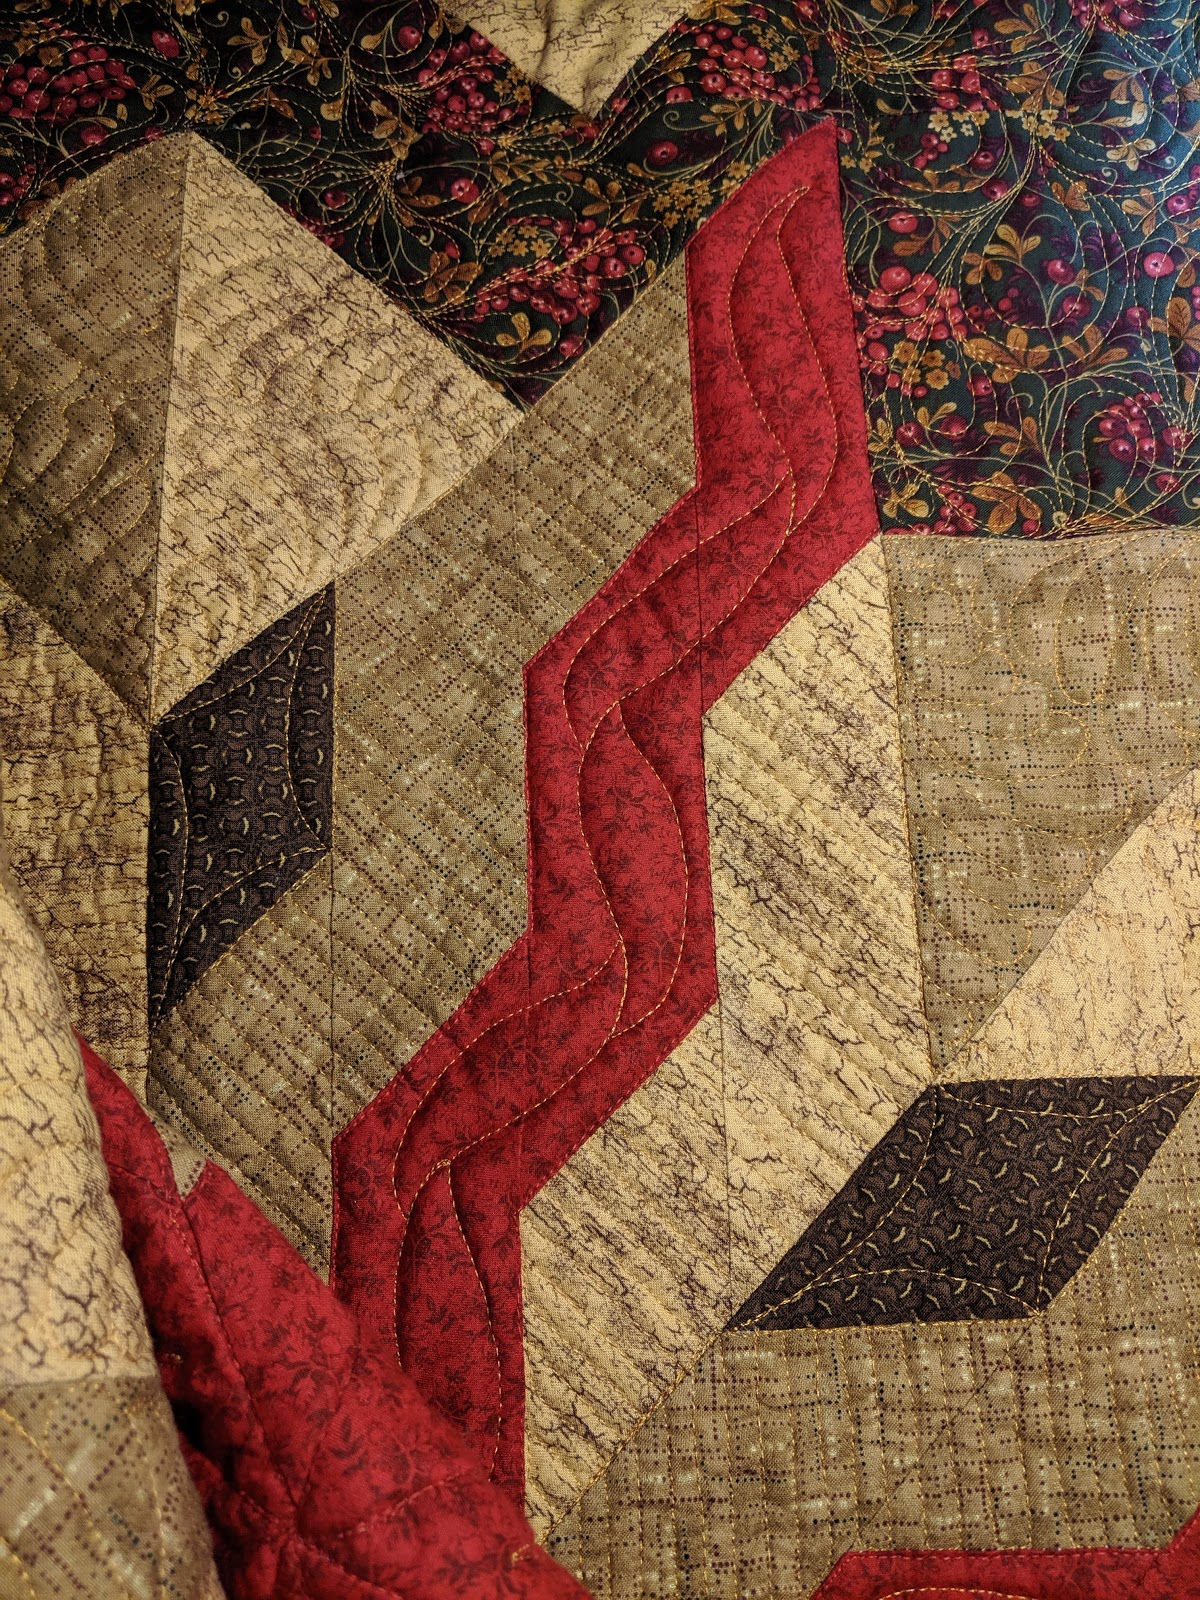
This quilt was a mystery quilt I tested the pattern for back in 2010 or 2011. Jessica JE Smith at the Quilt and Needle is the designer. I tested the quilt as a mystery and had no idea where color placement would be. I used fabric from my stash and am so happy with how it turned out. I finished to top way back when, but felt I didn't have the skills I wanted to use for quilting it.
Thanks to HollyAnne Knight's Free Motion Quilting Academy, I have the confidence to tackle just about any quilting project now. I'm over the moon with the results on this one. measures just under 60 x 60.
 |
| Phire's Radiance |
 |
| Phire's Radiance |
 |
| Phire's Radiance |
 |
| Phire's Radiance |
 |
| Phire's Radiance |
 |
| Phire's Radiance |
 |
| Phire's Radiance - Quilting in progress |
 |
| Phire's Radiance - marking the center section |
Subscribe to:
Posts (Atom)