Sunday, February 1, 2015

Sometimes the little finishes are the best...

So this week, I had the luxury of finishing up  some small blocks called "Wild and Goosey" that Bonnie Hunter had published in Quiltmaker magazine this last spring. (April/ May 2014)   The blocks are small at 3" finished,  and are paper pieced.  They are like potato chips... you can't make just one. 

I made some in scrappy mode....  all from little crumbs and scraps....  they turned out cute.... 


Then... I thought about a project I want to do for our guild.... a small quilt (under 24" square), that will go in our small quilt raffle.  I pulled out my scrap drawers and pulled scraps that  were purple and lime green.  This is the result.... it measures 9" square.  Still needs to be quilted and bound, but I don't need it until April. 


Who would ever think that these are pieces that many throw away?  Those little white areas are less than 1" square! 

If you want to make some of these adorable blocks, do a google search for "Wild and Goosey"  and you should be able to find the PDF of the downloadable pattern to print out. 

Then I have signed up for 4 blocks for a baby quilt.....  This is a Moda Bakeshop pattern called "Jungle Path".  It goes together quickly  and are 10" blocks.   These are ready to send out in the mail. 


I still need to make a couple of pinwheel blocks for another baby project, they need to go in the same envelope, so those are next on the line. 

I also finished the final 2 blocks of our Block of the Month project for Guild.  Being the chairperson, means you need to work ahead.  I had all the blocks done in October, but didn't take enough of a couple of  fabrics with me to retreat where I worked on them last.   It feels so Good to get those off my "to do List". 

I also finished the row I had of the 2015 Stitchin' Sisters Row Robin I'm participating in this year.  We all chose our own theme....  I mailed my starter row earlier in Jan.  My theme is "Winter".... my thoughts were around winter items "NOT CHRISTMAS"... so  snowmen, snowflakes, mittens, cocoa, birds, branches, etc.  I had snowflake fabrics from an internet exchange several years ago, and this seemed like the perfect way to put them to use.


The checkerboard is one of three "filler rows" I have made.  I sent it along to let everyone see the variety of blues I envision.  I will also add a pieced border using the same fabrics... piano key... or some other idea....  I want to use all my fabrics though. 


Vanessa's starter row arrived at my home last week, right on time.  Her theme is "Coffee and Cupcakes".  She sent a little fabric along with her row.   It didn't take this project very long to talk to me....  I made log cabin blocks in brown and tans. Appliqued a small cupcake from the fabric she sent in the middle of each block.  Then made 3 larger applique blocks with coffee cups on them.  These don't have to be mailed until after the 20th of February.. but I'm early for a change... That feels good too! 


Here are some of the individual blocks in close up.  They finish at 8".  We aren't attaching our rows, as most of us want to add extra filler rows to make our tops larger when we get them back later this year. 


While none of these is  a huge project... it sure is nice to clear them off the project table.  I'm wanting to put another top or two into the sandwich and quilt mode, so getting these little things done helps a bunch.  


Sunday, January 25, 2015

Stash Organization Tips - a tutorial


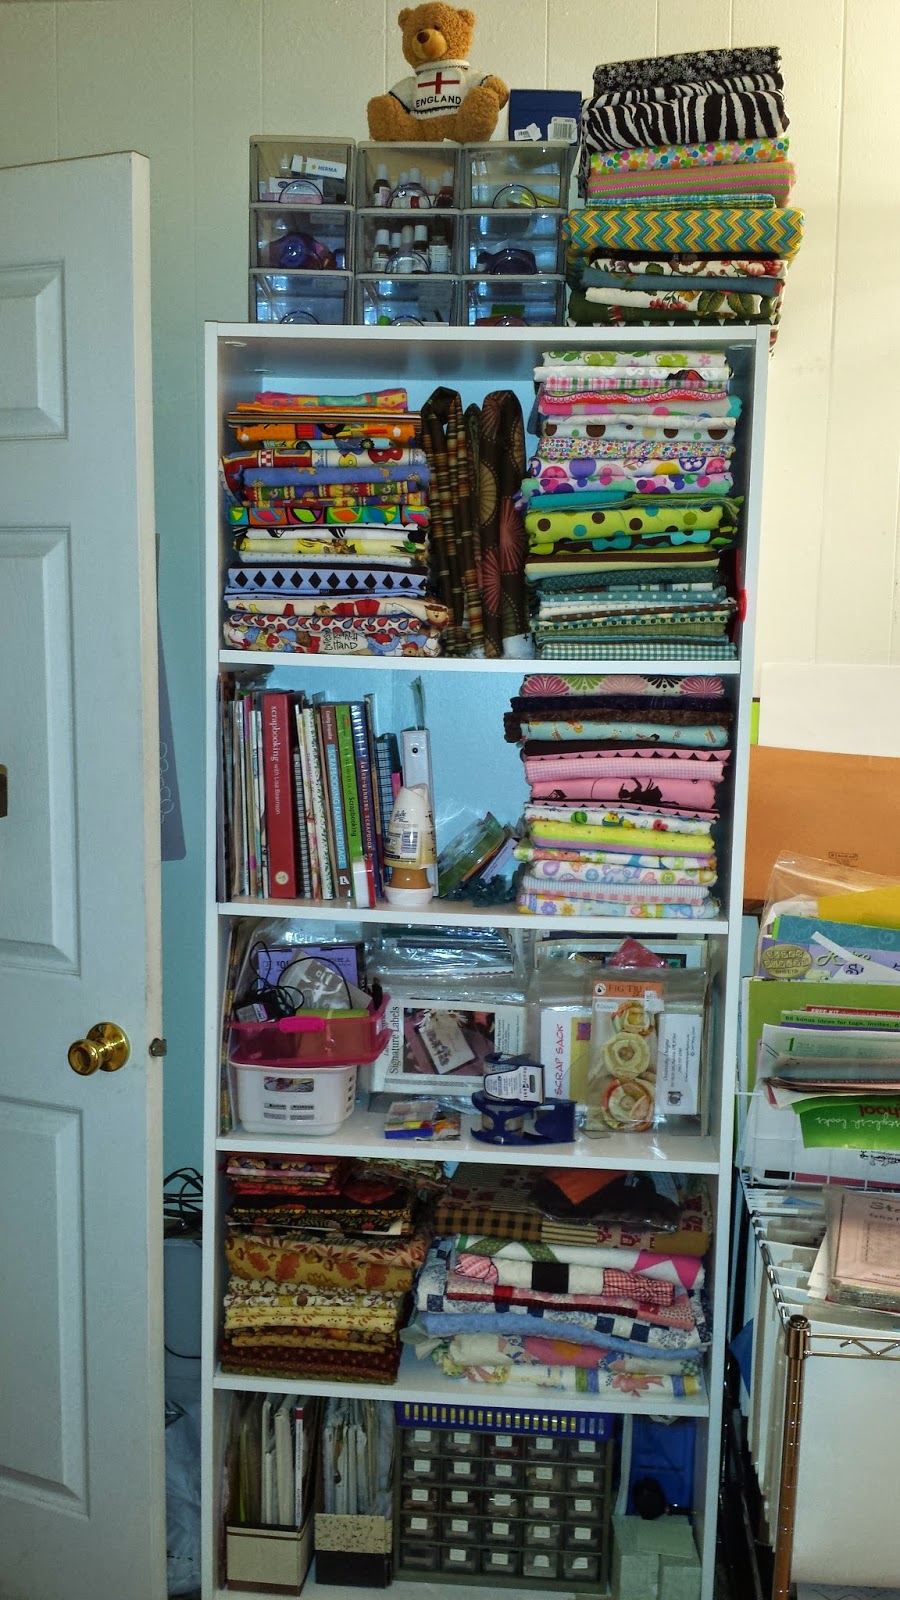
 If you can't see it, you won't use it!  

That's my motto!    I've tried cardboard boxes... even covered them to make them pretty....  I've tried large plastic totes..... I've tried plastic shoe boxes.....  But this is the system that works for me so far..... 


I use several types of storage containers and systems to organize myself.... depends on what it is I'm storing. 

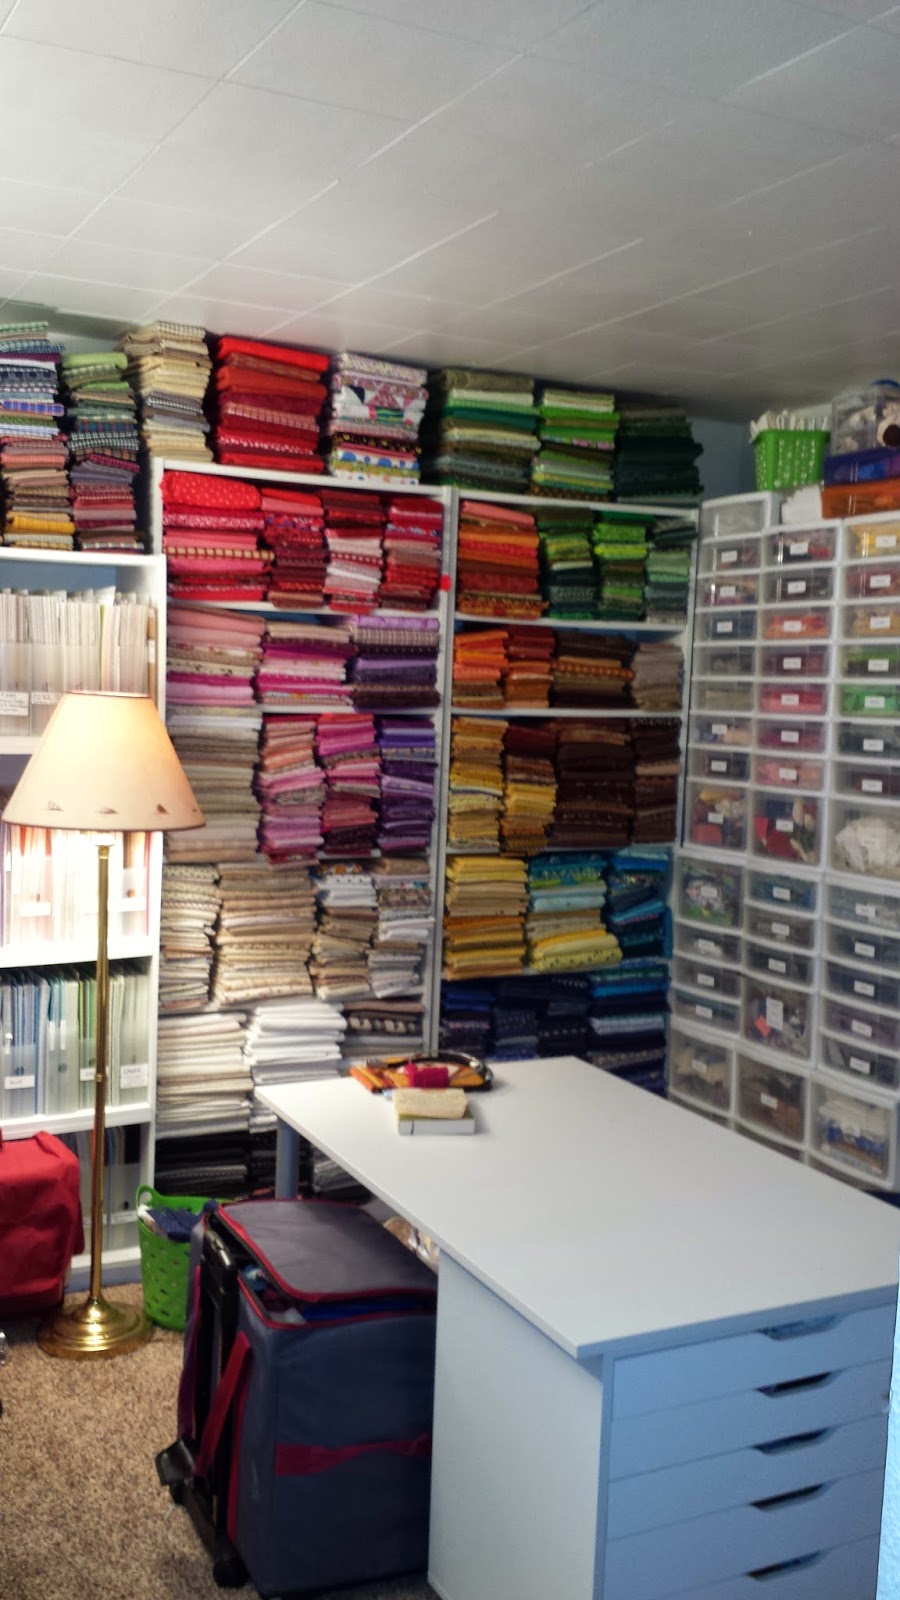
Large pieces of fabric...  1/4 yard  to 1 yard or more.... 

for a 1/4 - 1 yard piece, I fold it so that it is  4 or 5" by 1/4 WOF   
 for pieces over 1 yard, I fold it so that the piece is approx  9" x 1/4 WOF... 

They go on these IKEA Billy book shelves.  I have added more shelves.  


notice the two sizes of blue fabric stacked in this picture.  They fit on a 12" wide shelf nicely this way.  


I have not tried the comic book boards.... seems like $$$ I can use for fabric.... I can see what I have with this method. 

I sort generally by color group... however, I have my homespuns on the top of another shelf all together.... and I have the fabrics for children's quilts on a different shelf as well.  I also have a collection of leaf fabrics, and outdoor / woodland fabrics  that are each in a separate area. Flannels have their own spot too. 

Smaller pieces.... FQ or smaller, but larger than a 6" square. 

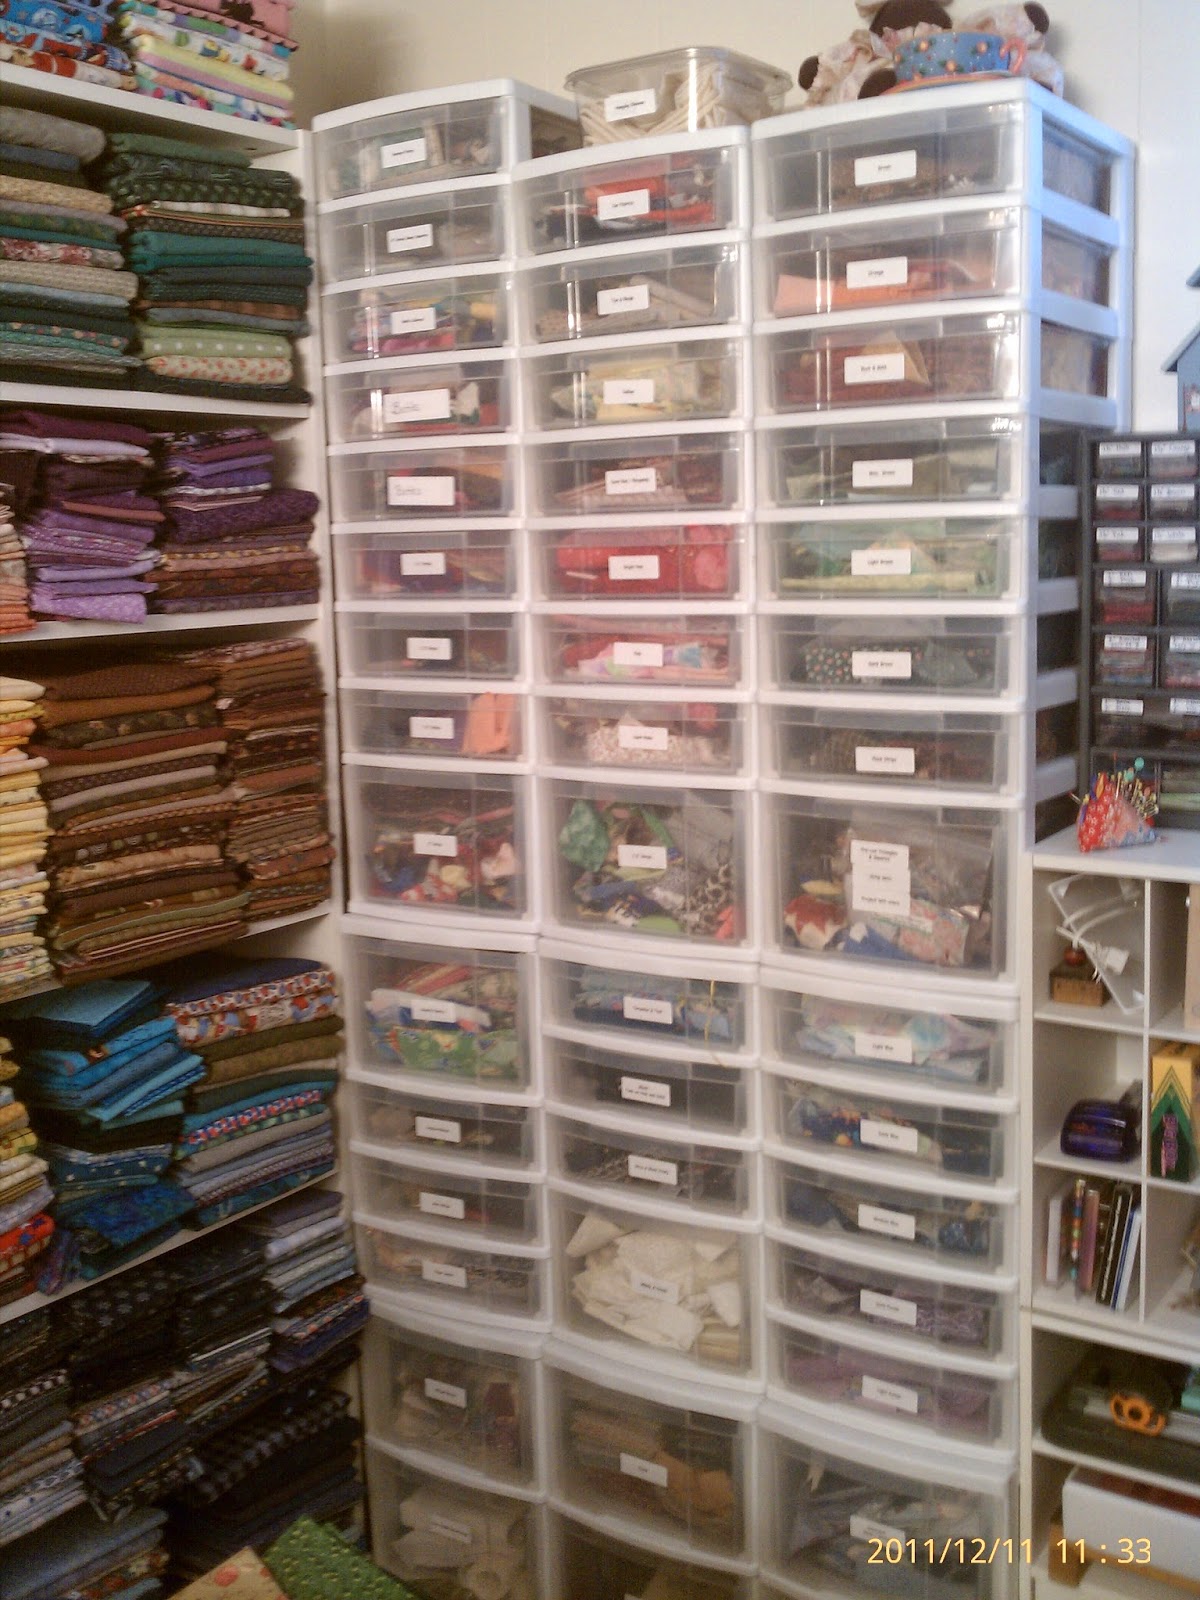
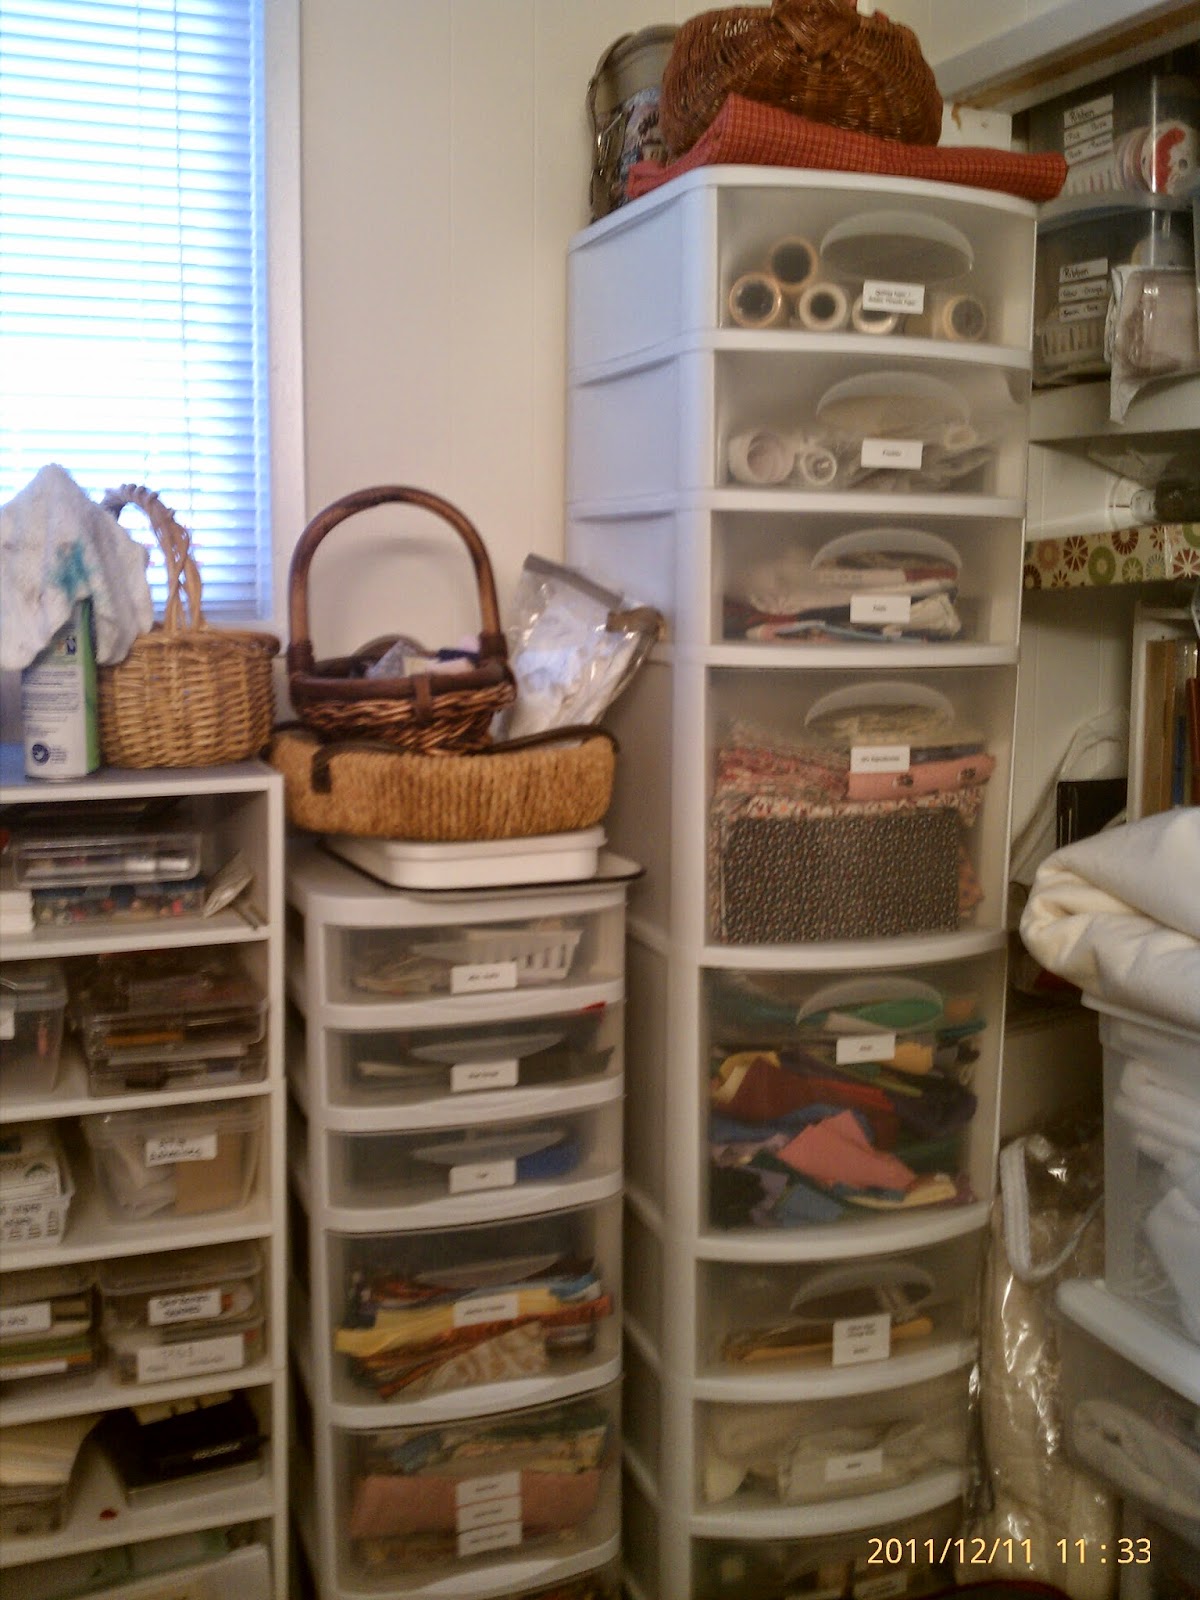
These pieces go into my drawer system... 
These were purchased over time at either Target, Walmart, or wherever I found them on sale.  These were in sets of 2 larger drawers and then 4 shallow drawers.  As you can see... I've rearranged them so that the deeper drawers are more at the bottom of the stacks... this is so I can pull the top drawers out without them being too heavy. I did not use the casters on these in this area.  

I'll post a list at the end of this tutorial of how I separate the fabric... but mostly they are by color, or size of strips.  

These are my three green drawers....  when one gets full,  I sort through it, and cut the smaller pieces, or the oldest pieces down into strips, squares, or bricks.... 

I usually cut out in the other room, so having these drawers makes it easy to pull the drawer out of the unit, and then put it back.  The clear shoeboxes got frustrating for me, trying to get a box out of the bottom of a stack.  I also like being able to open the drawer and stick a piece in. 

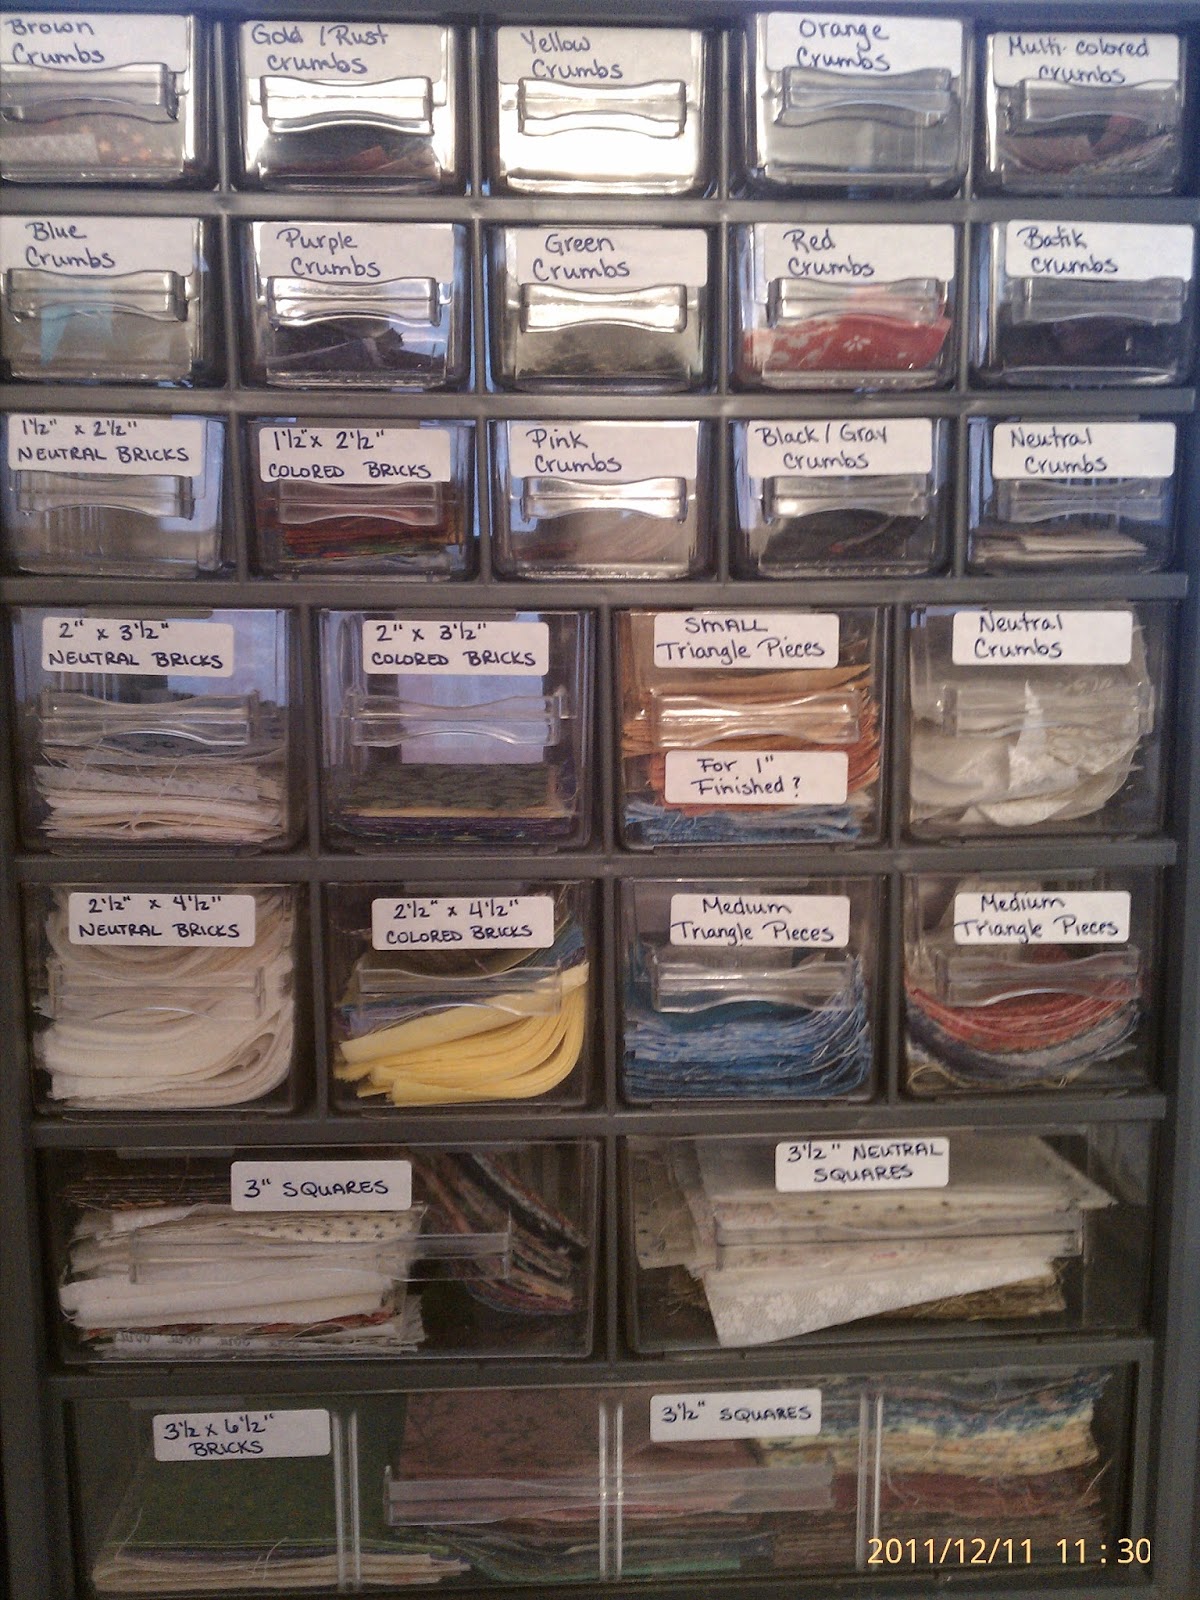
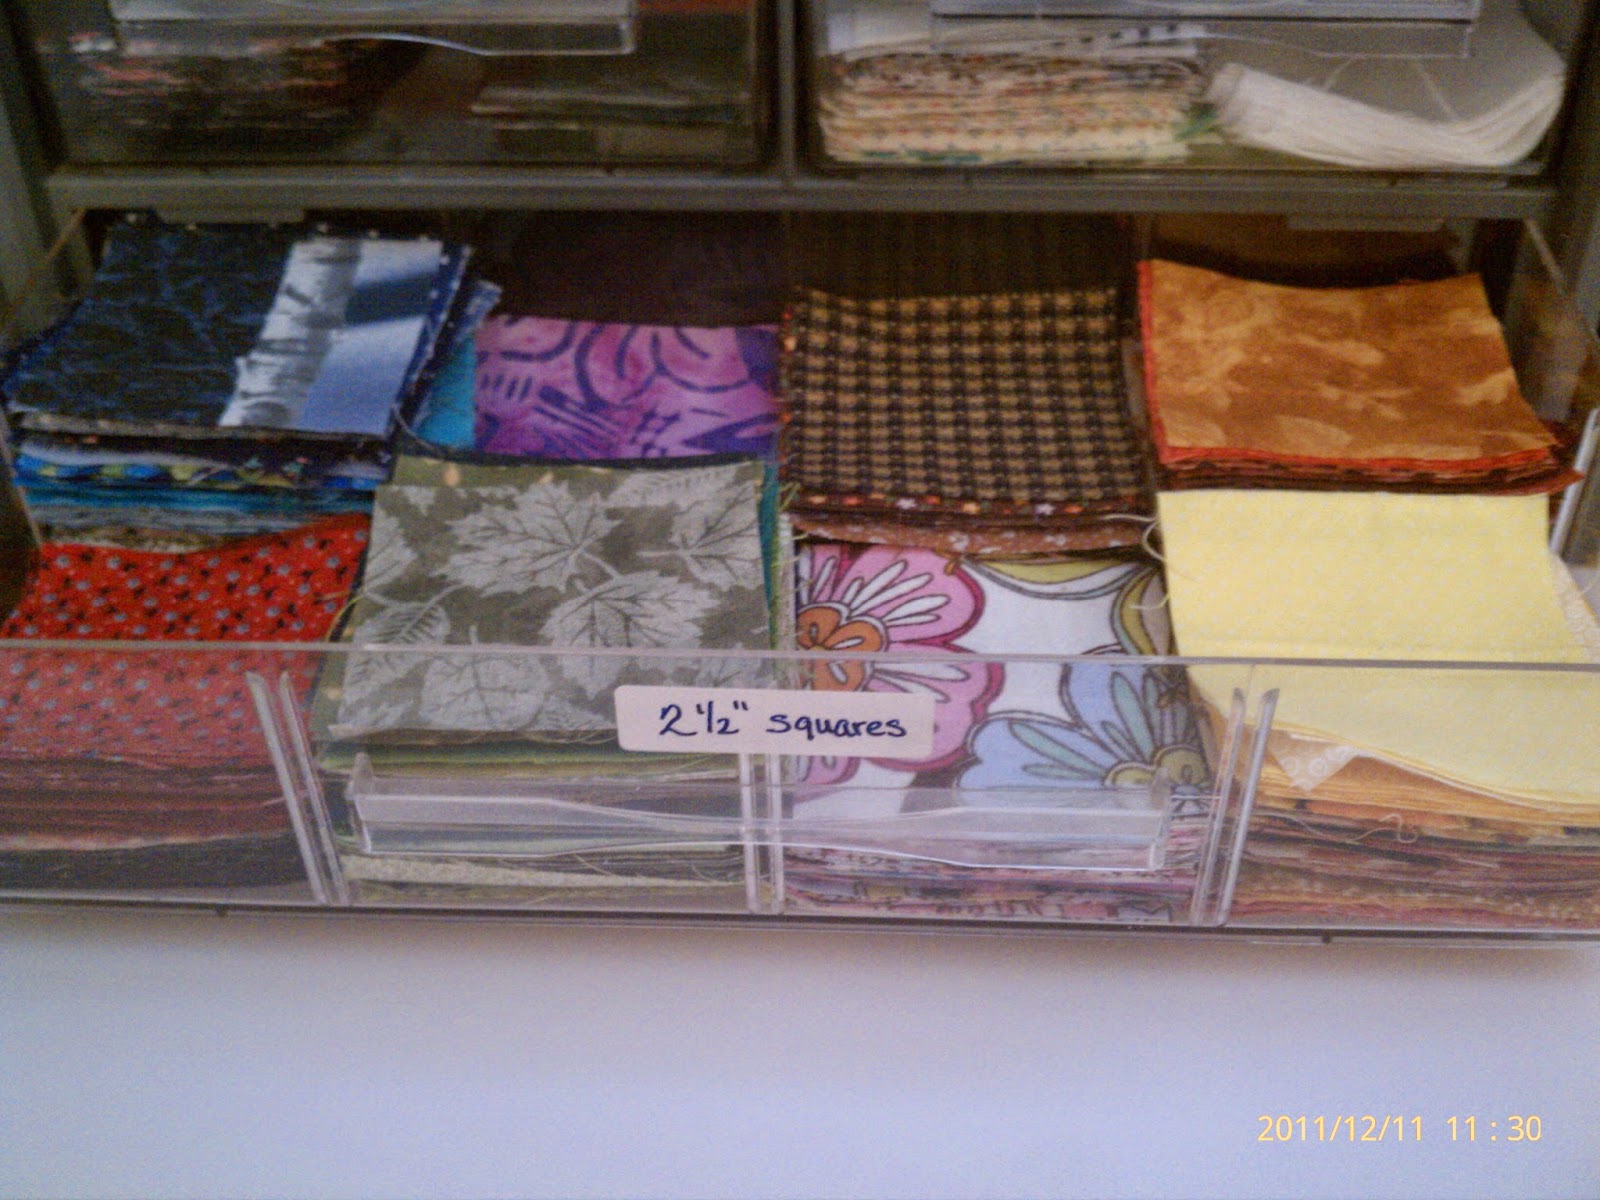
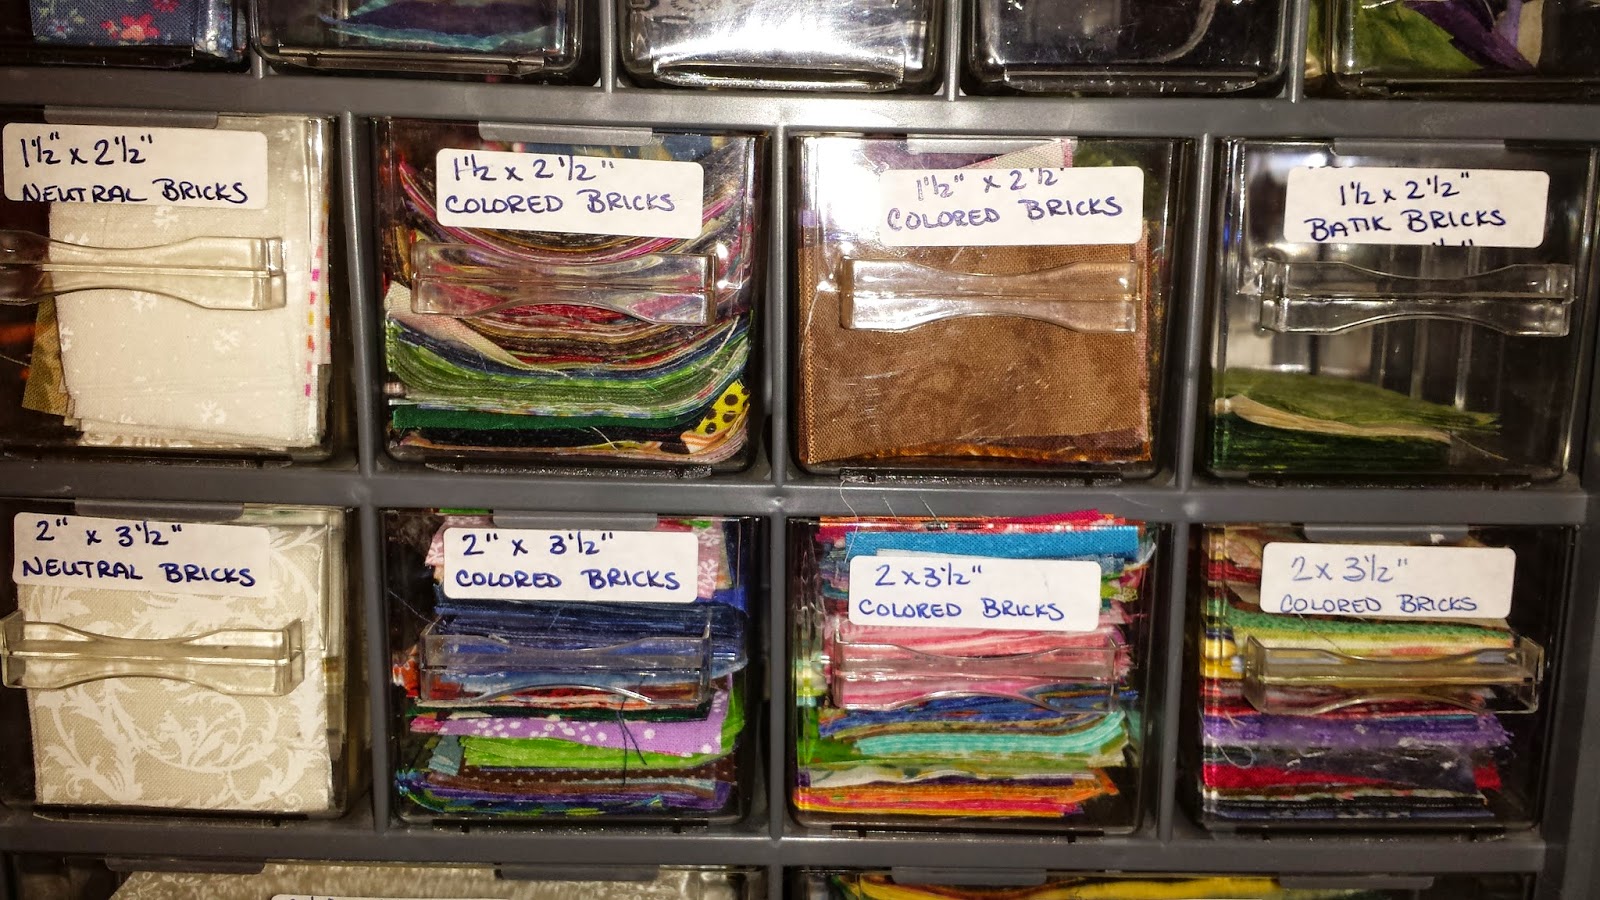
Smaller pieces.... squares, bricks, crumbs and triangles.... under 3" 

See the little unit to the right of the plastic stacking drawers?  ...Just behind the chicken pincusion on top of the shelving unit? 

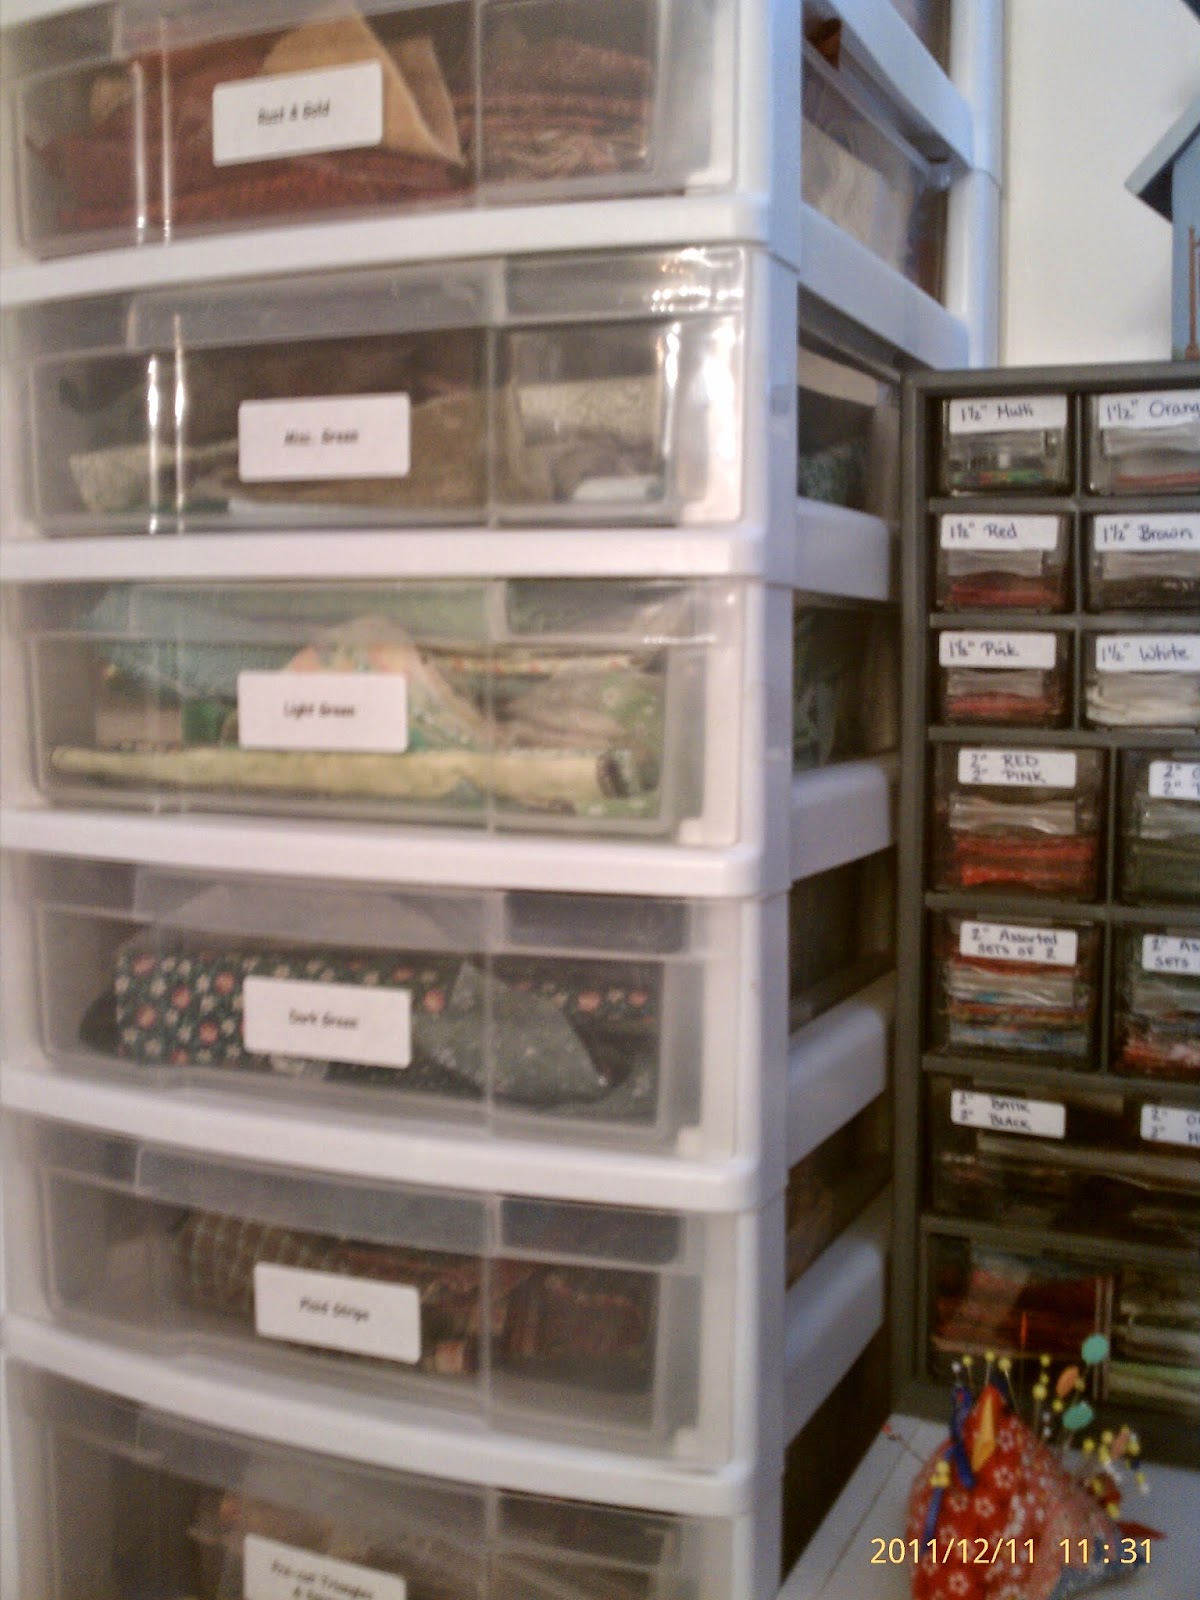
I found these small drawer units that are for holding small hardware.  Mine came from a swap meet, but Harbor freight has them, or you might try Lowes or Home depot.   The small drawers have little handles.... and the smallest size ones are 1 1/2" wide.... the medium size ones are about 2" wide, and the larger ones will hold 
 3 1/2" x 6 1/2" bricks.  


I have three of them....  and they work great! 


Small pieces.... squares, bricks, crumbs and triangles.... over 3-1/2" 

I also save 4" squares, 4 1/2" squares,  5" squares and 6 1/2" squares.  I simply cut the largest size square I can from a scrap when it gets to that point.  I can always cut it smaller if it's the perfect color, but I can't add to it, if you know what I mean....

When cutting with the easy angle ruler and companion angle ruler, if I have the leftover outside piece, I save those too, in... 1 1/2" 2 1/2", 3 1/2" strip size before cutting. 


The bright colored boxes on the right are from the Dollar Tree store.  I have these larger cuts stored in them.  

Special collections.... 

My  pieces of wool, 30's reproductions, civil war.... florals.... patriotic fabrics... solids.... batiks.... muslin... etc..  These are in a different  drawer set.  I purchased these first, and then couldn't find them again.... since they don't interact with the others... and are slightly larger, they work great for these thing.  I also have rolls of fusibles, and golden thread quilting paper in the top drawers.  
 

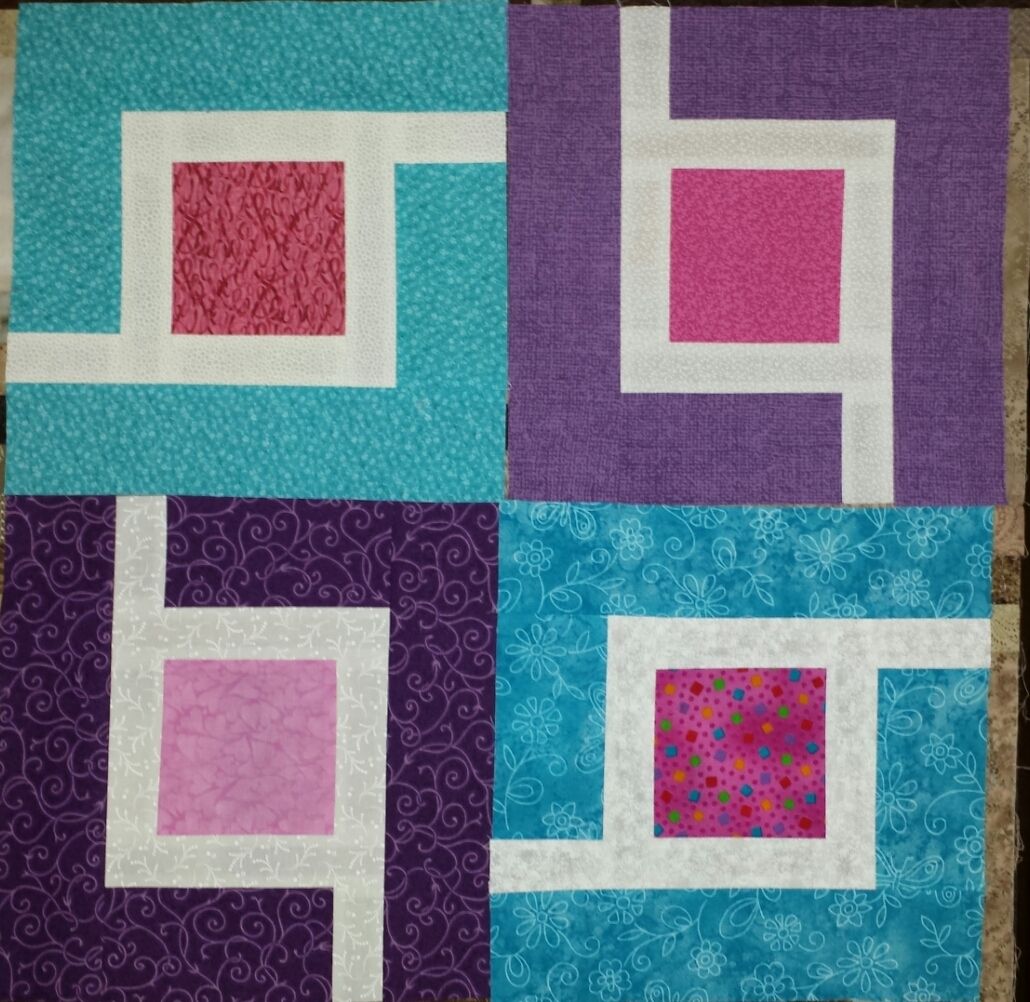
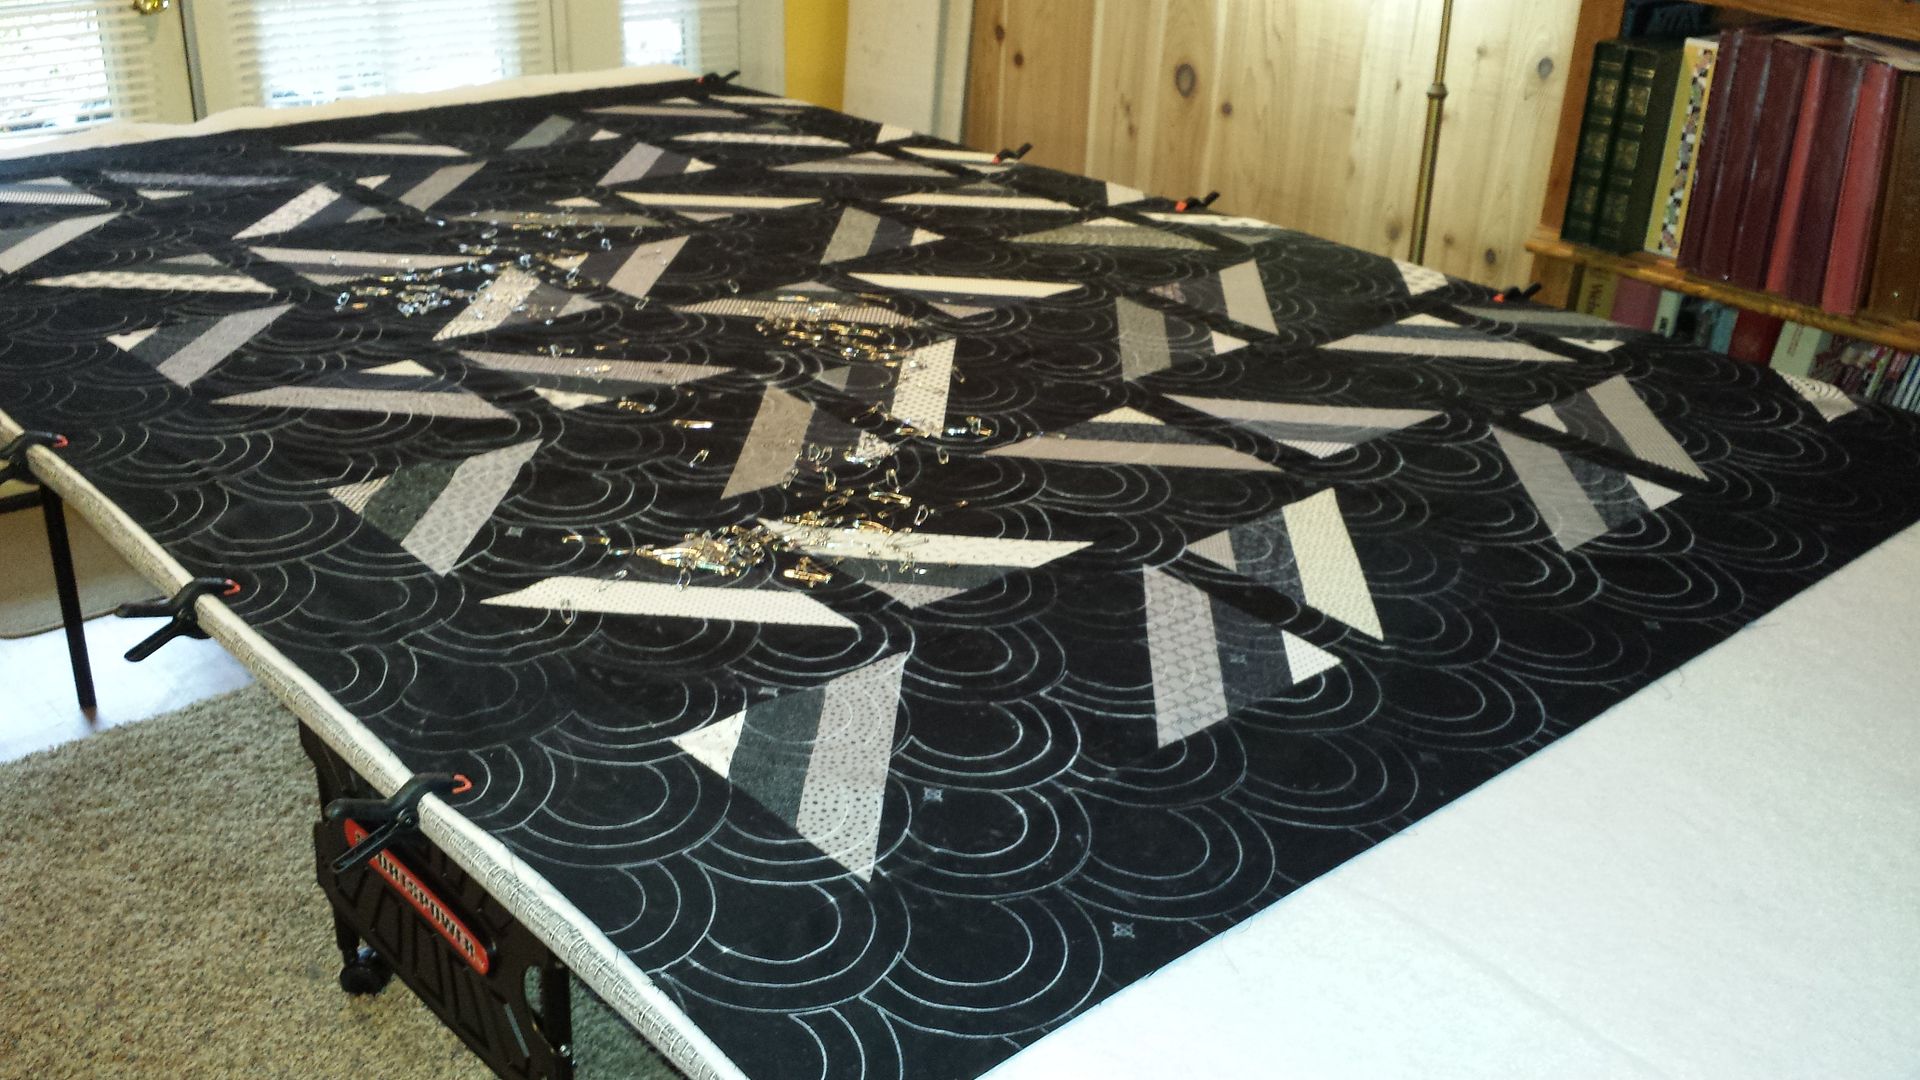
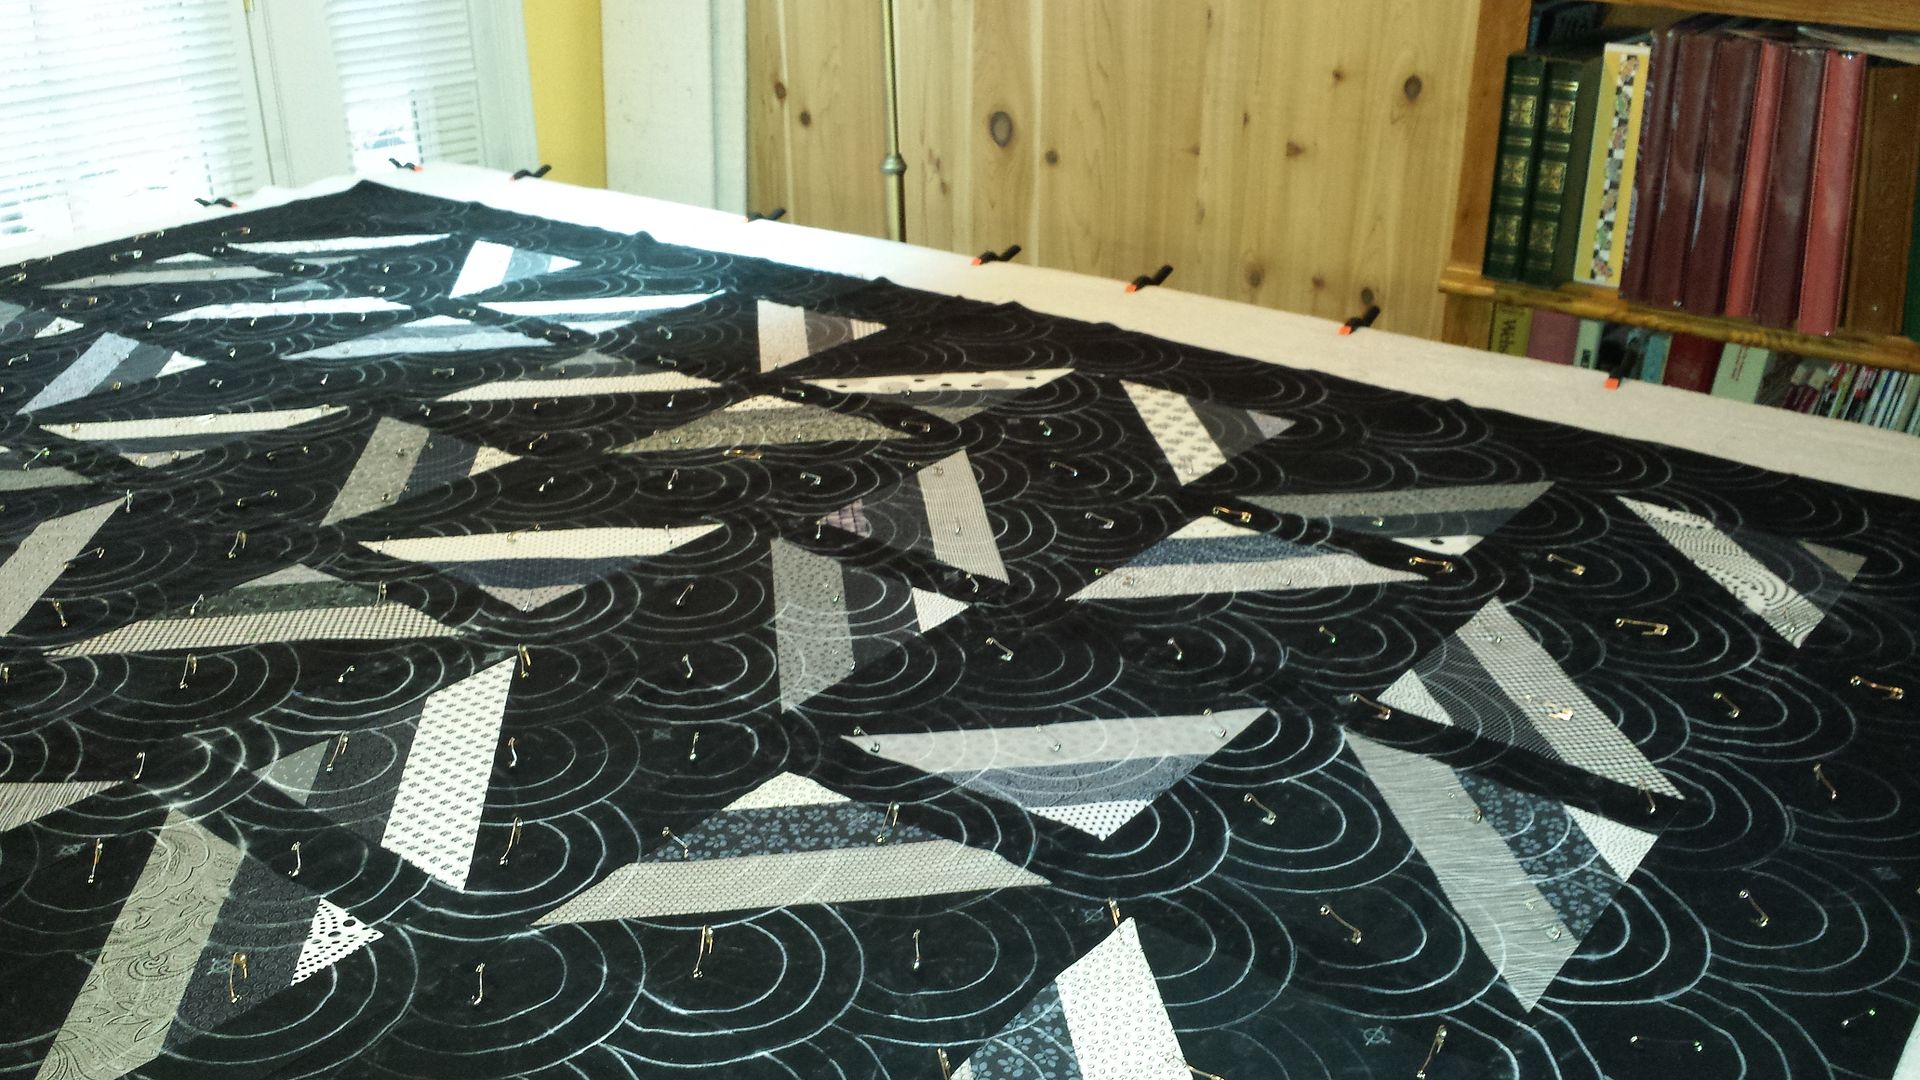
For projects under way.... and yes... there are lots of them!  

I love these stacker boxes that go on sale after Christmas... they hold 12" blocks....  and they stack easily w/o sliding around.  They have a handle for taking to class.  


I keep the yardage with the cut pieces until the top is done..... just in case I need to re-cut something or I change plans mid-stream. The pattern or instructions go with the project....  I make a photocopy of instructions that are in a book or magazine, so that I can use the original source for another project if I want to. 

The zippered bags that linens come in make super project bags.... I have several of those..... 

I also have some of these 12" boxes that come in a 6 pack at Costco.... but they aren't as deep, and with their curved edges, they tend to slide around a bit more. 


This pink box is one that I've set up for sorting small cuts while taming scraps.  When this gets full, I take it to the back room and put into the drawers.  
Out next to where I actually sew, is my drawer that has my strings.  Since this is where i cut, it made sense for me to have the string drawer close by.  


List of how I sorted what's in the drawers.... 

  • Whites and creams
  • blacks and grays
  • Black and white prints
  • dark blue, medium blue and light blue (3 separate drawers) 
  • turquoise and teal
  • orange 
  • golds and rusts
  • browns
  • tans
  •  yellow
  • dark green, light green and misc green(3 separate drawers) 
  • bright reds and dark reds/ maroon (2 separate drawers) 
  • light pinks and dark pinks (2 separate drawers) 
  • light purple and dark purple (2 separate drawers) 

  • 3" strips
  • 3 -1/2" strips
  • 2 - 1/2" strips 
  • 2" strips
  • 1 -1/2" strips
  • Bias strips  
  • Plaids
  • focus / novelty fabrics
  • vintage flour sacks
  • Christmas fabrics
  • Seasonal - not Christmas or winter
  • Winter / snowflakes fabrics
  • Orphan blocks
  • left over block components... mostly 1/2 square triangles 
  • Civil war repros (Fat Quarter size or smaller) 
  • Floral fabrics 
  • Solids
  • 30's 
  • wool
  • Batiks 
  • Batiks scraps
  • Patriotic prints
  • Panels
  • Border prints
  • Muslin

Scrap Saver System sizes: (Bonnie's system)

I cut into the sizes that are on Bonnie's blog... so the sizes I store in the little drawers are: 
  • 1 1/2" squares
  • 1 1/2" x 2 1/2" bricks
  • 2" squares
  • 2" x 3 1/2" bricks
  • 3" squares (not usually a Bonnie size, but I save them.)
  • 3 1/2" squares
  • 3 1/2" x 6 1/2" bricks 
  • crumbs 
  • Triangle pieces (these will all go away with wild and goosey! )
   

I do separate all these little sizes into colors, and into neutrals.... all colors go together.... neutrals go into a separate little drawer.   I know... I'm a little OCD..... As I cut them, I separate.. so it's not a big task, but it sure is easier to grab the neutrals to go with what ever else I'm using, than to dig through the entire stack. 

I hope you have enjoyed my storage tutorial.... 

STASH!!!!

I told myself I wasn't going to do anything else until I found the flat surfaces in my sewing and stash areas.....   The tables, dressers, floors... were stacked and then stacked some more....  I still have a couple of bins of scraps to tame.... but I can move and see what's  there.... 


This little table in the middle of the room was stacked about 3 feet high! 
I use this 10 x 10 room to store my fabric stash and my scrapbooking supplies... It is truly stacked floor to ceiling....  I don't think I can fit another fat quarter in here right now... 

I found some great buys at an estate sale, and two garage sales last fall.... large pieces that I can use for backing or borders,  and all was less than $3.00 a yard... some even less.   Not that I needed more fabric, but who can pass it up at that price, especially since I make so many donation quilts.  

I'm heavy on blues!  Quilt of Valor ideas floating in my brain.....  


Hope the fire marshall doesn't see this....   I think I'm covered in each color category, except for purples.....  I'm trying to limit my purchases to blenders, tonals, small textural prints that read as more solid.... to move the larger printed pieces through and into completed projects.  


This shelf has my leaf fabrics, a few small quilts, patterns, buttons, and fabrics for quilts for kids.... 

These are my "scrap drawers" for scraps that have been tamed... Looks like I need to find a project for small bricks....  these little drawers are full!  *except for the batik one..... it's looking sad and empty.... 
I am very blessed, my hubby lets me indulge when great buys come along..... 

Tuesday, January 20, 2015

Using a Ping Pong table for pin basting quilts - a tutorial

I've been wanting a ping pong table to use for my quilting for awhile now.....  I remember using our ping pong table as a teenager to layout  patterns and cut the garments I made in high school.   The large surface was wonderful! 

For Christmas, I got one!   It's fantastic!  and it was on sale for under $100.00.  My hubby and I also got the benefit of an afternoon of bonding as we put it together.  


It folds up against the wall like this when I'm not needing the 5' x 9' surface. 
Folded up against the wall  across from my machine area. 

If I need an area larger than my 22 x 36 cutting area just behind my machine.... I can open up half of it like this....
opened half way..... 5 feet wide and 4 1/2 feet deep front to back.  
I forgot to take a picture of just the table folded out and moved so I can slip around it on all sides, but here it is with a backing in process. I purchased some 1 1/2" clamps at Harbor Freight for  under a dollar each.  I think I bought 24 or 25 of them. 


Folded out all the way.  

I used the clamps to secure one edge of my backing on the near side of the table. It was not a full nine feet long, so I used painter's tape to help hold the end taught.  

On the back side, the backing drapes down the back side, but I used the clamps to help keep the backing nice and tight. 


This is the back side, where the excess backing is draped off the table.  I needed one more clamp to keep it all secure. 


Once the backing was clamped in place,  I spread out the batting, making sure to smooth out bumps and wrinkles. 


The batting is now all  smoothed out and clamped in place...  


I clamped it in place releasing one clamp at a time to keep the entire backing from slipping. 


Now it's time to lay the top out.  This top is one I already marked with an overall design using my new miracle chalk stencils that are really cool!  they work like a screen-print screen, but that's another tutorial, on another day.  

top smoothed out, clamped in place and ready for pinning
I started on the near side, using the straight table edges to keep my quilt top square.   

Again, I released clamps one at a time, and re-clamped the top down once I had it smoothed out where I wanted it. 

This is the back side, where the top draped off the edge. 
I pinned this quilt in the center of each of the rainbow clamshells to hold it tight and secure. 

 When I had finished pinning  the part that was on the table originally,  I lifted the tape on the backing on the one end.... removed the clamps all the way around..... and pulled the entire sandwich over so that the rest of the quilt  was on the table, with the  pinned edge now draped off the edge of the table. 

Notice how I used the edge of the table and the block seams to make sure the quilt is square all the way down... on this quilt, it just happened to land right at the edge of the table, but I could have measured from the edge over to the sashing seam if needed.


Make sure that you get all your layers pulled  smooth and tight, so that your backing is not wrinkled underneath.  Re clamp.  In this process, my backing and batting are clamped at this point, but the top is floating.  I used a couple of long flower pins to keep the edges straight until I could get them pinned down with the safety pins.  (I prefer the #2 curved pins... they are large enough to handle easily and the curve makes them easy to use.) 

You should be able to see where the row on the back side of this picture still has not been pinned.  This is after I've shifted it over on the table.  
As you work towards the last area, use rulers to make sure that you are still square and straight on your outer edges.   

This was so much easier than moving furniture, using t-pins into my carpet and spending 2 hours or more on my knees on the floor.    

So here is one of the best parts....  When it's re-folded up against the wall, I can use my clamps to hold a design wall that I can see from my machine as I work. 
  
My design wall is a Dritz cardboard cutting board covered with warm and natural batting.  it folds up and I can take it with me on retreats or to sew-ins.... it can lean against a wall, or  I can hang it from  those command hooks that don't damage walls.   I like being able to see the grid lines behind the batting.  I made 2 of these several years ago and they have held up really well. 

And... since this is all in our family room.... and I share the space with my hubby and those that come to visit....  when I'm not working with my design wall, I can clamp a finished top that is waiting for it's own sandwich up to admire while thinking of how it will get quilted!  

This top is waiting for quilting inspiration ... meanwhile I can admire it instead of just folding it up under the table. 

Who knows.... we may actually play ping pong on it sometime !  I did purchase some paddles and balls, but they haven't been opened yet. 

Starting the New Year out Right!

It's only the middle of the month... and I have two finishes!  
These are the two quilts for my sister and her new hubby.  (I know, the wedding was 3 weeks ago... but at least they are done before their 5th anniversary? right?) 


Windsong - complete
Print Fabric Detail 
Binding and quilting detail 


Reminder to myself.... Don't use a pink ceramic pencil on white for quilting design.....  I had to use Grandma's secret and a soft toothbrush with water to get those lines out after i quilted.... I wanted to make sure they were totally out before putting it in the washer.  

The new Miracle chalk template worked great on the solid black..... it came out with steam!  


Parallel Universe - complete 


Quilting Detail 


I'm also sending off this starter row for a new 2015 Row Robin I'm doing with some internet friends.....  my theme is "Winter".....   I'm also sending one of my 3 filler rows along with my starter row so that everyone can see the variety of blues I'm using in my piano key borders.  


 I'm a couple of days late getting this in the mail.... (should have gone out on the 15th)... but I had black thread in my machine with my free motion foot..... I had to wait until the quilting was done on the Parallel Universe quilt before I could stitch around my applique pieces. 

I know.. many of you may be saying... "What?  Starting another project?"... LOL  I'm hopeless!