Showing posts with label quilting. Show all posts

Saturday, December 24, 2016

One Spring Finish! Smith Mountain Morning


     Sew......  it is becoming increasingly clear to me that I can either quilt,  garden,  or blog.... it must be like trying to walk and chew gum at the same time.   

     End of February was my last post?  Really????? 

     I did spend a lot of time outdoors this summer, finishing a landscaping project from last year,  but that shouldn't really be an excuse, 

     I did finish one quilt between February and October,  it was my Smith Mountain Morning, that I started when Bonnie Hunter came to do workshops with our guild in 2014. 

     I completed the top in February and decided to get it quilted in time for our guild's show which was in May.    I can't remember now, the exact date,  but I would estimate it at mid April, because I know it was done before it was time to work on show layout tasks


Hanging in the show.... 
Block and Quilting Detail 
Border Details 


Bonnie Hunter and Myself at our workshop  May 2014

     This workshop was so worth taking a personal day off from work to attend!   Bonnie is such a wealth of tips and information, and not a pretentious  bone in her body!   

     I use this quilt daily as my chair quilt.  The bright colors make every day a bit more cheerful! 

.  

Sunday, February 1, 2015

Sometimes the little finishes are the best...

So this week, I had the luxury of finishing up  some small blocks called "Wild and Goosey" that Bonnie Hunter had published in Quiltmaker magazine this last spring. (April/ May 2014)   The blocks are small at 3" finished,  and are paper pieced.  They are like potato chips... you can't make just one. 

I made some in scrappy mode....  all from little crumbs and scraps....  they turned out cute.... 


Then... I thought about a project I want to do for our guild.... a small quilt (under 24" square), that will go in our small quilt raffle.  I pulled out my scrap drawers and pulled scraps that  were purple and lime green.  This is the result.... it measures 9" square.  Still needs to be quilted and bound, but I don't need it until April. 


Who would ever think that these are pieces that many throw away?  Those little white areas are less than 1" square! 

If you want to make some of these adorable blocks, do a google search for "Wild and Goosey"  and you should be able to find the PDF of the downloadable pattern to print out. 

Then I have signed up for 4 blocks for a baby quilt.....  This is a Moda Bakeshop pattern called "Jungle Path".  It goes together quickly  and are 10" blocks.   These are ready to send out in the mail. 


I still need to make a couple of pinwheel blocks for another baby project, they need to go in the same envelope, so those are next on the line. 

I also finished the final 2 blocks of our Block of the Month project for Guild.  Being the chairperson, means you need to work ahead.  I had all the blocks done in October, but didn't take enough of a couple of  fabrics with me to retreat where I worked on them last.   It feels so Good to get those off my "to do List". 

I also finished the row I had of the 2015 Stitchin' Sisters Row Robin I'm participating in this year.  We all chose our own theme....  I mailed my starter row earlier in Jan.  My theme is "Winter".... my thoughts were around winter items "NOT CHRISTMAS"... so  snowmen, snowflakes, mittens, cocoa, birds, branches, etc.  I had snowflake fabrics from an internet exchange several years ago, and this seemed like the perfect way to put them to use.


The checkerboard is one of three "filler rows" I have made.  I sent it along to let everyone see the variety of blues I envision.  I will also add a pieced border using the same fabrics... piano key... or some other idea....  I want to use all my fabrics though. 


Vanessa's starter row arrived at my home last week, right on time.  Her theme is "Coffee and Cupcakes".  She sent a little fabric along with her row.   It didn't take this project very long to talk to me....  I made log cabin blocks in brown and tans. Appliqued a small cupcake from the fabric she sent in the middle of each block.  Then made 3 larger applique blocks with coffee cups on them.  These don't have to be mailed until after the 20th of February.. but I'm early for a change... That feels good too! 


Here are some of the individual blocks in close up.  They finish at 8".  We aren't attaching our rows, as most of us want to add extra filler rows to make our tops larger when we get them back later this year. 


While none of these is  a huge project... it sure is nice to clear them off the project table.  I'm wanting to put another top or two into the sandwich and quilt mode, so getting these little things done helps a bunch.  


Tuesday, December 30, 2014

Saying Goodbye to 2014 and Hello to 2015

As I look back on my blog... I realize that I've been as faithful to regular postings to this, as I was with my diary as a teenager.....  I'd start.... and then nothing for ages..... 

I love the idea of a digital quilt diary.... it helps keep me motivated... and it also allows me to share with all my quilty friends.... 

I am currently working on two projects that I hope to have finished by the 10th of Jan.    My younger sister is getting married this week, after being a single mom for 14 years!  

I have chosen to make each of them a throw.... and she has chosen black, white and grays.....  I sent her some choices I had worked up in EQ last month.....  and she and her sweetie each quickly picked their favorites.  She's wanting  a modern feel to these, so I've chosen solid backgrounds.   

Von's quilt is "Parallel Universe"... I found the pattern at my local store, Fabric Depot.  The blocks went together really fast.... using the strip / tube method.  I was a bit afraid of the bias edges... but it lies really nice.   I guess the sashing helps to tame those edges... 

Here is a picture of it before the final borders.... (which still need the fabric pre-washed)... I ran short... and decided rather than cut the borders from 2 different pieces, I'd rather go buy more of the black.... so that all the borders are from the same piece.   


The prints were all from my stash.....  the original pattern called for the darkest prints (center strip) to be the same as the background... but I wanted a little more movement and variation... so I used my deepest gray prints and black prints in that spot..  I'm happy with it. 

Leann's  quilt is a pattern called "Windsong" by Jessica Smith at Thequiltandneedle.com
the large applique was a little scary at first..... I was so afraid of not being able to get the entire thing positioned in the right place, that after tracing the fusible, I backed out and simply traced it onto freezer paper and then hand basted it in place.   the attached picture is not the actual fabrics... it's my EQ  mock up.....  the actual quilt itself.. is under my machine... with about one more hour of quilting to go.....  


Why is it that when I decide to do something simple.. it doesn't work out that way?   I chose a simple 3" grid for quilting at a 45 degree angle.... turns out I don't have a flat surface in my home that is condusive to marking a quilt that is 70 x 80.....  my kitchen counters weren't cutting it.    

I went out and purchased a ping pong table to use.... (which I've been wanting to do for awhile now)..... we counted it as my Christmas gift! LOL    I spent as much time marking this quilt and fixing my initial mistakes as I have doing the actual quilting.    I forgot to factor in the color changes for my thread..... so I've had lots of threads to bury along the way as well.    I only have the lower right hand corner left..... about 1/6th or less.... and then I think I'm going to do a free motion stitch through the applique to help hold it down better in the middle so it doesn''t want to shift since I didn't use fusible.  

I'm anxious to get it done, and then I'll post pictures.   I'm a little afraid of getting rid of all the lines I drew with my ceramic pencil....  


Saturday, May 5, 2012

April Finish

Here is my April UFO progress!  Another finish!  I played with my new curved ruler set that I bought at our quilt show to get the curved cross hatching.  I definitely need to practice more.... but that's the story of my life.  For those of you who are just starting to follow, this was a bonus quilt from my "Roll Roll Cotton Boll" quilt that was Bonnie Hunter's 2010-2011 Mystery. 
I don't know where this quilt will go yet.... it's a small lap / crib size quilt.  


This little sunflower template seemed perfect for the alternate blocks.....


Sunday, April 1, 2012

Annual Quilt Show

Well,  it's been a long week,  but our quilt show is officially over for another year!   It always feels good to have this behind us.   I was in charge of where the quilts were laid out.  Set up day was Wed.... and it was a long one.... We got started early... before 8 am... and it was right at 8 pm when I finally climbed into the truck to head home.... 32,000 steps on my pedometer later. 

Over 200 wonderful quilts and wearable art items plus lots of fabulous vendors... I purchased two extension tables to extend my quilting surface,  and some rulers for free motion ruler work.   I tried to keep my fabric purchases to a minimum,  but came home with about 10 yards of fabric.

Our show is a peoples choice show... and visitors our first 2 days choose their favorites in several categories.....  then the ribbons go up for the 3rd day.  

This is our Peoples choice... the most votes of all quilts.... First place for piecing... and first place for hand guide long arm quilting... plus the show chairmans' favorite.....  This gal deserved them all.   She saw a picture of this quilt which was about 3"..... and replicated it without a pattern to go by!   There are heat set zwarovsky crystals on the points and centers.....  As if the workmanship wasn't enough... this young woman made this quilt while her huband was dying of brain cancer..... it was her solice during a very dark time in her life.   Hearing her story brought you to tears....  She has titled her quilt... "He Calms My Raging Soul".


Thursday, March 8, 2012

It's a wrap! My Dresden Plate quilt is finished!

Finally!  I got this quilt finished.   It was my February UFO quilt... and I got it finished on the 5th of March... so not too bad....


If you haven't heard (or read) the story.... I purchased the antique rings in 1999.  I then hand appliqued them with a needle turn technique to some muslin.  (this process took me a little over  a year of on again, off again handwork.)  

Then I needed a setting for 11 blocks.   A weird number..... but I did not want to make a 12th block. 

The setting I used was in an old quilt magazine, (can't remember the name, or the date) from the mid to late 80's.  I photocopied the pages I would need,  and purchased the blue fabric.   The original pattern had 4 dresden plates in the four corners, and then a scalloped border on four sides to make it a double size.   I had orignally planned on just using the solid blue for the corners, and leaving the scallops off, to make a twin size quilt.   

As I got around to piecing the top together 3 years ago.... I miscut the corners, (imagine that after 10 years, I had misplaced some of the pages).   And to make matters worse,  I did not have enough fabric to fix the situation.  I chose the scrappy block for the corners, and made 4 of them using my reproduction 30's.   (I felt that new dresden plates would look too new).   

The new corners I made with those blocks, were also not the right size, and I had a top that would not lay flat.  

Fast forward to now,  and by adding a "coping strip" to the corners,  I was able to get the top to lay nice and flat. 

Since I really wanted this quilt to have a vintage feeling to it,  I decided to quilt it with a grid.   This will be a quilt that will stay in my personal quilt collection.   I don't have plans to give it to anyone anytime soon.    

Sunday, January 8, 2012

Stash report week 2

ok.... I fell off the wagon for sure this week... but as I mentioned last week, I can't resist a good deal.....
A local craft store is having their annual  flat fold sale this month.....
How does a girl resist fabrics at $3.99 a yard.... or $3.00 a yard... or even $2.00 a yard?  
I can't... I know that.... I tried... believe me... I really did try....


The sale wasn't supposed to start until Wednesday.   But on my way to get groceries, I decided to stop in to see what they had.... and they had started the sale early... no one was in the store... I had access to 2 wonderful clerks to cut my fabric for me.... and I went way overboard.....


Believe it or not... this is 102.5 yards of fabric... all stacked up on the counter so I can pay for it.....
My bill totalled $317.44 !!!!   So I really did stick to fabrics that were a bargain...


These are name brands... PB textiles,  Red Rooster, Hoffman, Robert Kaufman, Timeless Treasures, SouthSea Imports, Michael Miller, etc.  


I got all 10 yards of that yellow with the lime green, turquoise, and brown dots.... It will make great backing and borders.     There are 3 yards in that piece with the wild peace signs... it will be great for a teen or youth quilt... borders... I'm thinking.  


See the multi-colored dots in the center stack... about 2/3 from the top???  There are 8 yards of that between the 2 pieces.... should work for backing on several little quilts. 


I did manage to come home with some tone on tones and blenders....


Now... the sale runs all month.. and they'll get several shipments of new fabrics.. so I may have to go back.... but meanwhile... I need to get these washed and worked into the fabric wall in my stash room.... maybe I'll make a list of colors I could use more of before I go back.... LOL .

Used this Week: 1.5 yards
Used year to Date: 1.5 yards

Added this Week:  102.5
Added year to Date:  102.5
Net used for 2012: -101.00


Thread spools at start of 2012-           294
Thread spools emptied year to date:       7
Thread spools remaining -                   287


.

Sunday, December 12, 2010

Diamonds in the sky....a lesson on color value....

     I love doing mystery quilts....if I count up how many I have done over the years, it is at least a dozen! 
      Last weekend, I participated in the Dec. Mystery celebrating the 3rd Anniversay of the Quilt and Needle.com   Jess Smith has once again found an interesting way to keep us in suspense while building components for a quilt in 3 size options.  The pattern will soon be available on Jess' website store. Way to go Jess!   I have been a pattern tester for Jess on some of her mysteries... she asks a few people to pre-stitch the week prior to the actual weekend, to help troubleshoot any difficulties.
      During the actual mystery weekend,  participants pay for the pattern, and she sends it to us via email in installments during the mystery.  Pictures get posted, and we all share ideas and thoughts on color choices,  stitching techniques etc.  on a forum thread just for that purpose. 
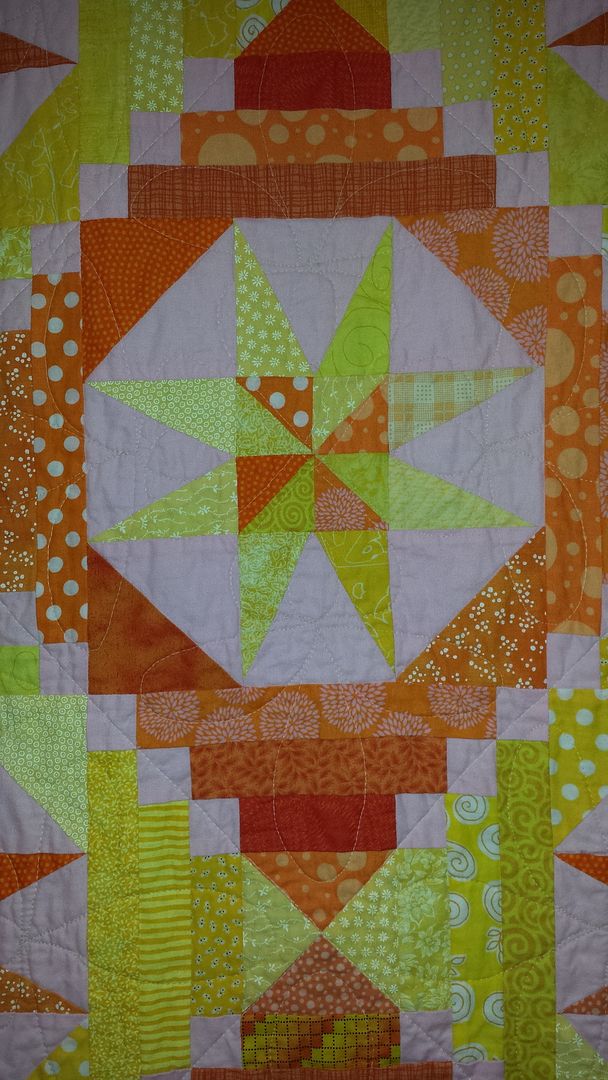
     I try to use as much of my stash as possible on mystery quilts....

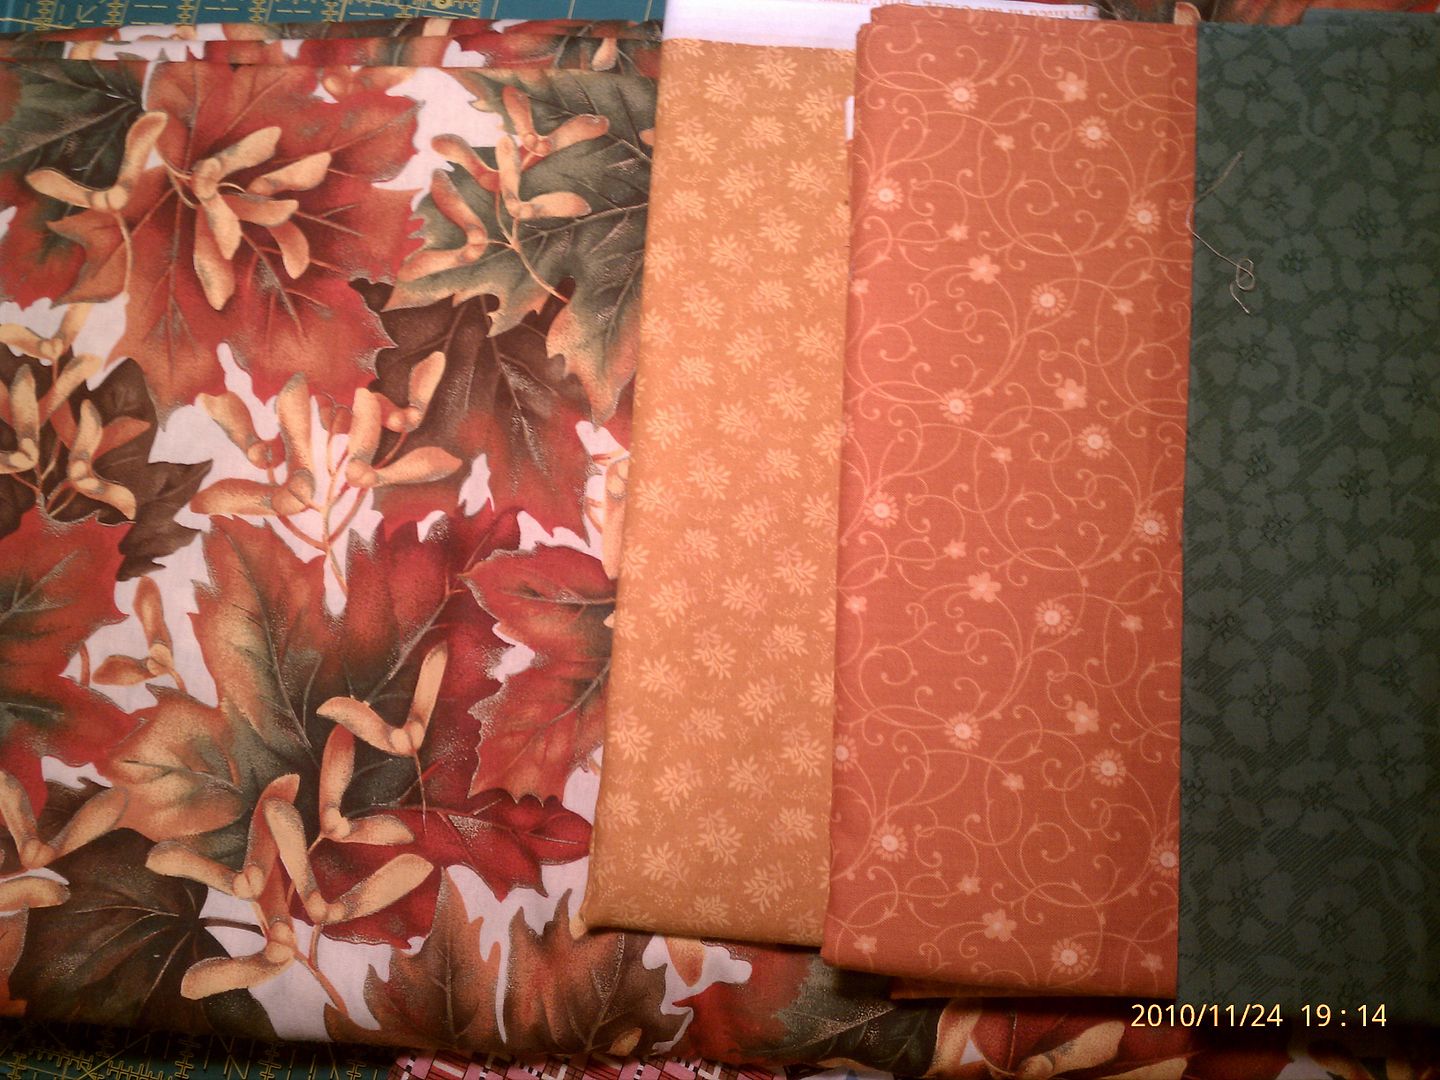
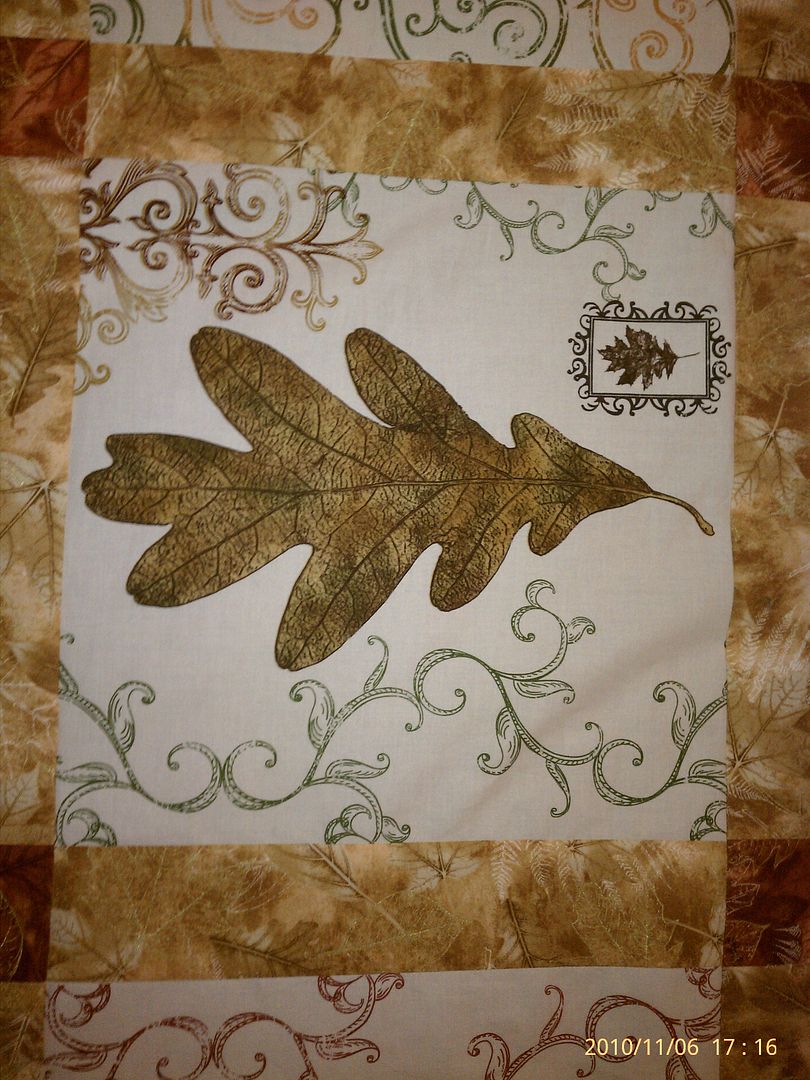
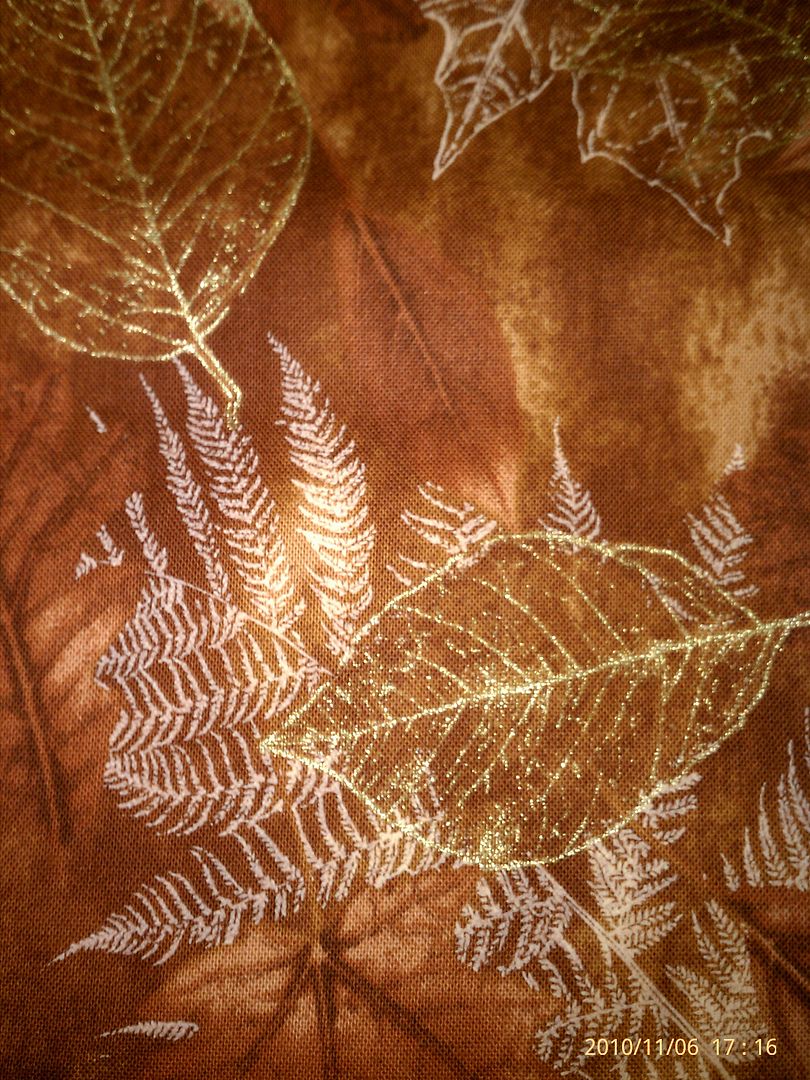
     I had a 5+ yard piece of 57" wide autumn leaves in my stash that has been raising it's hand to ge used in a quilt.... I thought I could make it work...... it was going to be close. ... here are my fabric choices before I started cutting.... (The cutting chart called for 7 yards of 40"... I did the calculations.... should work....

        I had a tiny pile of the leaf fabric left after cutting.... (I'm making the 100 x 100 size).  I'll have to add an additional border for our king size bed with deep 14" mattress).  Yeah!  I cut all the pieces!  
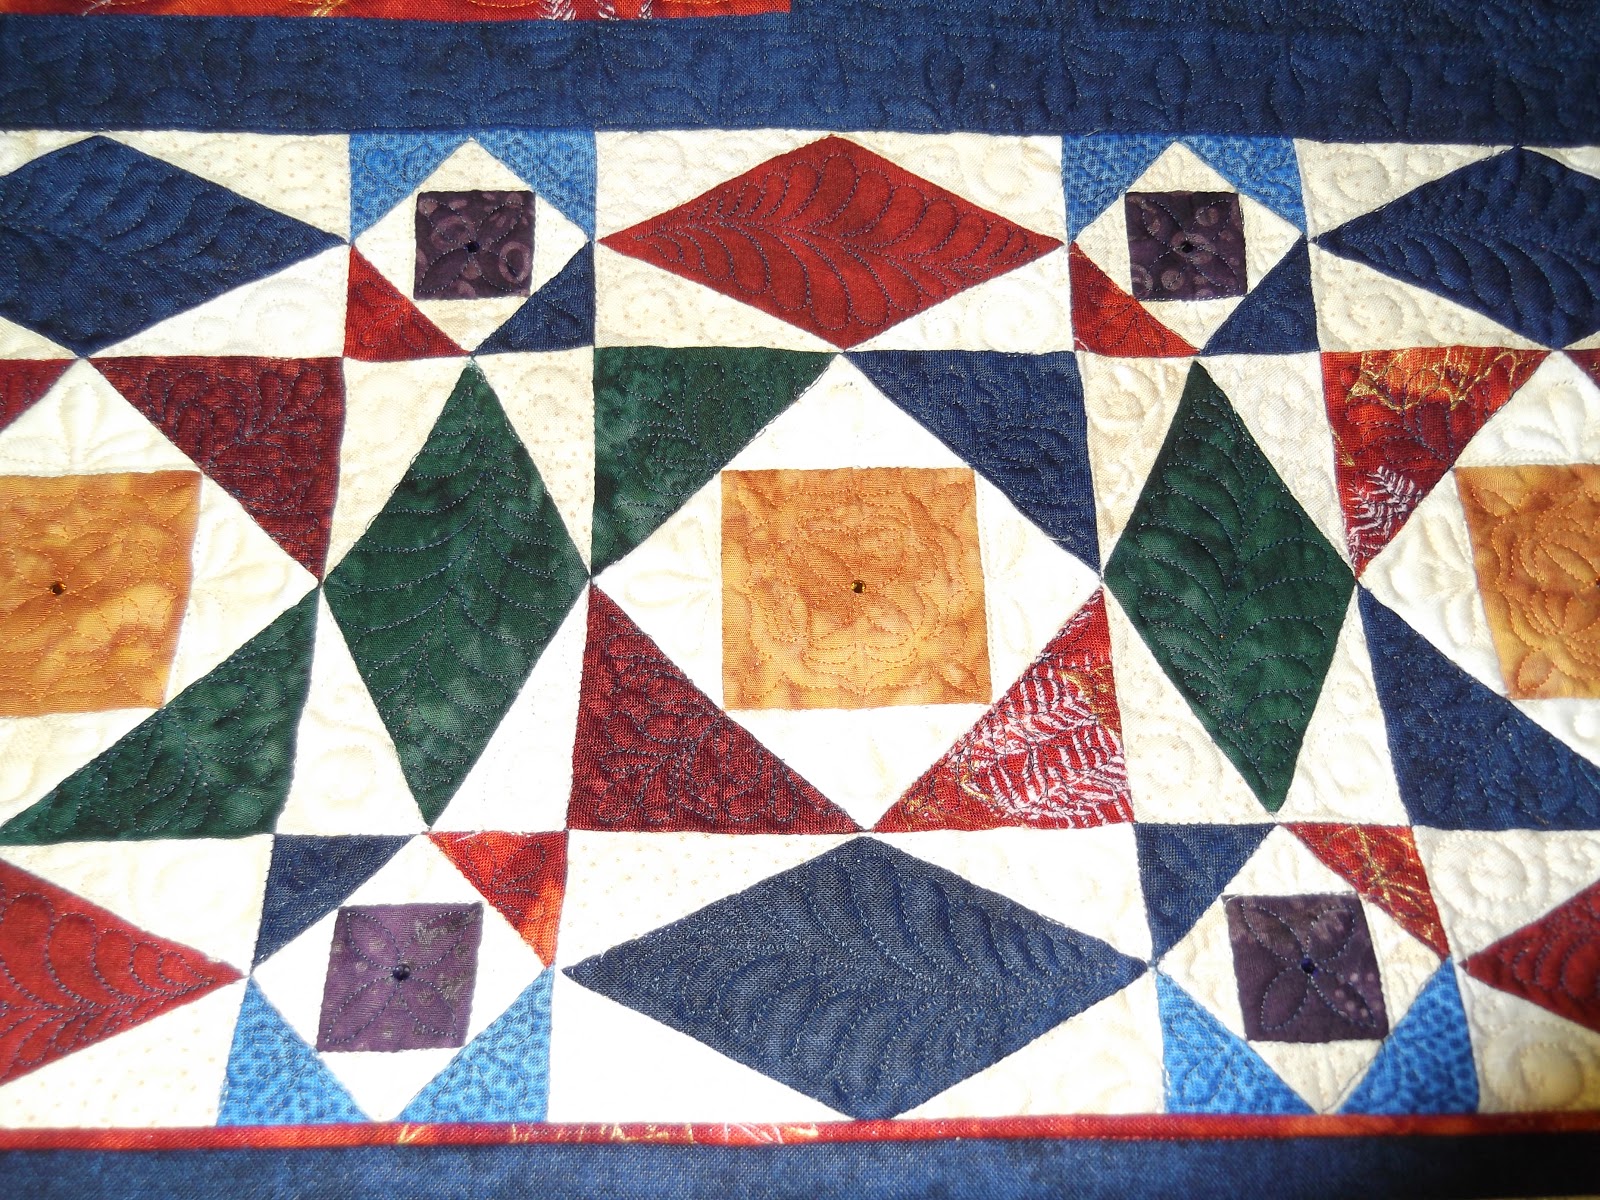
        Instructions for the first trial step arrive, and before I even started stitching, we found a cutting error.... I needed 4 more of a component.... and guess what... it was my focal fabric!   EEK!!!  Now this doesn't normally throw me too far, (I mean afterall, my name is scraphappydenise)  But being a mystery, how do I go about it?  Jess told me I could substitute by adding a 5th color... she even went into her EQ and did a color change in the area we were talking about....ooh, it opened up a new design option, and she is excited to see what a 5th color will add, so I chose a cream that was similar to the background in the focal fabric, and off I go... happily sewing along.... 


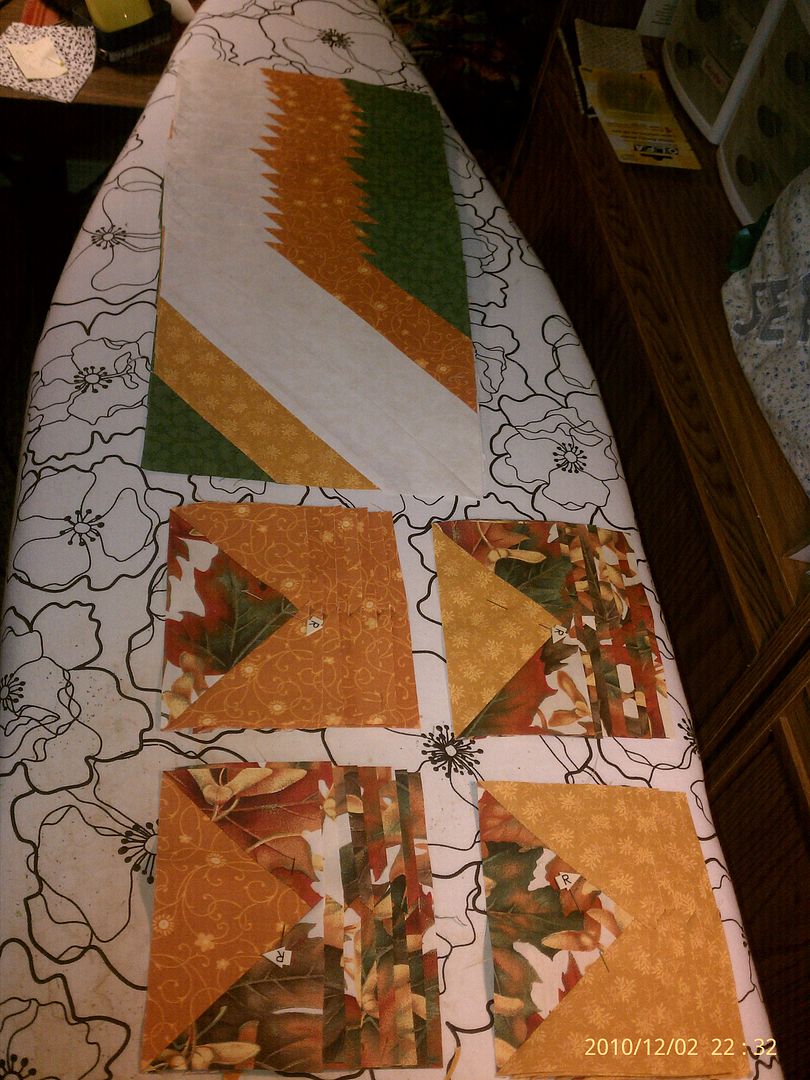
       When we got to the part of laying the pieces out for the center medallion.... this is what I got..... I love the overall look, and the way the two golds overlap and play together... I love the little stars that appear around the green squares.... The general color scheme is beautiful.... BUT...I really do not like the cream!  It seems to be sreaming at me.  NOT the feeling I wanted.   Another color would be great!

       I work best sometimes at 11:00 pm,  so with DH snoozing in his chair a few feet away... I went to my scrap bin looking for strips I could lay over the cream to do some testing.... after a dozen or so options, I think I like this one the best.   I found a rust that I have enough of in my stash to fix this...
      The little stars still show at the green squares... The rust highlights the flow around the design.... I think I am going to be happy with the results.  When I chose my replacement fabric I SHOULD have stood back and looked at the overall value of my leaves, not simply chosen the background color..... Lesson learned.....  This beauty is now on the back burner.... until I'm off work for the holidays.... I have enough of my two gold fabrics and the green to recut those 16 squares.... It will be easier than unstitching and replacing... there is bias in those blocks... and they laid nice and flat the first time, but I don't want to give them a reason to fight me later.... I'll simply use the original blocks in a charity quilt in the future. 
     I had originally intended to show you some of the previous mysteries I have done, but this post is long enough, so another time....

Monday, November 15, 2010

My Favorite Block.... Dec 2010

I have completed my blocks for the Dec. draw at Block Central.   We do these every other month... and I have been lucky enough to win two times this year!  The green blocks in Feb.,   the Red blocks in August,   and this months are Red/ and Green!   I wonder if my luck will continue?  

These are Yankee Puzzle blocks.....  Carol, one of the winners last month chose this theme of cream background, with red and green.  A very fitting color combination for Dec., don't you think?

There will be two lucky winners of these blocks.... these are ready for the mail on Dec. 7.   (I can't believe I'm actually ahead of schedule on something!!!! )

Thursday, November 11, 2010

latest project...

This is my latest finished top.... it was so easy... from cutting it out, to stitching on the outside border, this took me 3 1/2 hours.... while watching a college football game on tv last weekend.


I did cheat, however.... this was two panels that were meant to be table napkins..... they made excellent quilt blocks though, ifI might say so myself.....

The two fabrics I used have a touch of metallic in them, little leaf outlines that look like leaf skeletons. I'm not usually a metallic type person, but I had to use them for this!  I actually purchased the gold piece this summer on a sale table, before I even found the panels..... then, after I had the panels,  I went looking for something to use with them....  found the rust piece.... When I got home, I realized that the gold and rust were the same print!   then, as I was cutting out,  the panel was by the same fabric company.....(Timeless Treasures).  I don't usually buy fabric that way,  I usually try to mix it all up, (that's the scrappy side of me),  but I do have to say that the results were great. 


Sunday, August 30, 2009

August's To Do List....


I go back to work on Tuesday. That gives me just two days to finish my list of to dos for the month. It was a huge list, and there are only 3 things left to do. I actually finished up several extra projects and exchange blocks that were not on the original list. I feel good about my accomplishments.


We are seriously trying to find a new home and some acreage just out of town, and that means I'll have to move my fabric stash and my scrapbook stash. It didn't seem like very much when I hauled it into our basement one or two shopping bags at a time!


The two quilt tops pictured above are comfort quilts for the small community of Corbett, which sits in the Columbia Gorge, just 20 miles east of Portland. I quilt with a lovely group of ladies out there.


The one with houses is flannel. Those house squares were rescued from a donated piece that looked like swiss cheese. (someone had fussy cut out the houses they wanted and discarded the rest) it looked pretty hopeless at first, and one of the gals wanted to put it in the garbage. I saw some potential, spotted some more flannel pieces in another box, and remembered some flannel at home that would help.


The blue dresden plate is made of some pillow panels that were printed and sold in the 1980s. There were only 5 in the donation box. It took a group effort, but someone pieced the alternate blocks.... someone else did the four patch, another member added the wide blue print from her stash, and then I brought it home and added the piano keys. It's ready to be quilted by another member.

Saturday, August 29, 2009

Applique Tutorial


Well, I've signed up for another internet block swap.... this one is a Christmas Stocking Block Swap at blockcentral.com . I found an easy way to prep the stocking sections for applique, and wanted to share it with everyone. This will work with any simple shape applique you want to do, and can be adapted for both machine, and hand applique. Try it!


Step 1: print your pattern


Step 2: Using plastic template material, trace your pattern, add seam allowance and cut out.


Step 3: Using whatever method and pattern you decide, create your pieced fabric. Just make sure it's large enough to accommodate your template.


Step 4: Lay the template on your fabric, and trace around it


Step 5: Trace around the shape and cut it out.


Step 6. Lay the template on a lightweight non woven interfacing. I used some grid type pattern material, 'cause it was what I already had. Trace and cut out.


Step 7: Lay the interfacing on the top of the right side of the stocking....


Step 8: Stitch around the shape. All the way around. Do not leave any opening. The more complex the curves, the smaller you want the stitch for a smooth edge. I used a 2 on my stockings.


Step 9: Carefully cut a small hole in the center of the interfacing. clip up the middle and towards the corners. Just enough to be able to turn to the back.


Step 10: Using pinking shears, (mine are scallop shears) Trim the curved areas to make it easier to turn and to reduce fullness.


Step 11: Roll the interfacing to the back, finger pressing the seams so that the interfacing does not show from the front.


Step 12: Turn over and press the interfacing, so that the cut edges are close together. You do not have to stitch them together. Press lightly.


Step 13: Turn to the right side, and press well... making sure that the interfacing is all on the back side.


Step 14: Position on the background square. (If you will be machine stitching, I suggest that you use some starch on the background before pinning the stocking down. This will make it easier to stitch.)


Step 15: Add the top cuff. Then applique with your desired method.


I hope you enjoy using this method. It makes it so easy to get a nice clean edge, with no raw strings to deal with.