A few days ago, I came across some of those "bonus" half square triangles. You know the ones.... when you are doing a flip and fold technique on snowball blocks, etc.?
At first, I was going to take the ziplock baggie and toss it into the "orphan block" bin, and deal with it later....
Then I thought.... why am I saving these for later? The matching fabrics from the project are still right here where I can pull from them if needed to do something with them.
As I was stitching the original project, I had already stitched 1/2" away from the original seam, so that when I cut them off, they were already sewn...
I spent the evening while watching TV, pressing these open. I sorted them as I pressed, putting them with like fabrics. Some had sets of 4... but most had sets of 2.
So then, I paired up two sets of 2 that had similar tone and value.
The first couple of sets, I trimmed to a nice square. These still needed trimming after they were assembled into pinwheels, and since I wanted this to be a quick "Use it Up" type of project, I really didn't want to spend a week sliver trimming 4 blocks and then the larger blocks. I also realized that a couple of the sets I trimmed before assembly were then slightly smaller than the 3" or 3 1/2" size I was hoping for.
Then, I got an idea... what if I stitched the pairs into the four patch needed to create the pinwheels, and then trimmed at the very end..... How would they turn out?
 |
| Here is my first set of 4. The dark fabric is the same, but the neutrals are different. My first step was to trim the dog ears from them with some small snips. I did not worry about any wonkiness at this point. Then.. I set them out in the layout I wanted, alternating the two different fabrics like in the picture below... |
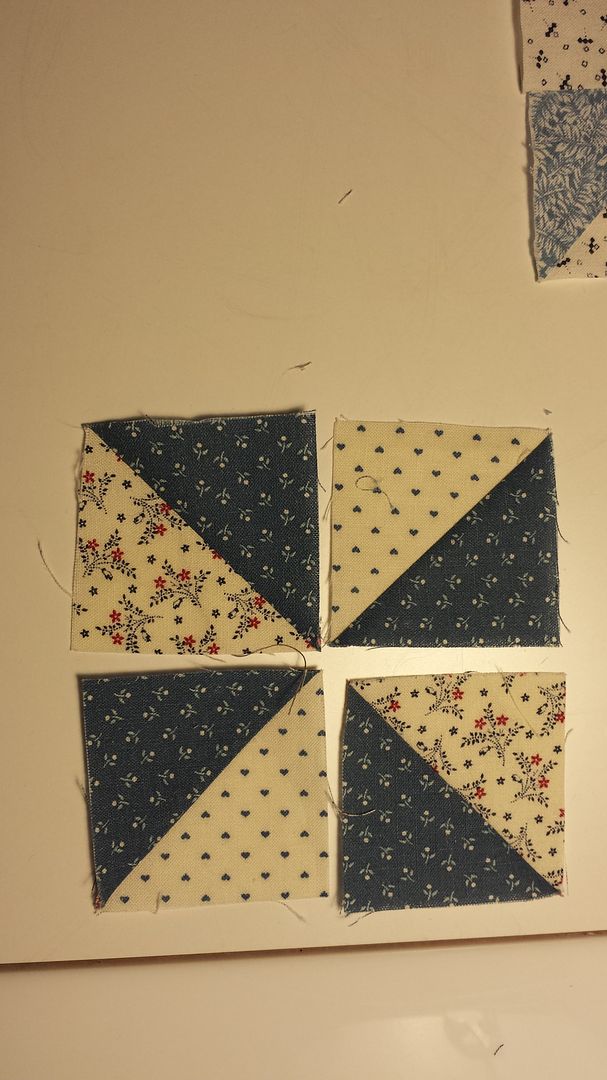 |
| Can you see where the two sets are not quite the same size? The one on the left is larger than the one on the right.... I didn't let this bother me. I just made sure that the center seams matched, even if the outer edges were not even. I treated them like a standard 4 patch making sure that my diagonal seams meshed together for a nice center. |
 |
| Here are the four stitched into "twosies".... Then I stitched the center seam, matching the center as the priority, rather than worrying about the outer edges of the seam. I spun my seams, creating a mini pinwheel on the back, which gives it a much flatter center... and pressed well. |
 |
| While looking at the back, You can see the spun seams at the center, and you can also see where the outer edges are wonky. |
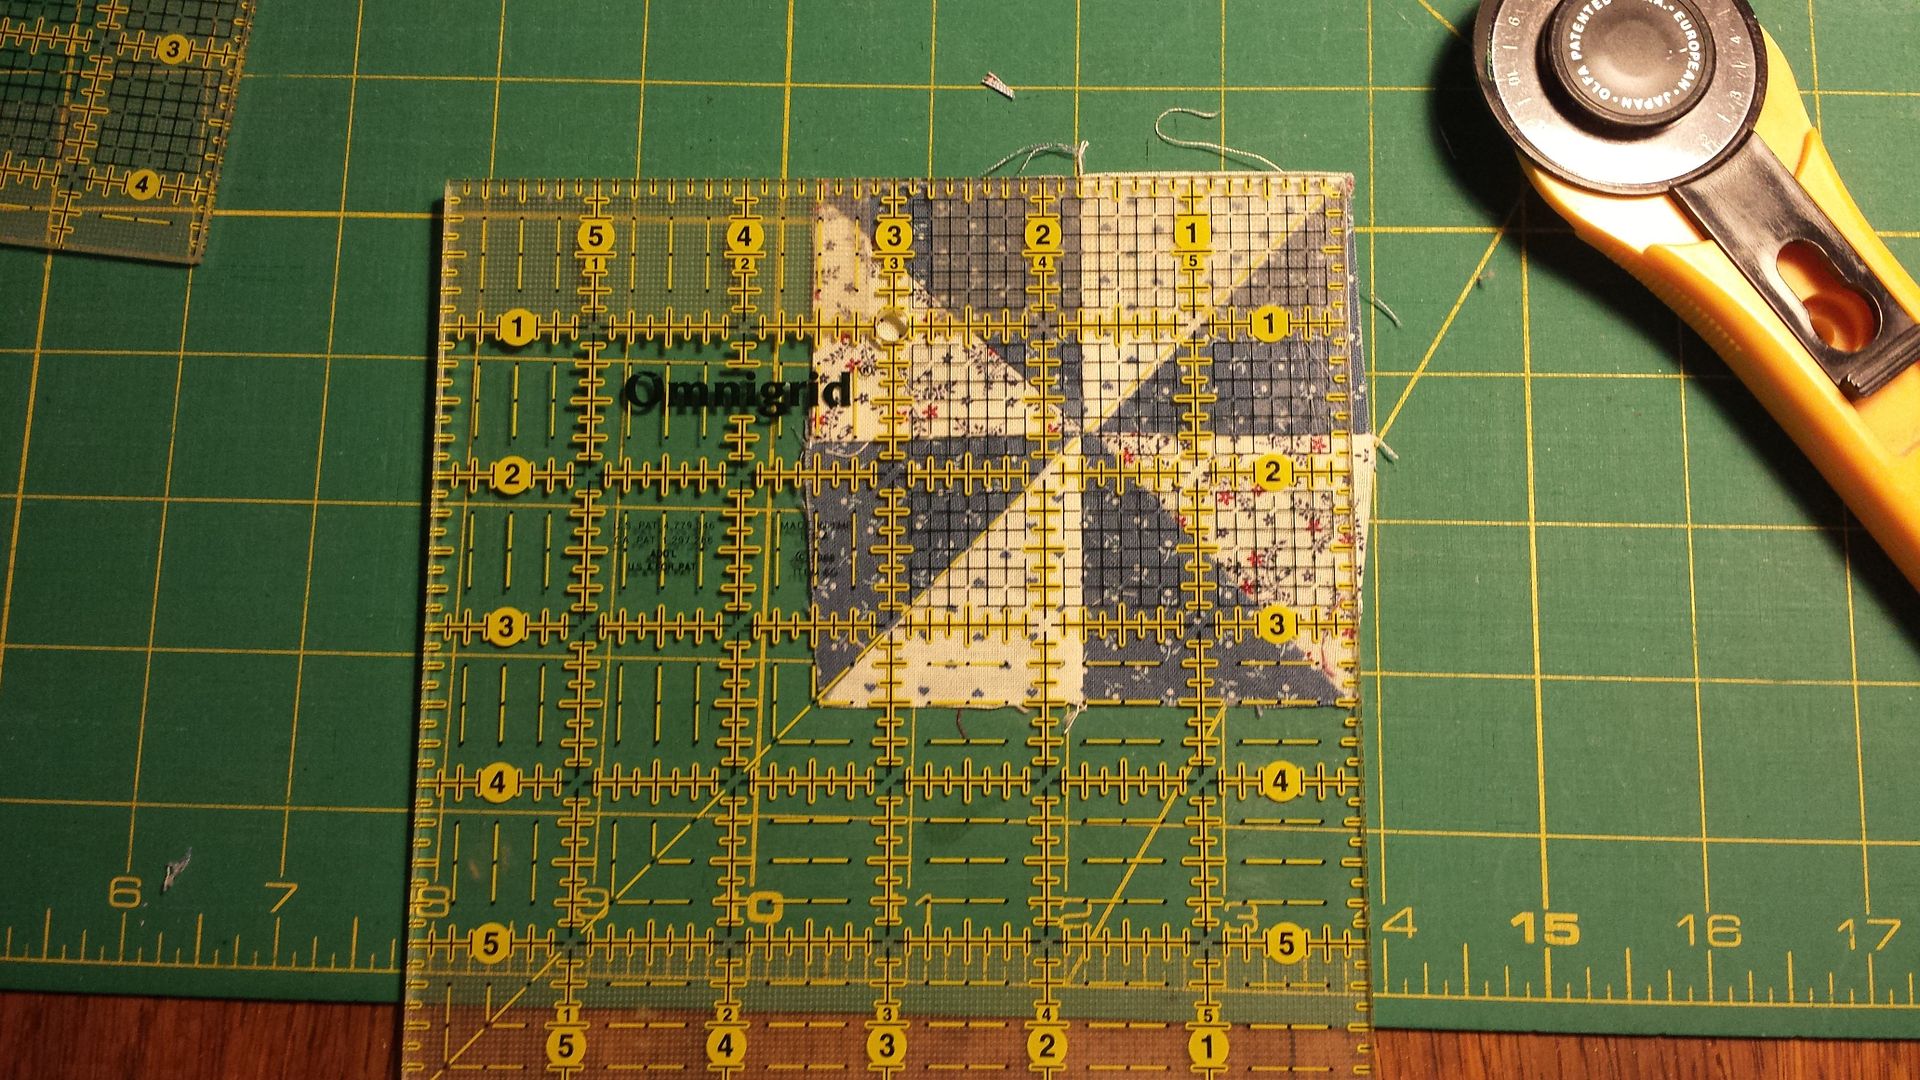 |
| You can see that there isn't much to trim, but it will cure that "wonky curve" on the right side. Trim. See how cute it is? |


Here are my first 5. Looking good!
I hope you try this method for using up some of those leftover pieces.....
No comments:
Post a Comment