For Christmas, I got one! It's fantastic! and it was on sale for under $100.00. My hubby and I also got the benefit of an afternoon of bonding as we put it together.
 |
| Folded up against the wall across from my machine area. If I need an area larger than my 22 x 36 cutting area just behind my machine.... I can open up half of it like this.... |
 |
| opened half way..... 5 feet wide and 4 1/2 feet deep front to back. |
 |
| Folded out all the way. |
I used the clamps to secure one edge of my backing on the near side of the table. It was not a full nine feet long, so I used painter's tape to help hold the end taught.
On the back side, the backing drapes down the back side, but I used the clamps to help keep the backing nice and tight.
 |
| This is the back side, where the excess backing is draped off the table. I needed one more clamp to keep it all secure. |
Once the backing was clamped in place, I spread out the batting, making sure to smooth out bumps and wrinkles.
 |
| The batting is now all smoothed out and clamped in place... |
I clamped it in place releasing one clamp at a time to keep the entire backing from slipping.
Now it's time to lay the top out. This top is one I already marked with an overall design using my new miracle chalk stencils that are really cool! they work like a screen-print screen, but that's another tutorial, on another day.
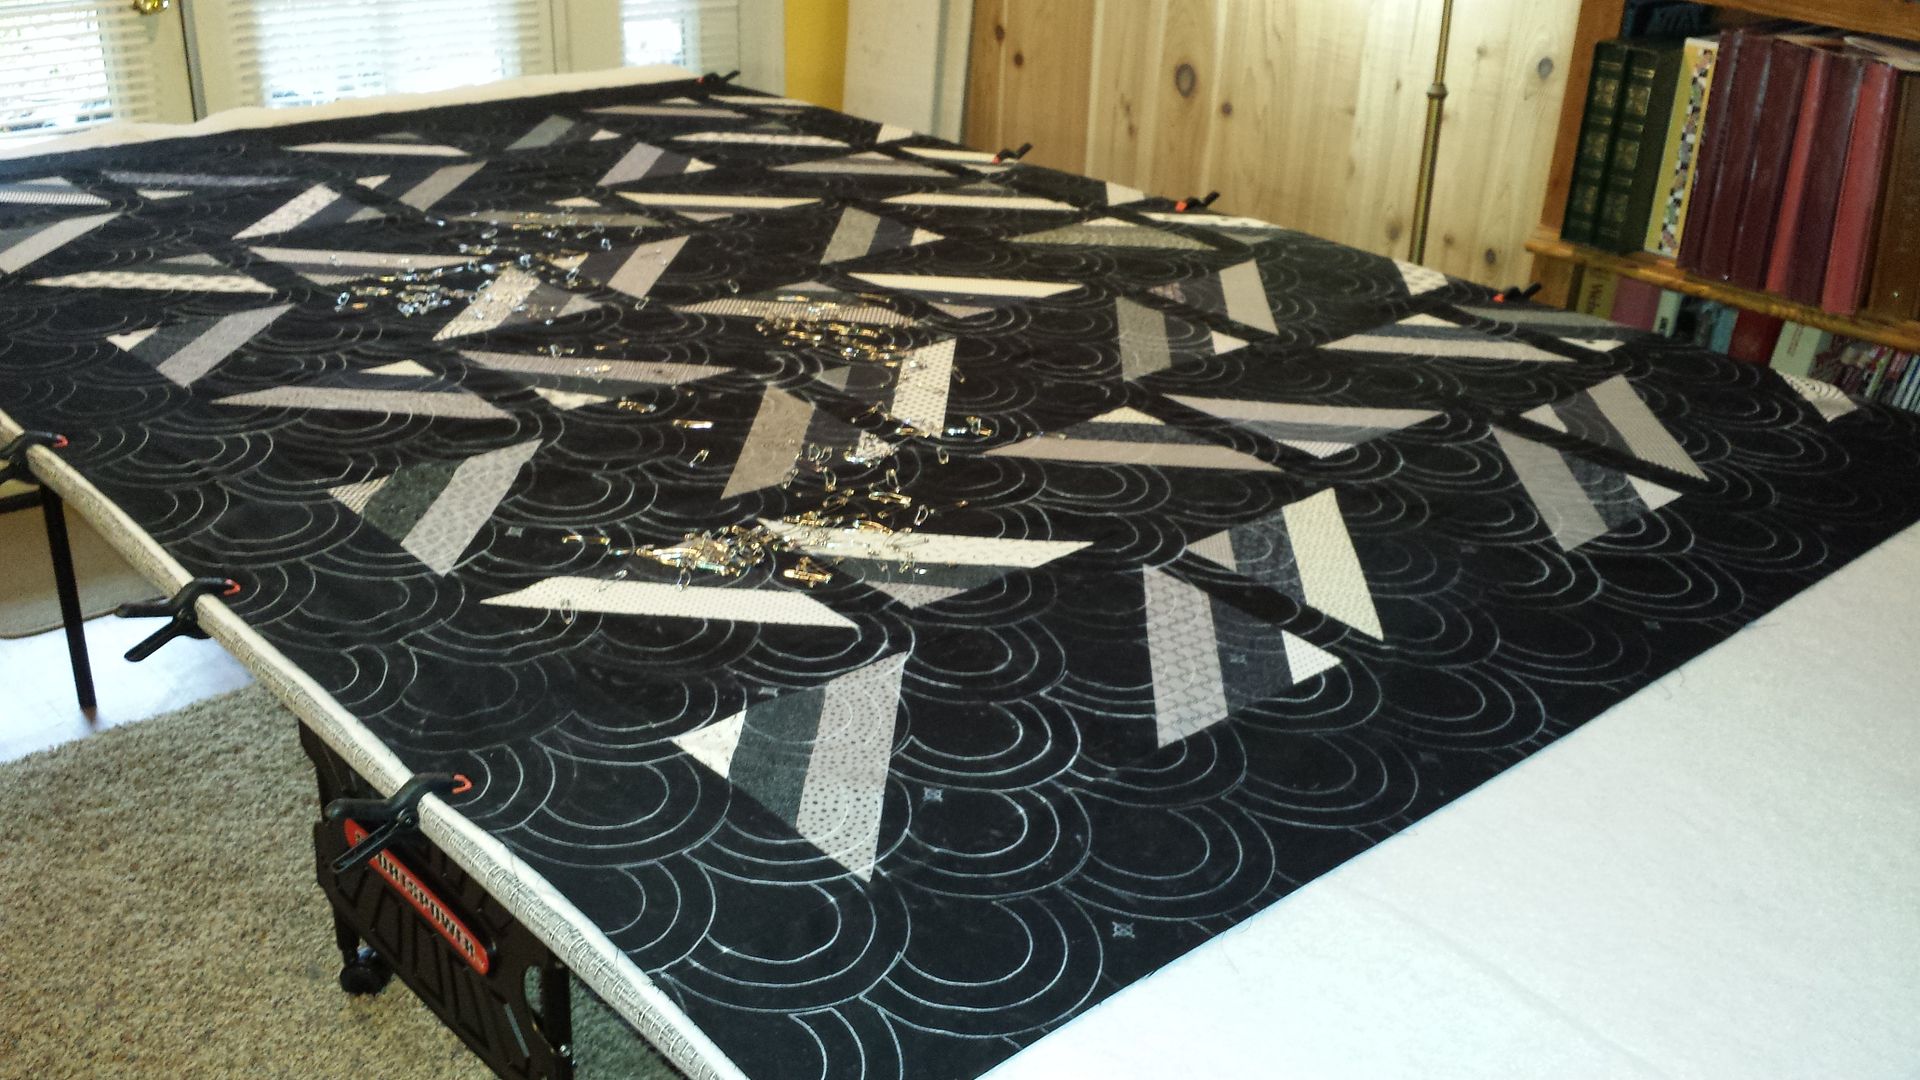 |
| top smoothed out, clamped in place and ready for pinning |
Again, I released clamps one at a time, and re-clamped the top down once I had it smoothed out where I wanted it.
 |
| This is the back side, where the top draped off the edge. |
When I had finished pinning the part that was on the table originally, I lifted the tape on the backing on the one end.... removed the clamps all the way around..... and pulled the entire sandwich over so that the rest of the quilt was on the table, with the pinned edge now draped off the edge of the table.
 |
| Notice how I used the edge of the table and the block seams to make sure the quilt is square all the way down... on this quilt, it just happened to land right at the edge of the table, but I could have measured from the edge over to the sashing seam if needed. |
Make sure that you get all your layers pulled smooth and tight, so that your backing is not wrinkled underneath. Re clamp. In this process, my backing and batting are clamped at this point, but the top is floating. I used a couple of long flower pins to keep the edges straight until I could get them pinned down with the safety pins. (I prefer the #2 curved pins... they are large enough to handle easily and the curve makes them easy to use.)
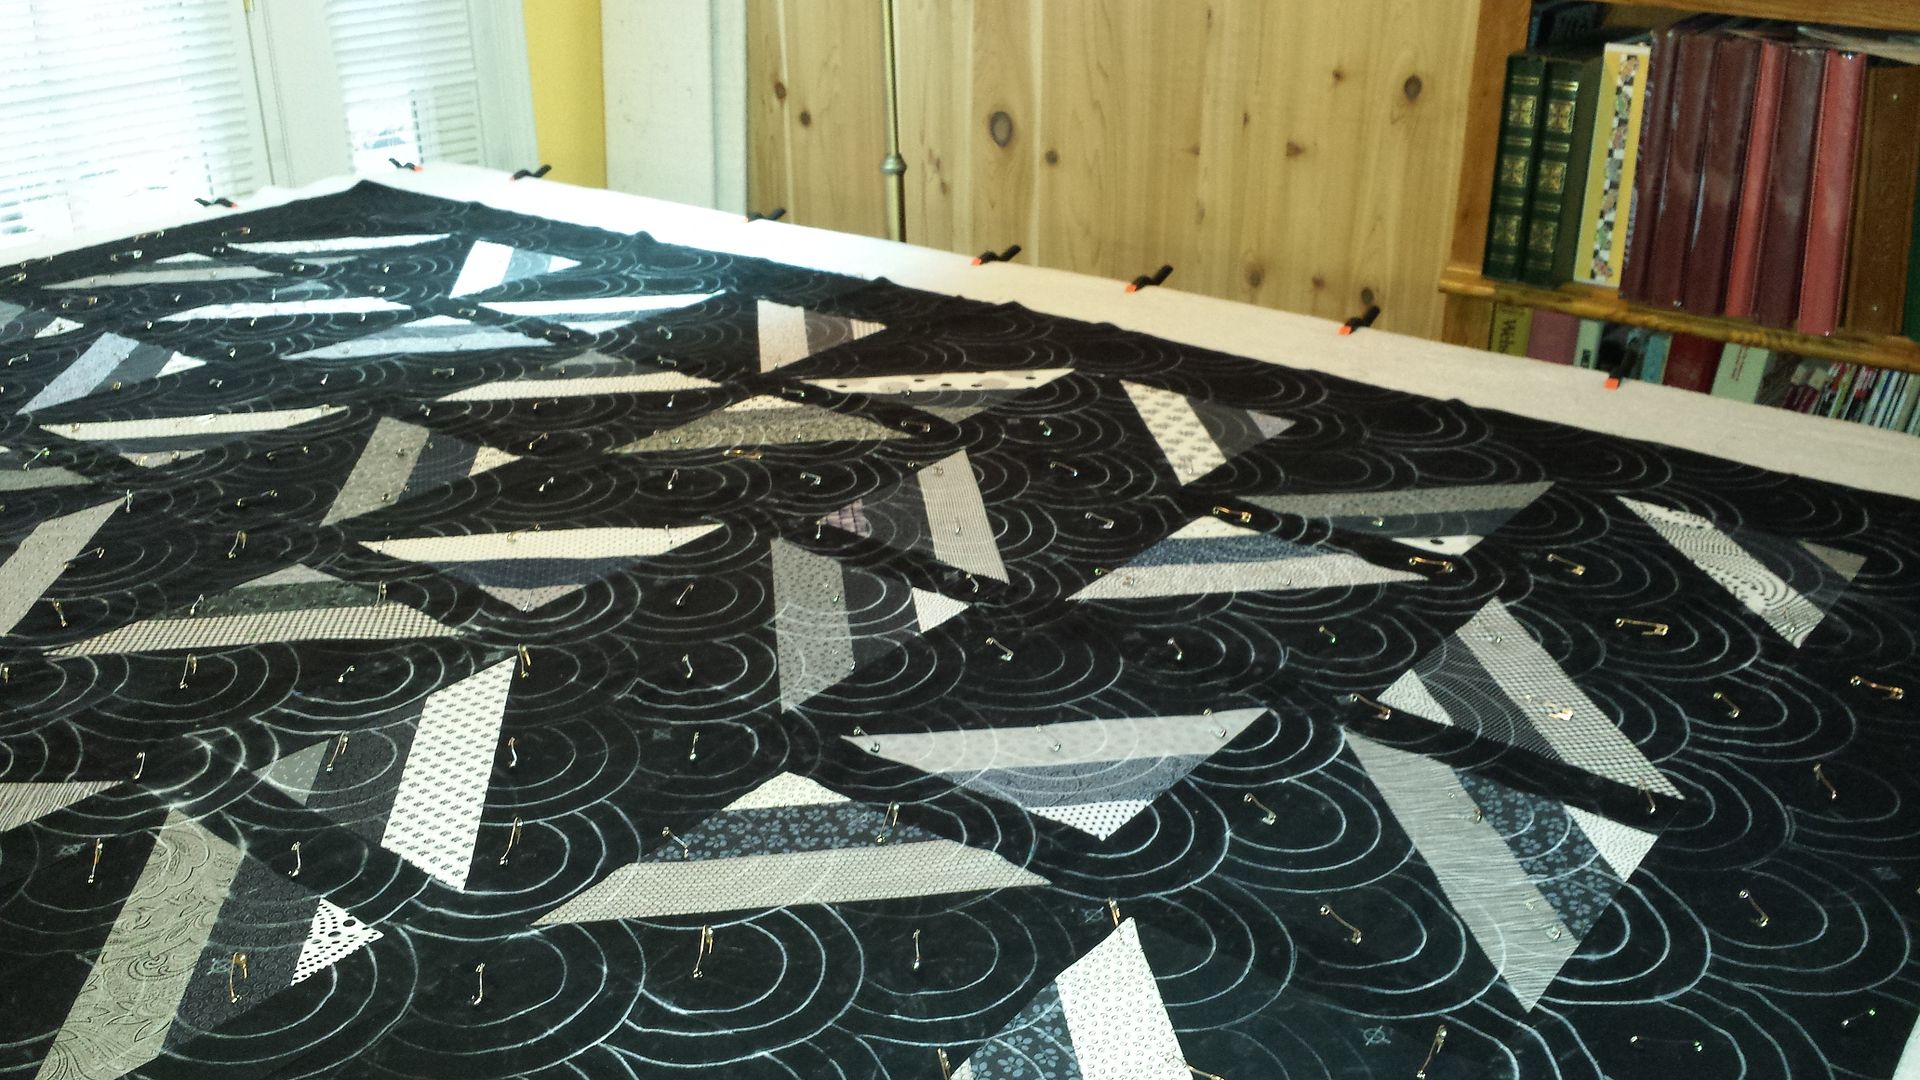 |
| You should be able to see where the row on the back side of this picture still has not been pinned. This is after I've shifted it over on the table. |
This was so much easier than moving furniture, using t-pins into my carpet and spending 2 hours or more on my knees on the floor.
So here is one of the best parts.... When it's re-folded up against the wall, I can use my clamps to hold a design wall that I can see from my machine as I work.
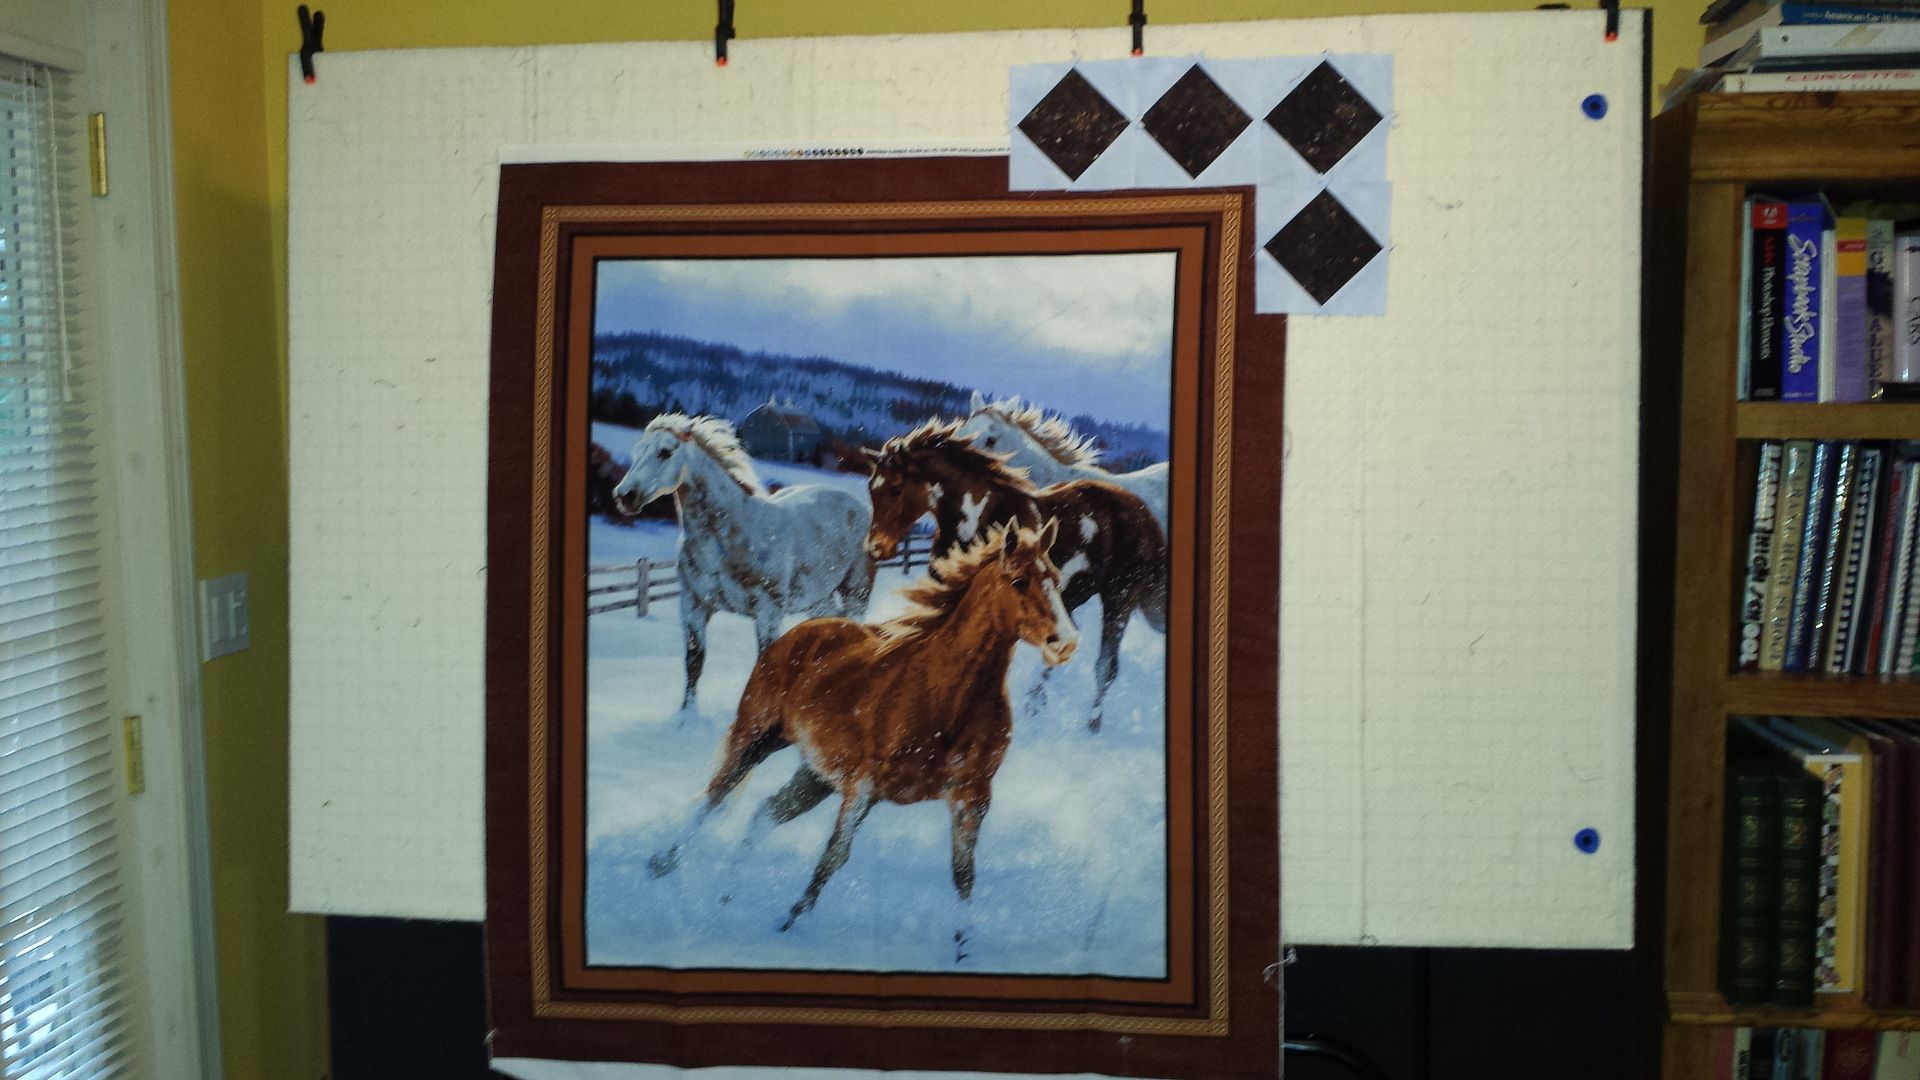 |
| My design wall is a Dritz cardboard cutting board covered with warm and natural batting. it folds up and I can take it with me on retreats or to sew-ins.... it can lean against a wall, or I can hang it from those command hooks that don't damage walls. I like being able to see the grid lines behind the batting. I made 2 of these several years ago and they have held up really well. |
And... since this is all in our family room.... and I share the space with my hubby and those that come to visit.... when I'm not working with my design wall, I can clamp a finished top that is waiting for it's own sandwich up to admire while thinking of how it will get quilted!
 |
| This top is waiting for quilting inspiration ... meanwhile I can admire it instead of just folding it up under the table. |
Who knows.... we may actually play ping pong on it sometime ! I did purchase some paddles and balls, but they haven't been opened yet.
One of the very best things about my Bee at the local community center is the ping pong tables (3 of them) which can be used for sandwiching our quilts. So if you do not have room for a large table -- check out a local community center. The tables may be free when the kids are in school.
ReplyDeleteThis is definitely one way to use a ping pong table. Using a ping pong table for pin basting quilts sounds pretty fun. Not very many people would think about using a ping pong table like this, but it is a great idea. This is something that my wife would love to do.
ReplyDeletehttp://www.pathmarkbilliardsandgames.ca/index.php/games-accessories/games/ping-pong