7 years ago, my husband Mike and I decided to leave city life in Portland, and find a home outside the urban lifestyle. We spent the summer, doing drive-byes, and crossing numerous RMLS listings off our list. We had a list of "Needs" and "Wants"...and while we loved the idea of a log home, we knew that our dream cabin would be too expensive, too much maintenance, and difficult to find within a 25 mile radius of Portland
Needs:
- Paved driveway / road because of our classic cars
- At least a 2 car garage
- A designated sewing area for my quilting (at least as much space as my previous basement area)
- At least 1 acre of space (but not over 3) due to cost and maintenance
- A pole barn / shop building
- Plenty of parking space for boats, RVs, trailers, etc
- Within a 15 - 20 minute drive to my job in Gresham
Wants:
- Gardening space
- Open floor plan
- Preferably a single level
We aren't afraid of a little work and rehab... we've done it before... but we aren't kids anymore, at least not physically.
Then, one August night, while going over the weekly foreclosure listings... we found it! A phone call to my sister, our realtor, and we made arrangements to look at it first thing in the morning. We were up early, and knowing we couldn't get into the lock box until 10 am, we still ventured out before 8 am.

This is the 2009 google earth photo... the biggest blue roof is the shop, the medium one is the house, and the smallest one is the upper garage. All sitting on an acre and a quarter.
Previous owner ran an auto body business from the home... and I think we counted 25 cars on the outside of the buildings in this photo, plus a tow truck...
A neighbor said there were over 50 at one time, before the neighbors complained.
This is what we found...
 |
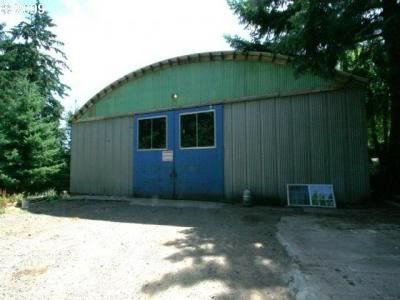
| A huge shop... previously an Airplane hangar that was moved to this property several years ago. It was unlocked, so we took a gander... SOLD!!!! and then decided to see about the house. It was BLUE! Blue roof, blue paint, blue foundation.... This is the driveway side. (The North side) There really isn't a true "Front Door".... 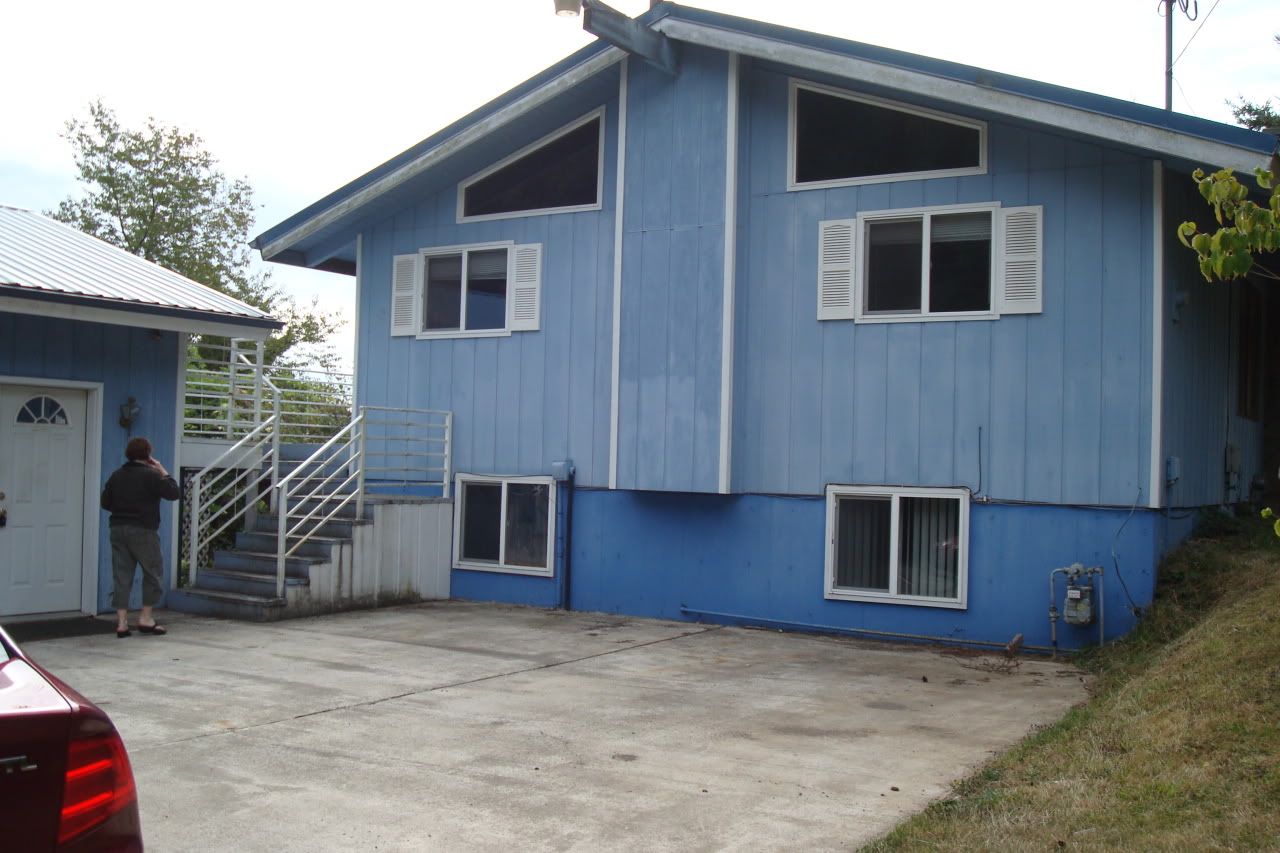 This is the South East corner... 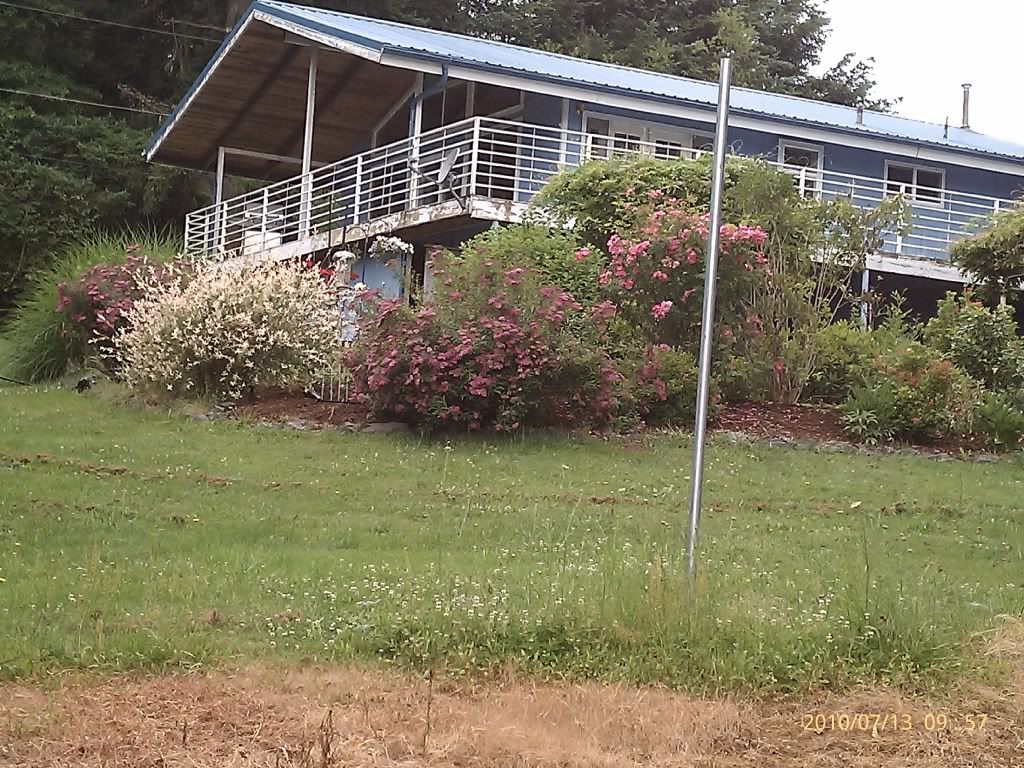
This is the South West Side
 
And then we have the North East side, looking at both the back of the
upper garage and the house.
We still couldn't get into the house until 10:00, due to a timer on the lock box, but we could look in the windows....
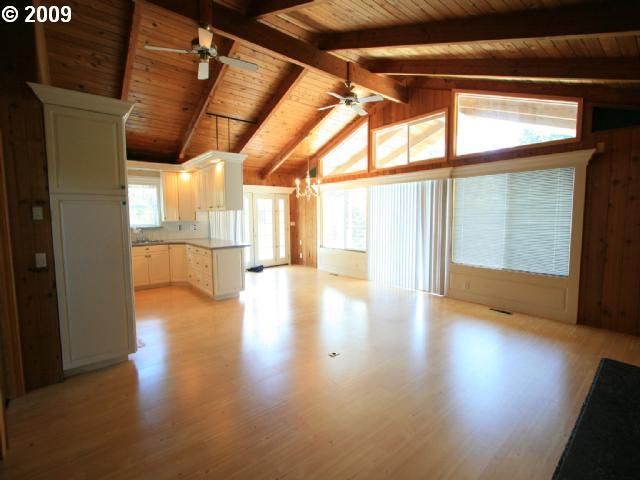
The living room, dining room and kitchen area...
   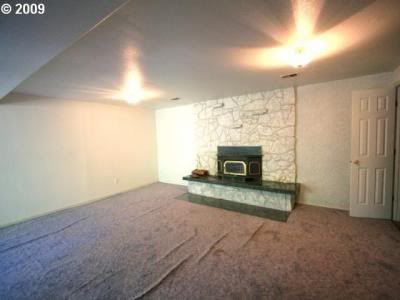 Here we have the downstairs family room fireplace. Looks like new carpet is in order....  The stairs going down into the family room |

This is going to be my sewing area, after we knock down the other wall and put in a stud/ 1/2 wall where the wall and door are here in this picture.
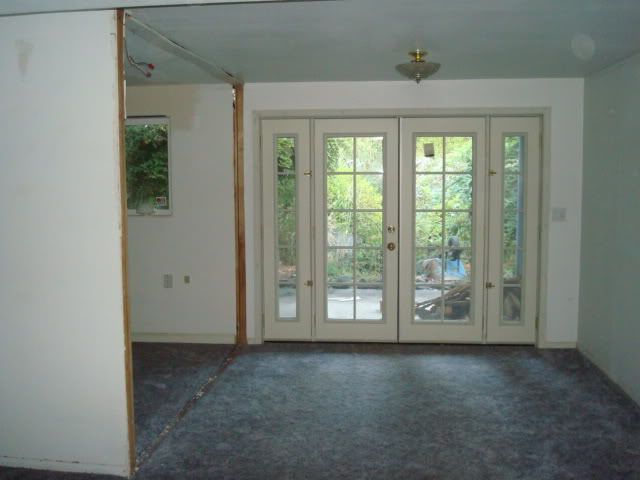
French doors from the downstairs family room to the garden area

Oh, goody! More blue in the laundry room / mud room area.
Don't get me wrong... I like blue,
but not quite this much of it in one place.
There was another bedroom downstairs, nothing spectacular to show in pictures...
And a bathroom with shower, toilet and vanity... again... just painted white, with black trim.
Upstairs... the master bedroom reminded us of a hotel room, very large, with long closet with mirror doors on one end, and a double vanity on the other... A commode room in the corner, and a double stand up shower. All in one room.

The commode room on the right, and the left door is a linen closet.


You can see that this room echoes the living room area, with tall, open cedar ceilings and walls, and some high triangular windows above.
This was a foreclosed home, so we purchased as is. We got our keys on Sept. 25, and moved in on Nov 17, 2009. Prior to moving in, we replaced carpet, Painted walls and put some cedar paneling in the family room, did lots of cleaning, replaced several light fixtures, put in new ceiling fans in the living room, put a ceiling in the upper garage, and I attempted to get a grip on the garden. It was a busy 6 weeks.... especially working at the same time.
The needs and wants list? pretty much all of it... .except for the one level... however, it's a walk-out daylight basement with sloped walkway to the lower level.
Fast forward... and 7 years later, it is very close to being just the way we want it..... still on the major project list...


Looks pretty good! the garden area in this picture is the area closest to the house....
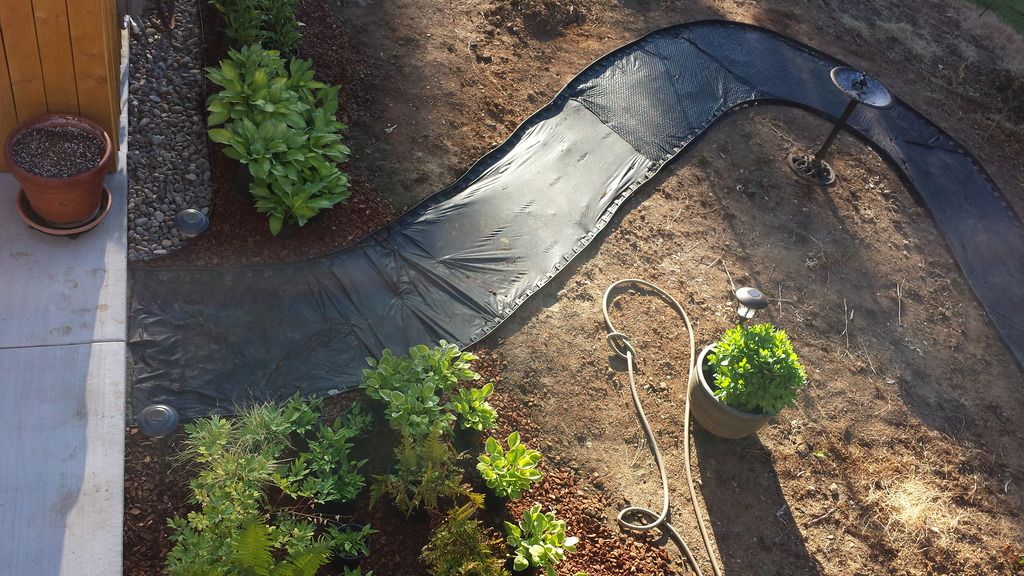
Somewhere along the way, a previous owner had placed heavy black plastic all through the garden area, and covered it with mulch. (Not breathable weed fabric... black plastic!) I spent that first spring and summer.... digging it out and not replacing it with a weed fabric. I was wanting a Cottage garden feel, with soft flowing edges. Those big rocks around the edge were literally holding down the edge of that plastic.

News flash... the plastic did not stop the grass roots from taking hold... this is a root mass of grass roots I encountered while digging out the plastic...


once the plants were able to get water and breathe.... it really took off! And i mean... take off!
Year two... 2011 brought small general projects... nothing major in store.... some gravel around the shop.... and we put the car port together.

The edges are starting to flow together... and then life happens....
We got word during the early fall of 2011, that Mike had prostrate cancer.... we had a medical whirlwind year... he had surgery in November, then some heart issues in March, then in the spring, he got word that surgery wasn't enough and we were looking at radiation.... 32 treatments... starting in June and going through August... No traveling farther than a trip to the beach. It was a mandated "Staycation" ...
Year Three.... (summer 2012) we extend the concrete path to the shop.... and then decided to put a patio and fire pit behind the upper garage... which was still a huge mess of overgrown rhodies, fire weed and blackberry plants...


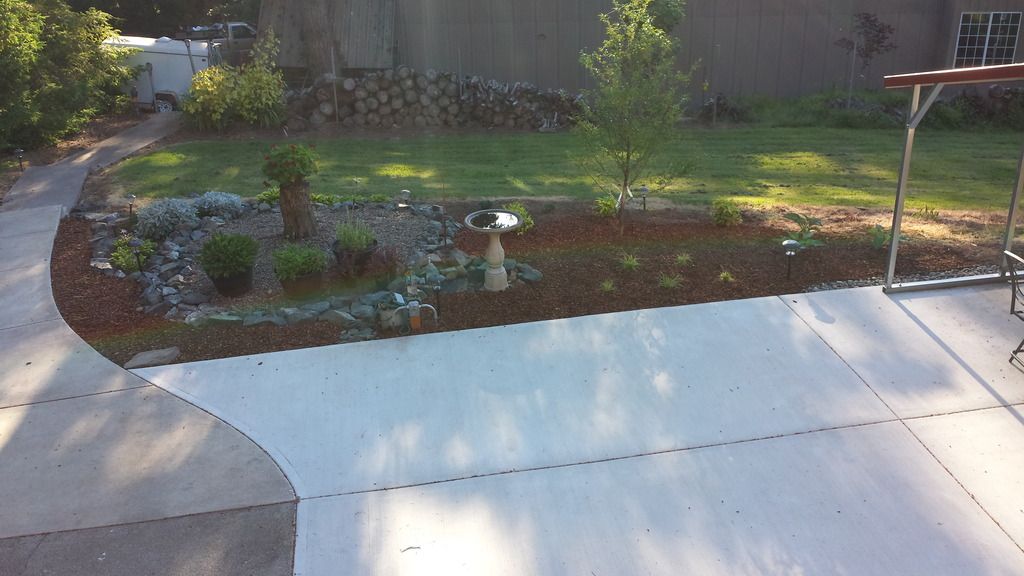
As my therapy that summer, while Mike underwent radiation, I hauled all those rocks that had been holding down the plastic, over to the new area and built this water feature....


Time for some plants.... and a fire!

The next two years, were low effort years for us.... we spent time with family and friends, going to the beach, traveling to Montana to see grand-kids, etc. We purchased a new travel trailer and for the Summer of 2014, we got out of town.... and spent 3 weeks in our travel trailer, camping, and traveling.
By spring 2015, I was feeling the pressure to keep the garden under control. I have a huge respect for those that can "cottage garden".... I've learned that I need cleaner lines.... more order, and much less pruning! The arthritis and carpal tunnel symptoms really flare up when I get momentum going out there. Attempting to rehab those 20 year old shrubs that had been neglected, poorly pruned, and starved of water and air in the soil was proving to be more than I had anticipated. I could sit under that huge wisteria and hear it growing. It needed pruning all the time!
After we did the fire pit, we realized that there was not enough space to do a potluck BBQ, and the large upper deck doesn't really have easy access to the fire pit area. I began thinking of a plan to pave about 1/4 of the garden area closest to the fire pit to create an area for potluck tables, a patio dining area, etc. We had a beautiful early spring in late January, and I got lots of clipping and weeding done... then a very wet March, April and May.... by Memorial Day you couldn't even see the progress made early on. I mentioned to Mike that I needed a blow torch and a load of concrete.....
You have to know my hubby.... but the happiest day of his life was the day we moved to a houseboat and he got to sell his lawn mower..... so yard work is not his favorite relaxation technique. About a week after my blowtorch request, he asked how much concrete I wanted..... "just this much" , I said as I showed him the area I was thinking of ..... but his logic took me further... In order to excavate the area I wanted paved, we would have to "cherry pick" plants and hand dig. He suggested we make the new patio area larger, and bring in an excavator to do the job.
WHAT? It took me about 30 seconds to agree.....
So one year ago.... I spent my first week of summer break, pulling bricks, stepping stones, perennials I wanted to save, yard art and bird feeders from the garden and getting ready for the project. Then the weather turned HOT.... 90 degree and higher... which is not usual for Oregon in June.... I felt like the water wand was permanently attached to my hand, and I had patio umbrellas covering groups of plants to protect them from the hot sun as they sprouted new roots in the 1 and 2 gallon pots.
Excavation only took an evening.....

I would still be out there digging this wisteria out.....


you can see the fire pit area behind the garage now....
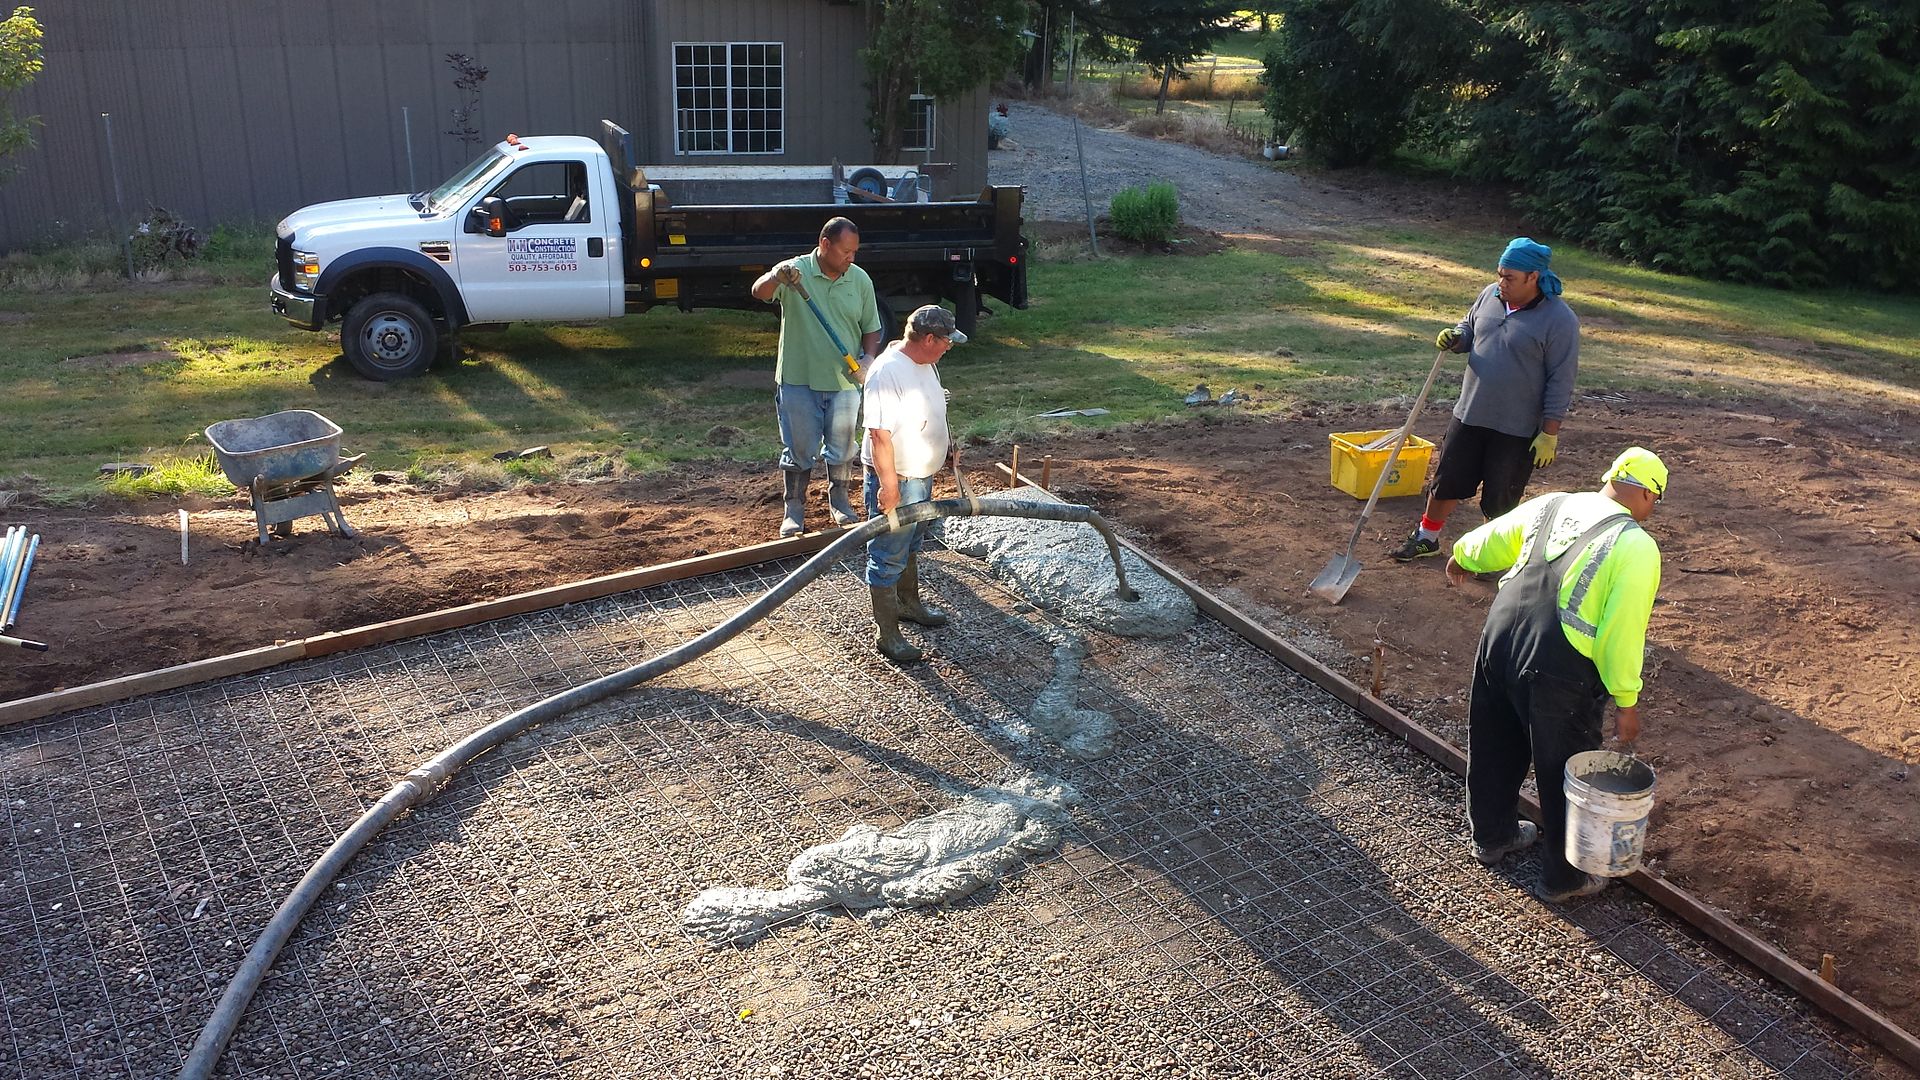
Next comes the concrete.... 25' x 40' of it!

While the concrete cured, we ordered a 10 x 20 shade structure/ gazebo to put up. It was really bright out there! By 2 pm, the house starts to cast a shadow on the patio area, so it is a perfect place to spend a summer evening.


Then we made it our own.... we enclosed one end of it for privacy and weather protection... ran water lines and electical and even a cable for tv.
Added some neat touches.... and we had fun searching craigslist for bargains.
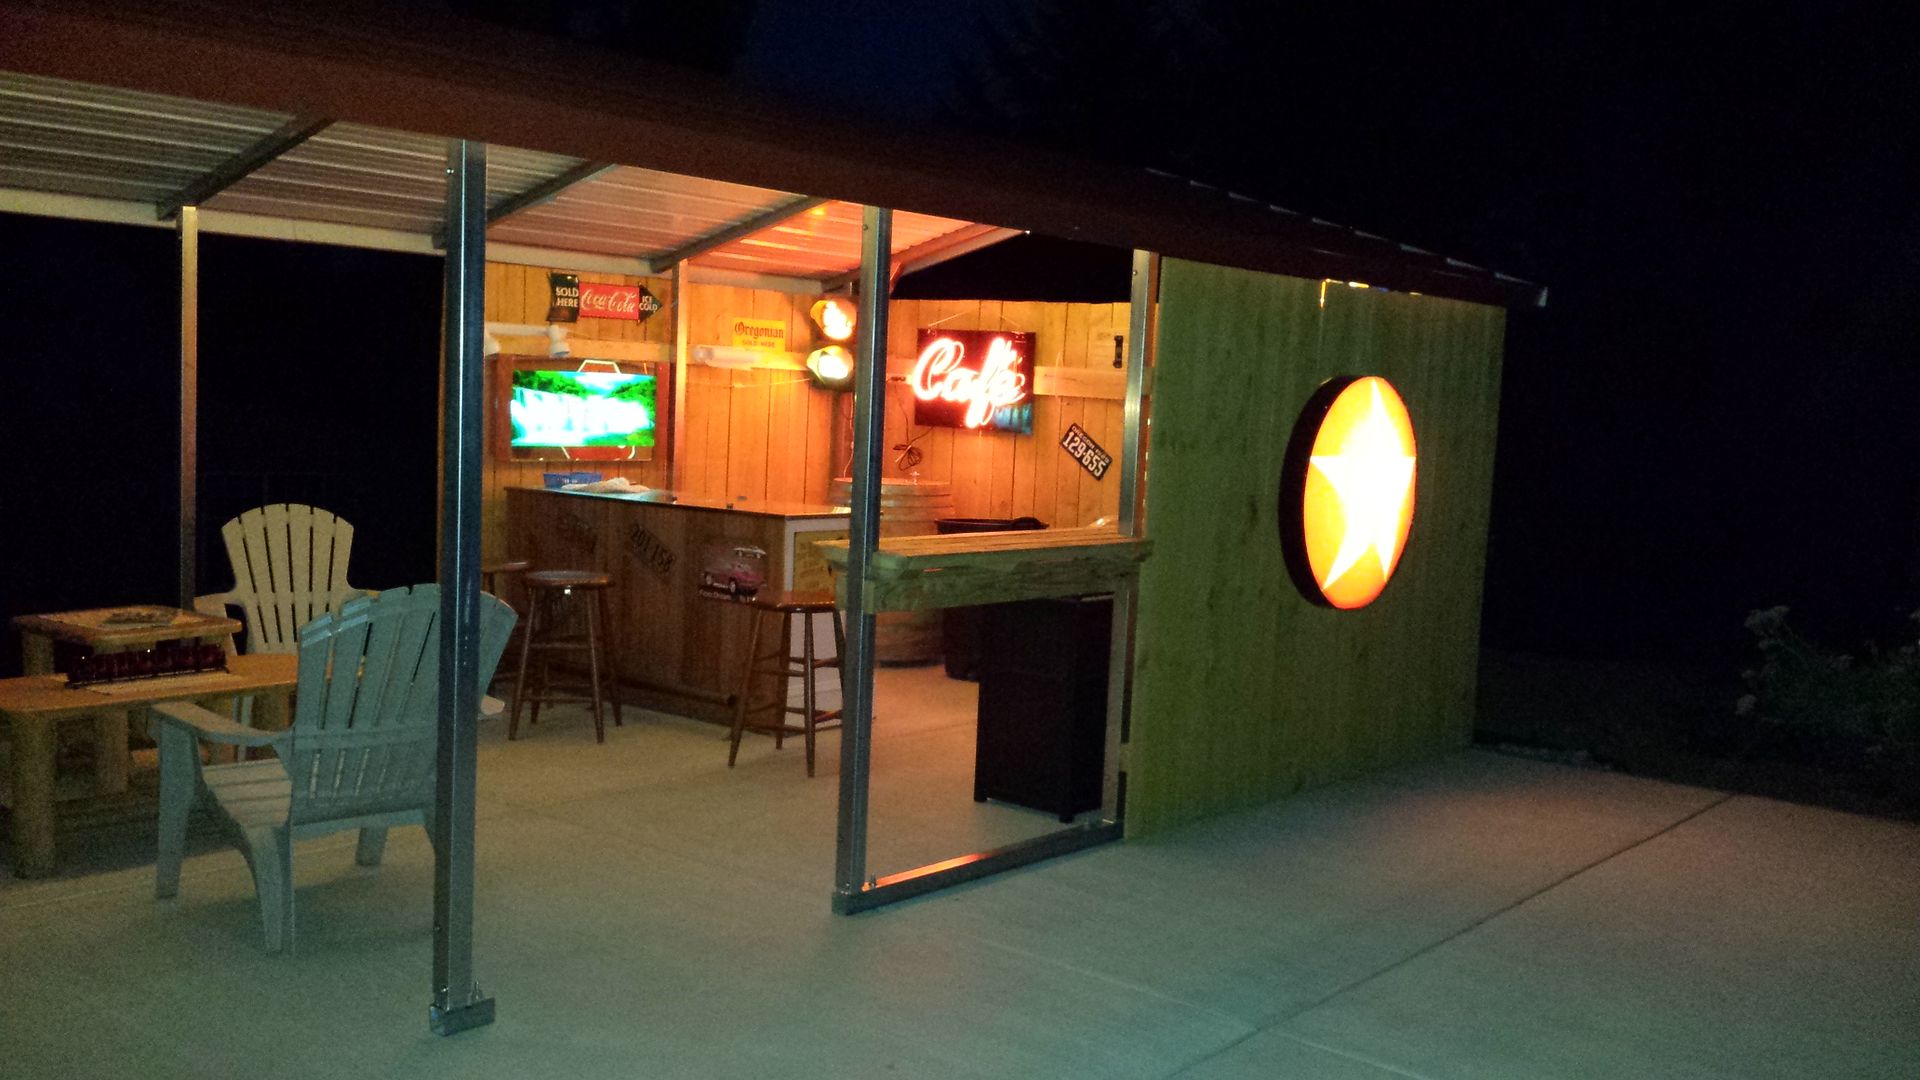

An old cupboard from an old house, and we made a wine barrel sink. Added some lights and signs ... It was ready to enjoy...
But our record heat wave and lack of rainfall made it impractical to do the landscaping portion. Those potted plants would have to wait all winter to be planted properly.
So you can probably figure out what I've been doing this spring..... and I'm within 2 dozen plants of being done!

First, I laid out a path
and filled it with cedar chips

Then, I planted a couple of trees, for future shade
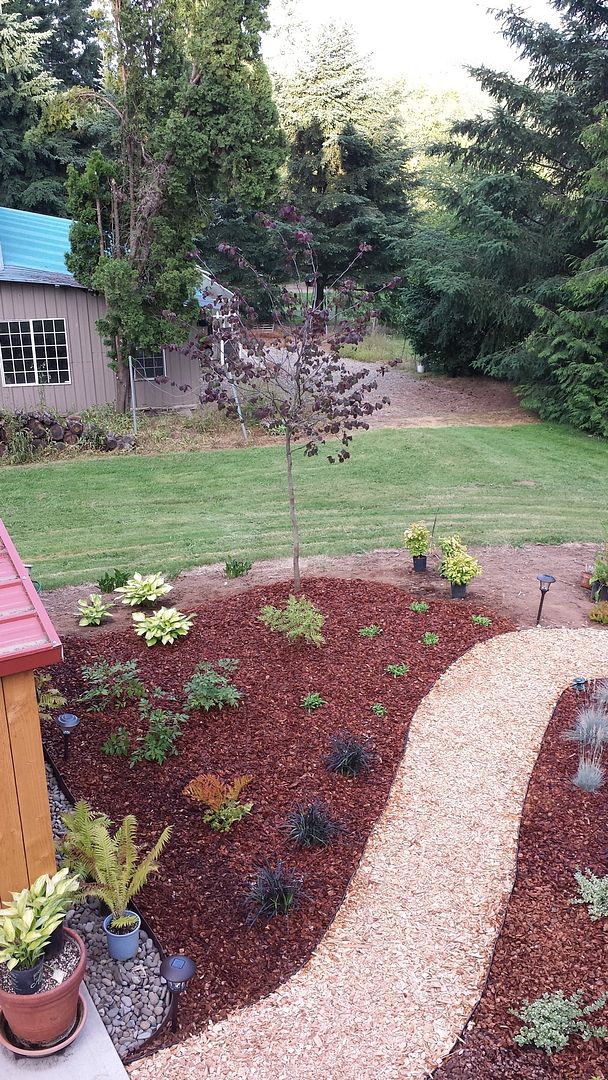
A Forest Pansy Redbud tree...
this will bloom next spring with lavendar buds before the heart shaped leaves emerge.
And a Japanese Snowbell Tree.
The stump was a Hawthorne tree that had really bad fire blight. A nearly dead tree and a fire pit don't really go well together....
It was sad to take it down though, because the birds loved it!
I specifically chose plants that don't get too large in the big scheme of things... so that the pruning will not be too intensive down the road.
Ornamental grasses, low growing evergreens, and the saved hostas, ferns, and perennials are placed around the perimeter. And bark mulch is in the works.....
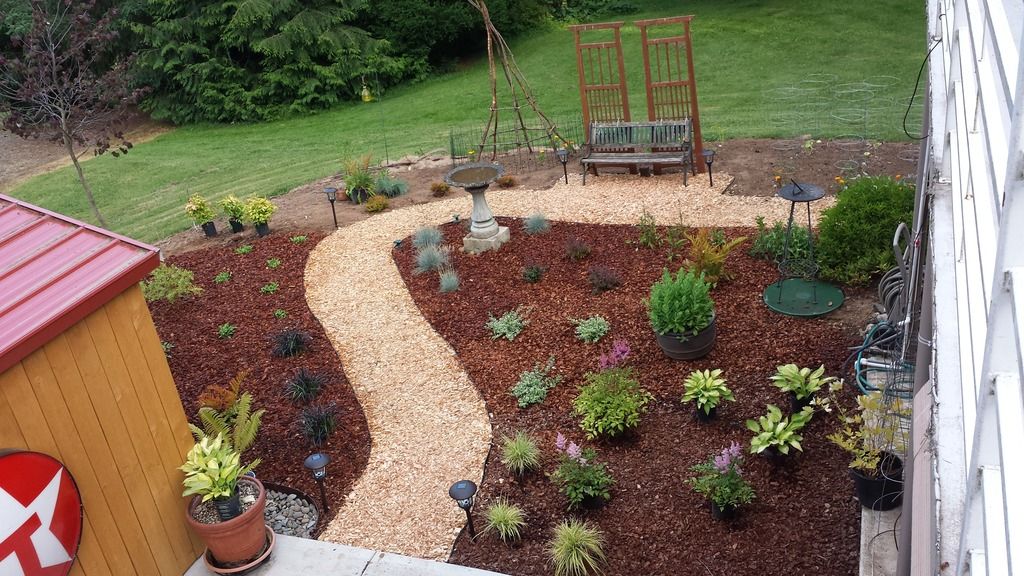
Looking south. The area behind the bench is my vegetable area... I had fun making the rustic bean tee pee out of some long branches I found in the neighbors woods.
The vegetable area is on the southern most edge, on the outside of the path behind the bench. New bench will be purchased, and the two upright trellis pieces will be replaced with a home made twig one, similar to my bean tee pee in the next few weeks... Peas will be planted on it next year. (too late now for this season)
We need to repair the upper deck area, so I am not planting those plants that will go nearest the deck.... I'll plant them when that work is done.... I think it will make it easier for the guys to move ladders, etc around if they don't have to be worried about my new plants.
So in the next weeks I'll get the final plants in the ground..... and the bark mulch finished. I can only shovel so much of it at a time. The outside edges need a final touch.... I'm planning on using the stack of bricks I saved a year ago... but it required digging..... I'm thinking about a small ditch witch to create a nice clean start.... but we are still debating the best way to go..... I want something that will give a nice clean way to get the riding mower up close to reduce the use of the string trimmer on a regular basis.
The lawn is a "country lawn".... full of weeds, mole holes, uneven ground.... etc. but it is green most of the year....
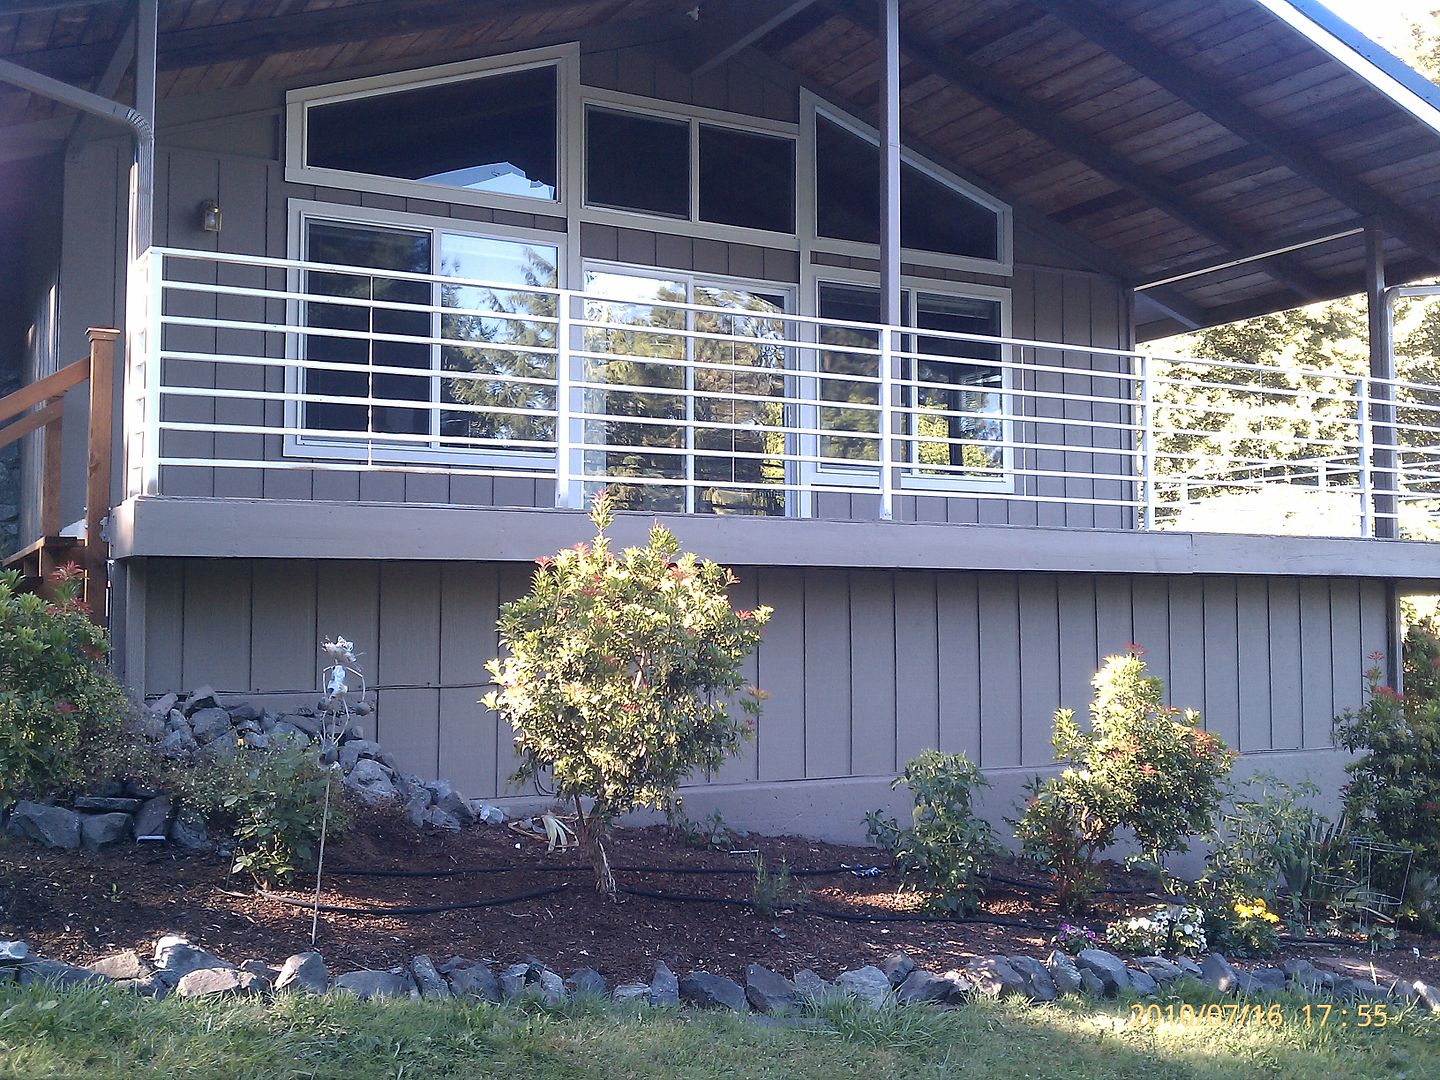
Next projects after the deck? I'll work the areas on the south side below the deck, and move around to the West side and choose plants similar to the new landscaping around the patio..... The new window on this side is sitting in the garage, waiting to be installed, then it will get white trim....
The area just above the shop is also in need of cleanup.... we weren't able to see it from the house before, because the plants that were so overgrown hid it most of the time.

I've planted two new trees down there, but I can't really do any under planting until we use up some of that stacked firewood in the fire pit.

French doors from the downstairs family room to the garden area

Oh, goody! More blue in the laundry room / mud room area.
Don't get me wrong... I like blue,
but not quite this much of it in one place.
There was another bedroom downstairs, nothing spectacular to show in pictures...
And a bathroom with shower, toilet and vanity... again... just painted white, with black trim.
Upstairs... the master bedroom reminded us of a hotel room, very large, with long closet with mirror doors on one end, and a double vanity on the other... A commode room in the corner, and a double stand up shower. All in one room.

The commode room on the right, and the left door is a linen closet.


You can see that this room echoes the living room area, with tall, open cedar ceilings and walls, and some high triangular windows above.
This was a foreclosed home, so we purchased as is. We got our keys on Sept. 25, and moved in on Nov 17, 2009. Prior to moving in, we replaced carpet, Painted walls and put some cedar paneling in the family room, did lots of cleaning, replaced several light fixtures, put in new ceiling fans in the living room, put a ceiling in the upper garage, and I attempted to get a grip on the garden. It was a busy 6 weeks.... especially working at the same time.
The needs and wants list? pretty much all of it... .except for the one level... however, it's a walk-out daylight basement with sloped walkway to the lower level.
Fast forward... and 7 years later, it is very close to being just the way we want it..... still on the major project list...
- we need a new deck this year.... about 650 square feet of it...
- replace the electric range with a gas one..
- resurface the fireplaces with river rock (we converted to gas logs earlier this year)
- Mike would love a resurfaced floor in the upper shop
- finish landscaping on West side of house.. (there is none... only grass )
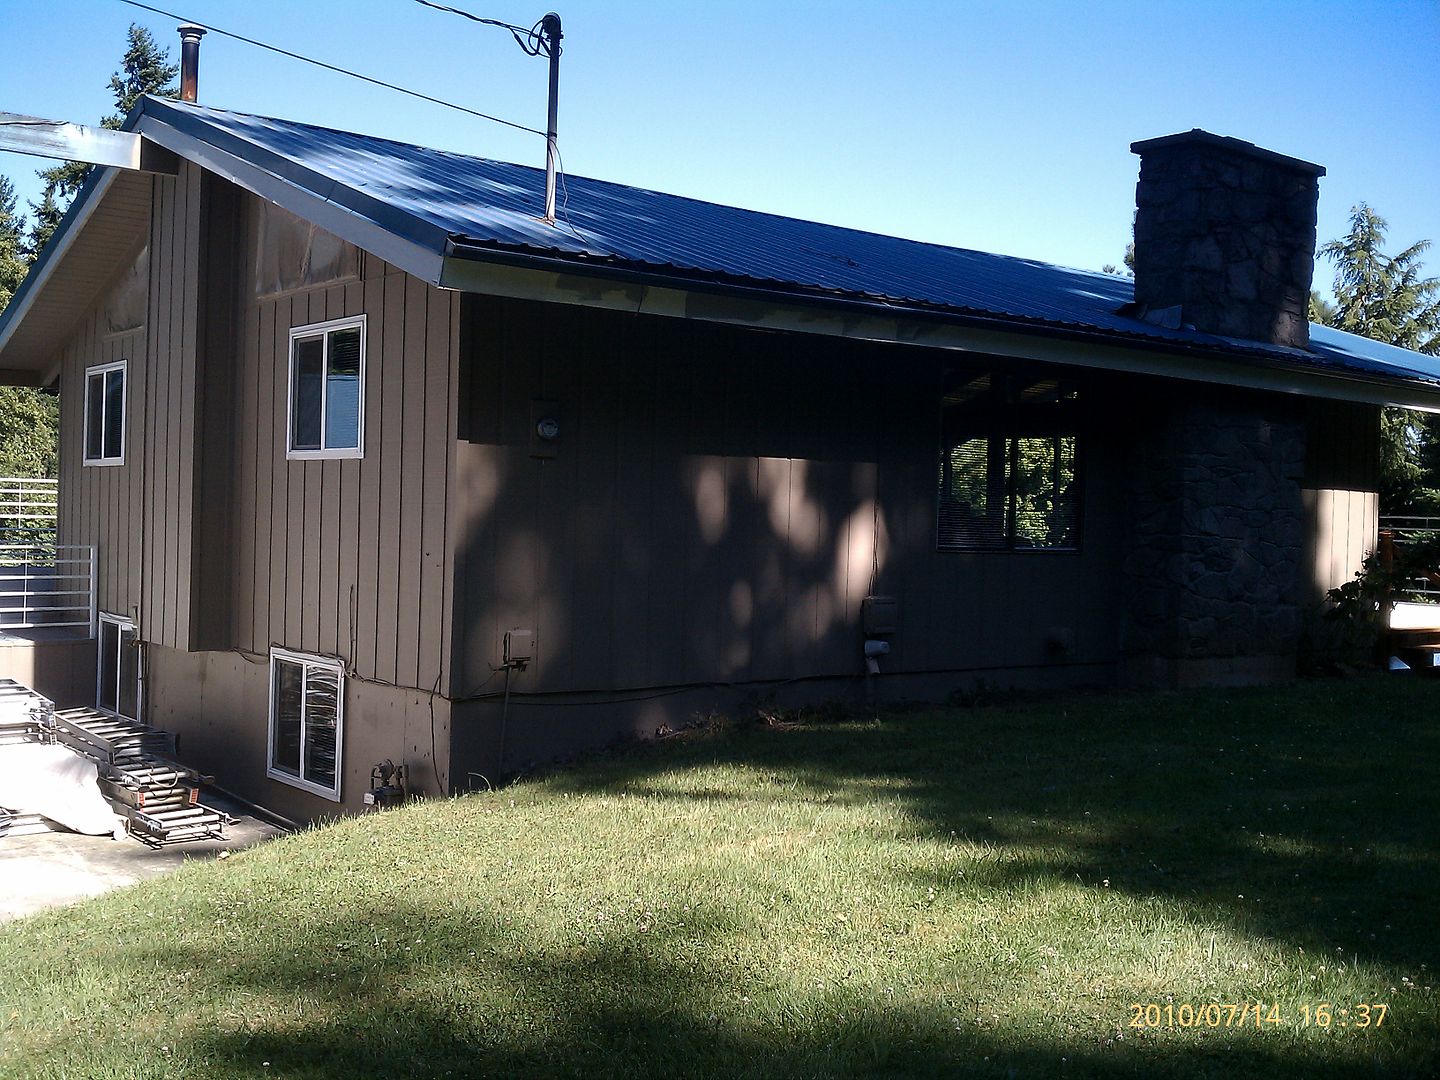
- In a perfect world, we would like to add stone over the foundation to add more interest
The first thing we did, after moving in was have a concrete path and stairs put in to replace the muddy trail and slippery rail road tie steps from the house to the lower shop. We had a pad put in next to the upper garage for a carport as well. Those beautiful fir trees all around us drop something all year long.... needles, then pollen, then those brown puffy things, then cones, then more needles... This was done the first spring.... followed by a paint job in July.... from blue to a soft mocha brown... That was the summer of 2010


Looks pretty good! the garden area in this picture is the area closest to the house....
Somewhere along the way, a previous owner had placed heavy black plastic all through the garden area, and covered it with mulch. (Not breathable weed fabric... black plastic!) I spent that first spring and summer.... digging it out and not replacing it with a weed fabric. I was wanting a Cottage garden feel, with soft flowing edges. Those big rocks around the edge were literally holding down the edge of that plastic.

News flash... the plastic did not stop the grass roots from taking hold... this is a root mass of grass roots I encountered while digging out the plastic...
 |
| See the black plastic working it's way to the surface? Yuck! |


once the plants were able to get water and breathe.... it really took off! And i mean... take off!
Year two... 2011 brought small general projects... nothing major in store.... some gravel around the shop.... and we put the car port together.

The edges are starting to flow together... and then life happens....
We got word during the early fall of 2011, that Mike had prostrate cancer.... we had a medical whirlwind year... he had surgery in November, then some heart issues in March, then in the spring, he got word that surgery wasn't enough and we were looking at radiation.... 32 treatments... starting in June and going through August... No traveling farther than a trip to the beach. It was a mandated "Staycation" ...
Year Three.... (summer 2012) we extend the concrete path to the shop.... and then decided to put a patio and fire pit behind the upper garage... which was still a huge mess of overgrown rhodies, fire weed and blackberry plants...
 |
| Back of the Garage before the patio and fire pit were poured |


As my therapy that summer, while Mike underwent radiation, I hauled all those rocks that had been holding down the plastic, over to the new area and built this water feature....


Time for some plants.... and a fire!

The next two years, were low effort years for us.... we spent time with family and friends, going to the beach, traveling to Montana to see grand-kids, etc. We purchased a new travel trailer and for the Summer of 2014, we got out of town.... and spent 3 weeks in our travel trailer, camping, and traveling.
By spring 2015, I was feeling the pressure to keep the garden under control. I have a huge respect for those that can "cottage garden".... I've learned that I need cleaner lines.... more order, and much less pruning! The arthritis and carpal tunnel symptoms really flare up when I get momentum going out there. Attempting to rehab those 20 year old shrubs that had been neglected, poorly pruned, and starved of water and air in the soil was proving to be more than I had anticipated. I could sit under that huge wisteria and hear it growing. It needed pruning all the time!
After we did the fire pit, we realized that there was not enough space to do a potluck BBQ, and the large upper deck doesn't really have easy access to the fire pit area. I began thinking of a plan to pave about 1/4 of the garden area closest to the fire pit to create an area for potluck tables, a patio dining area, etc. We had a beautiful early spring in late January, and I got lots of clipping and weeding done... then a very wet March, April and May.... by Memorial Day you couldn't even see the progress made early on. I mentioned to Mike that I needed a blow torch and a load of concrete.....
You have to know my hubby.... but the happiest day of his life was the day we moved to a houseboat and he got to sell his lawn mower..... so yard work is not his favorite relaxation technique. About a week after my blowtorch request, he asked how much concrete I wanted..... "just this much" , I said as I showed him the area I was thinking of ..... but his logic took me further... In order to excavate the area I wanted paved, we would have to "cherry pick" plants and hand dig. He suggested we make the new patio area larger, and bring in an excavator to do the job.
WHAT? It took me about 30 seconds to agree.....
So one year ago.... I spent my first week of summer break, pulling bricks, stepping stones, perennials I wanted to save, yard art and bird feeders from the garden and getting ready for the project. Then the weather turned HOT.... 90 degree and higher... which is not usual for Oregon in June.... I felt like the water wand was permanently attached to my hand, and I had patio umbrellas covering groups of plants to protect them from the hot sun as they sprouted new roots in the 1 and 2 gallon pots.
Excavation only took an evening.....

I would still be out there digging this wisteria out.....


you can see the fire pit area behind the garage now....

Next comes the concrete.... 25' x 40' of it!


Then we made it our own.... we enclosed one end of it for privacy and weather protection... ran water lines and electical and even a cable for tv.
Added some neat touches.... and we had fun searching craigslist for bargains.


An old cupboard from an old house, and we made a wine barrel sink. Added some lights and signs ... It was ready to enjoy...
But our record heat wave and lack of rainfall made it impractical to do the landscaping portion. Those potted plants would have to wait all winter to be planted properly.
So you can probably figure out what I've been doing this spring..... and I'm within 2 dozen plants of being done!

First, I laid out a path

and filled it with cedar chips

Then, I planted a couple of trees, for future shade

A Forest Pansy Redbud tree...
this will bloom next spring with lavendar buds before the heart shaped leaves emerge.
And a Japanese Snowbell Tree.
The stump was a Hawthorne tree that had really bad fire blight. A nearly dead tree and a fire pit don't really go well together....
It was sad to take it down though, because the birds loved it!

I specifically chose plants that don't get too large in the big scheme of things... so that the pruning will not be too intensive down the road.
Ornamental grasses, low growing evergreens, and the saved hostas, ferns, and perennials are placed around the perimeter. And bark mulch is in the works.....

Looking south. The area behind the bench is my vegetable area... I had fun making the rustic bean tee pee out of some long branches I found in the neighbors woods.
The vegetable area is on the southern most edge, on the outside of the path behind the bench. New bench will be purchased, and the two upright trellis pieces will be replaced with a home made twig one, similar to my bean tee pee in the next few weeks... Peas will be planted on it next year. (too late now for this season)
We need to repair the upper deck area, so I am not planting those plants that will go nearest the deck.... I'll plant them when that work is done.... I think it will make it easier for the guys to move ladders, etc around if they don't have to be worried about my new plants.
So in the next weeks I'll get the final plants in the ground..... and the bark mulch finished. I can only shovel so much of it at a time. The outside edges need a final touch.... I'm planning on using the stack of bricks I saved a year ago... but it required digging..... I'm thinking about a small ditch witch to create a nice clean start.... but we are still debating the best way to go..... I want something that will give a nice clean way to get the riding mower up close to reduce the use of the string trimmer on a regular basis.
The lawn is a "country lawn".... full of weeds, mole holes, uneven ground.... etc. but it is green most of the year....
Next projects after the deck? I'll work the areas on the south side below the deck, and move around to the West side and choose plants similar to the new landscaping around the patio..... The new window on this side is sitting in the garage, waiting to be installed, then it will get white trim....

The area just above the shop is also in need of cleanup.... we weren't able to see it from the house before, because the plants that were so overgrown hid it most of the time.

I've planted two new trees down there, but I can't really do any under planting until we use up some of that stacked firewood in the fire pit.